Apex Legends continues to be among the top multiplayer battle royale games, and it also continues to be a game that lacks native support for Mac systems. But like with many other unsupported titles, this doesn’t necessarily mean that the game cannot be played on a Mac.
There are actually quite a few potential workarounds, but each of them is good in different situations, so picking the right one for you can be confusing. For this reason, we decided to test the best available ways to play Apex Legends on a Mac computer and tell our readers about our experience with each option.
How to play Apex Legends on Mac: All working methods
You can find out what we learned while testing each method further down this post, but if you are itching to try them for yourself, here are all the methods we tried and confirmed as viable for playing Apex Legends on MacBook:
Boosteroid Cloud Gaming (Recommended method)
Features: Constant 1080p/60 FPS; Stable connection; Low bandwidth requirements (15 MBPS); Huge gaming library with all the latest AAA titles.
Pros
- Cheapest cloud-gaming option
- Compatible with all macs
- Hardware specs don’t matter
- You can play in your browser in about 15 minutes
Cons
- Requires a good internet connection
- You need to look if the game is supported with your chosen vendor
Extras: Here’s our review of Boosteroid with a comparison to GeForce Now; also check out our Boosteroid Games List.
We advocate for Boosteroid due to its impressive balance of user-friendliness, streaming quality, modest internet speed requirements, and affordability. It stands out as the perfect choice for Mac users seeking to play their preferred games smoothly, without needing complicated alternatives.
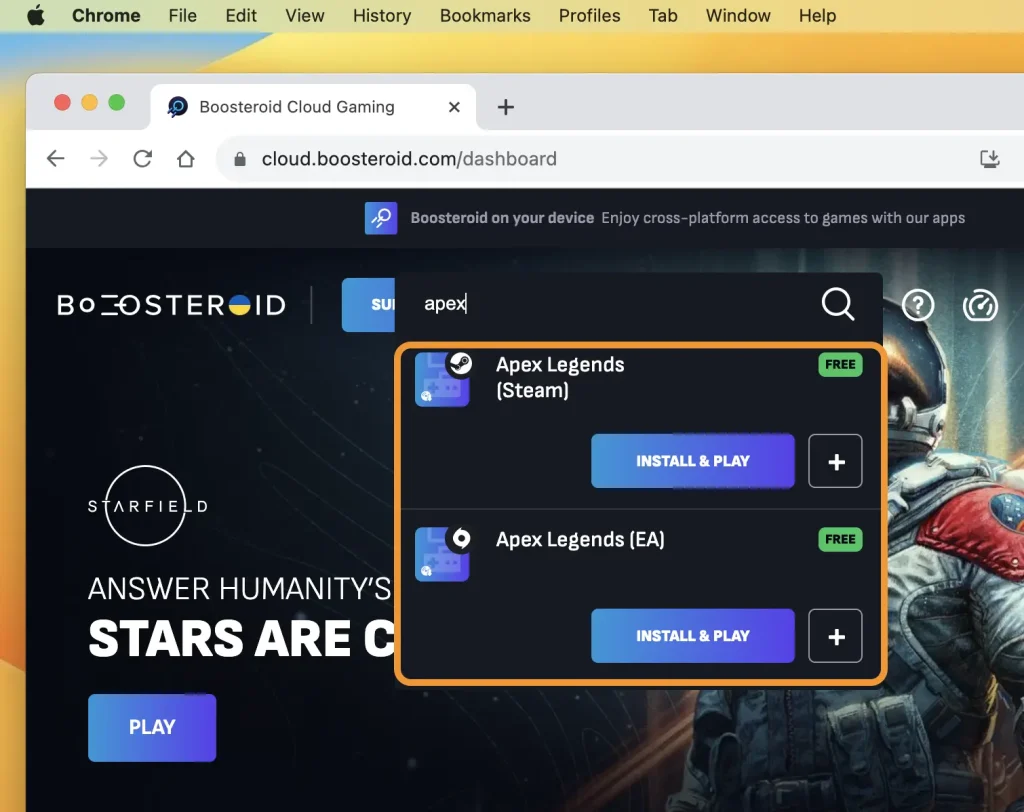
- Use the “Play with Boosteroid” button and go to the Boosteroid website. There, you need to create a new account or log in using your Google Account credentials.
- Go at the top-right corner of the screen and click on “My account”. To begin using Boosteroid, you need to activate a plan of your choice under the “My subscription” tab.
- Look for the game in the search tab and click play when you find it.
GeForce Now
Pros
- Access to a vast library of games.
- High-quality graphics and performance.
- No need for powerful local hardware.
- Cross-platform support.
Cons
- Requires a stable and fast internet connection.
- Limited to supported games.
- Potential latency issues in online games.
- Requires a subscription for some features.
GeForce Now is a cloud gaming service that offers an accessible way to enjoy this game on your Mac.
- GeForce Now’s strengths lie in its ability to bypass compatibility and high system requirements. It’s user-friendly and compatible with almost all Macs, offering reliable streaming quality. For enhanced experience, consider its Ultimate plan, which allows 4K streaming.
- The main drawbacks of GeForce Now include its need for high internet speed and a relatively higher price point compared to Boosteroid. While there is a free version, its one-hour session limit and the queue system often lead users to opt for a paid subscription or seek other cloud services or alternative methods.
Boot Camp
Features: Provides a native Windows 11 experience. Allows running all Windows-compatible programs and games as long as the Mac’s hardware can support them.
Note: Not available for Apple Silicon models.
Pros
- It’s free
- Unlimited compatibility
- Stable and reliable
Cons
- Takes time to set up
- Takes tons of storage
- Unavailable for M1/M2
Boot Camp allows you to install Windows on a separate Mac partition, facilitating seamless running of Windows programs.
- The advantage of Boot Camp is its unparalleled stability, free from compatibility issues and unexpected glitches, unless the game itself is problematic. It offers an experience akin to native gaming on a Windows PC.
- However, Boot Camp requires substantial space for both Windows OS and the game. Performance may also be limited if your Mac’s hardware is not up to par. Additionally, the setup process is time-consuming and is not compatible with Apple Silicon Macs.
Exploring and testing each method to play Apex Legends on Mac
Before we start talking about each method individually, we should note that only the first two options, the Boosteroid and GeForce Now platforms, can be used on Apple Silicon Macs. This means that if you have an M1 or M2 machine, cloud gaming is your only valid option for playing this game, and you’ll just have to choose which cloud service you prefer to use. On Intel Macs, you can also opt for the Boot Camp method, which has its downsides, but can still be a solid option for playing Apex Legends in particular.
Testing Apex Legends on Mac with Boosteroid and GeForce Now
There are many similarities between Boosteroid and GeForce Now, so we decided to talk about them together.
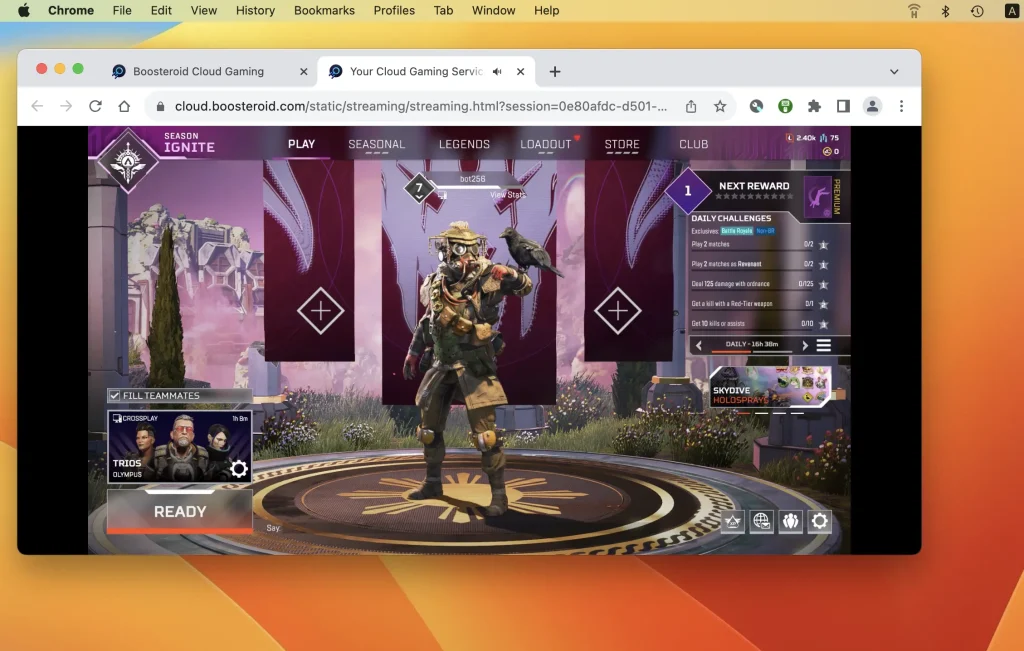
First we tested Apex Legends on Boosteroid. Our plan for this platform allows us to stream any game from Boosteroid’s library with up to 1080p resolution and 60 frames per second. For casual Apex Legends players like us, this is more than enough, but it’s worth noting that whether you get those same numbers in practice depends on how good your connection to Boosteroid’s servers is. The connection determines the streaming quality which, in turn, determines the game’s image quality and FPS (this applies to all cloud gaming services). In other words, bad internet equals choppy gameplay and reduced image quality.

In our test, the Internet we used had 40 Mbps speed and an average ping of around 40, which covers the 15Mbps/40 ms latency requirements of Boosteroid. With this Internet, the game’s resolution stayed consistent almost all the time and there were only a couple of instances of any stuttering, which was more than likely caused by lag spikes in our Internet. We played a couple of matches, even managed to score a win in one of them, and overall had a pretty great time with Apex Legends on our Mac.

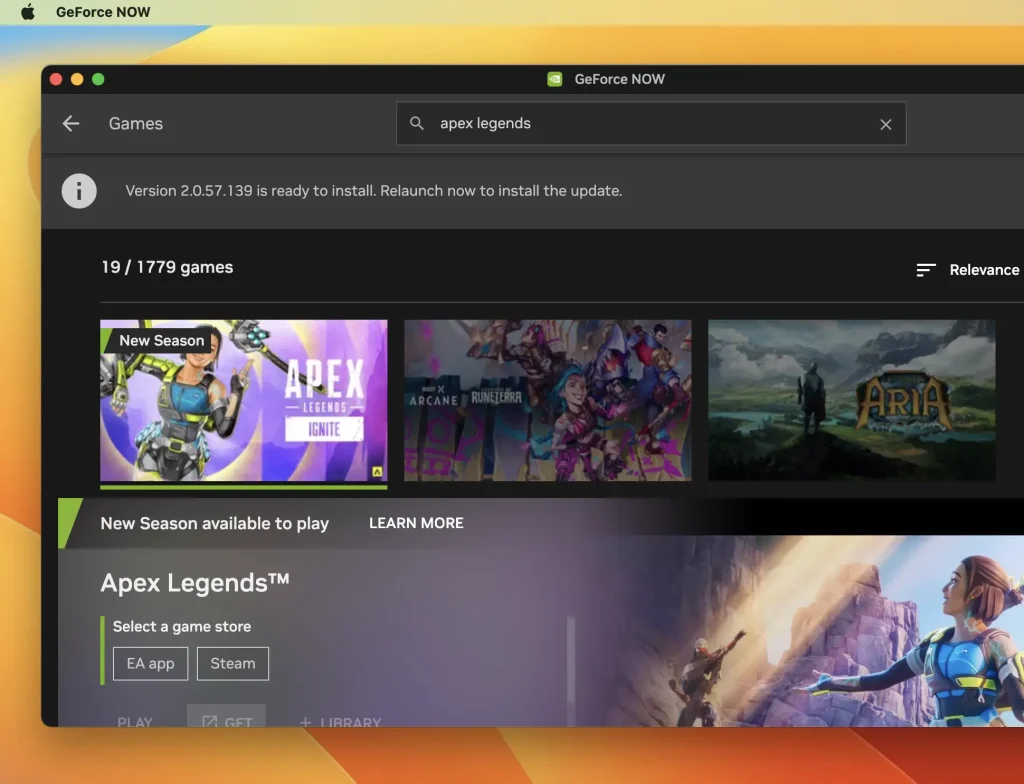
Next, we tried the same in GeForce Now. Like Boosteroid, our GFN plan (Priority) gave us an upper resolution limit of 1080p and a maximum of 60 FPS. There’s also the GFN Ultimate plan option for 4K resolution, but we didn’t feel the need to use it for Apex Legends.
It’s worth noting that the stated Internet speed required for a smooth 1080p/60 FPS stream with GFN is higher – 25 Mbps. Our connection meets this requirement, but if you are using a slower Internet, this could make a difference in the streaming quality.

In our case, our experience was almost the same as with Boosteroid. The only difference was that, during lag spikes, the game’s image quality took a bit longer to recover back to its normal full HD state, but that wasn’t a big deal and didn’t happen too often.
On the flip side, the GeForce Now client provides you a lot of customization options that let you fine-tune the balance between streaming quality and consumed bandwidth in order to make the stream as smooth as possible even if your Internet isn’t great. We didn’t need to use those settings, but we imagine if your Internet is slower or spottier, you might benefit from them.
Overall, both services performed very well, and we had a lot of fun playing Apex Legends on our Mac with their help. In terms of streaming quality, they are pretty comparable, with Boosteroid having a bit more lenient Internet requirements and GFN offering more customization options.
Our personal preference is Boosteroid mainly because its plans are slightly more affordable and because its library has more of our favorite games, but both are solid options if you want to play Apex Legends on a Mac machine.
Obviously, do note that playing through them won’t be the same as playing the game natively and there will be a bit higher latency, but this will mostly be felt by competitive players and should be a huge deal for casual gamers.
Boot Camp or cloud gaming for Apex Legends on Intel Macs?

As we said, if you are on an Intel Mac, you have the extra option of using Boot Camp to play Apex Legends. Instead of streaming the game, with Boot Camp you can download and play its Windows version, by first installing the Windows OS on your Mac. We did exactly that and after about 2 hours of preparations, we were ready to get started.
For this test, we used a MacBook Pro from 2016 that has only 8 gigs of RAM, so we expected it to struggle with Apex Legends. We launched the game, set most of its settings to Low, and entered a match. Surprisingly, although our MacBook got hot enough to fry eggs, the game actually ran pretty well, consistently hitting around 40 FPS. Sure, this is far from ideal, but considering we were playing on a 7-year-old Mac, the performance was respectable.
The big question here, however, is whether this option is better than the cloud gaming alternatives and to that we say a decisive… “depends”. Here’s the thing, if your Internet really isn’t good, then the cloud gaming experience will probably not be very pleasant, so it might be worth it to try the Boot Camp variant.
In most cases, we’d still say that Boosteroid or GeForce Now are the better, more convenient options, but if you want as little lag as possible and you don’t have a good Internet, then Boot Camp is also a viable variant and the main reason for this is that Apex Legends isn’t a very demanding game and would run even on older and less powerful Macs. Just bear in mind that the setup process does take a while and you will need 100 gigs (or even more) storage space to accomodate both Windows and the game installation on your Intel Mac.
Related Content
Leave a Reply