GeForce Now MacBook compatibility
Nvidia’s GeForce Now MacBook app provides a great way to play games on your Mac that would otherwise not run on it, be it because they aren’t supported for your system or because your Mac’s hardware specs are too low. This is a cloud gaming app, meaning that it lets you stream the games from Steam, Epic, GOG, etc. over the Internet, without needing to have it downloaded locally. The GeForce Now MacBook compatibility extends to both Intel and M1/M2-based Mac machines. You can download its dedicated app from its site after registering and starting your subscription, and use it to stream any game from the service’s library, including popular titles like Genshin Impact, Baldur’s Gate 3, and Fortnite.
Nvidia’s GeForce Now is great, but it’s not the only cloud platform out there. There are many other awesome cloud gaming services available for Mac, so if you want to explore more options and see what they have to offer in terms of supported games, pricing, streaming quality, and more, before deciding whether to go for GeForce Now, we recommend checking out this other popular cloud option that we can also recommend to our readers:
Is GeForce Now on Mac?
There are two ways to use GeForce Now on Mac – to download its macOS app and stream the games through it or use the recently introduced browser version of the service, which lets you play the games directly within your browser. It’s recommended to use the dedicated app, as it should, generally, provide better performance, lower lag, and improved image quality due to a lower package loss while streaming. However, if you are really low on storage space on your Apple computer or simply like the convenience of the second option, you can also use GeForce Now on Mac through its browser version and stream your preferred games in this way.
GeForce Mac requirements
The GeForce Mac hardware requirements are really low – according to the service’s official website, any Mac released in 2009 or later is able to run the service, provided that its macOS version is 10.11 or higher. This means you can play games like Genshin Impact or Baldur’s Gate 3 on Macs that could never meet their hardware requirements. The more important GeForce Mac requirements are actually related to the user’s Internet connection. The minimum Internet speed to use the service is 15 Mbps for 720p resolution and 60 FPS, and 25 Mbps for 1080p with the same 60 FPS. Also, your latency should be no higher than 80ms in order for the service to be usable, and no higher than 40 ms if you want the best experience.
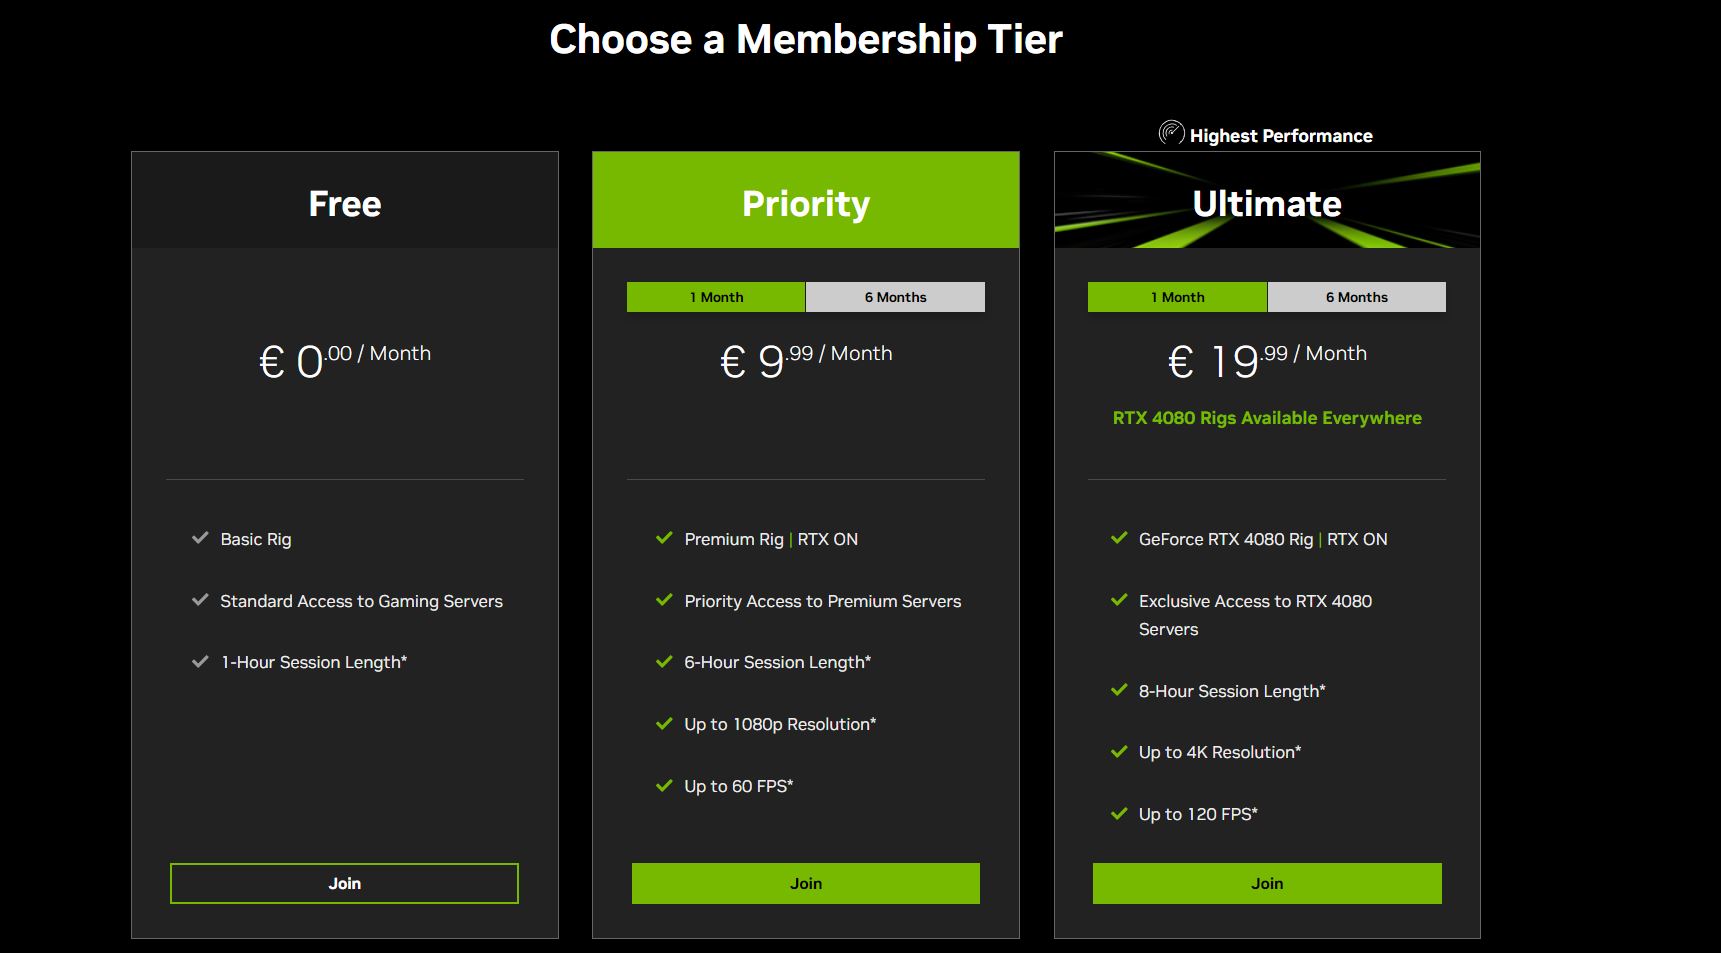
Also, know that if you’ve chosen to pick the GeForce Now Ultimate plan, which lets you stream with 4K resolution and 120 FPS, then you’ll need an Internet speed of at least 45 Mbps to benefit from the higher resolution and frame rate.
GeForce Now for Mac: performance
When using GeForce Now for Mac, your gaming performance will mainly be determined by two factors – how fast and stable your Internet is and how far away you are from the closest GFN server. Obviously, you have little control over the latter factor, but you can still check where the platform’s servers are when deciding whether to start using it. As for your Internet speed and stability, we already mentioned what the specific requirements are, but know that even if your connection isn’t the best, you can still get a decent gaming experience with GeForce Now for Mac. There are many settings in the app that let you fine-tune how much bandwidth is used during streaming, potentially allowing you to lower the bandwidth requirement to more manageable levels.
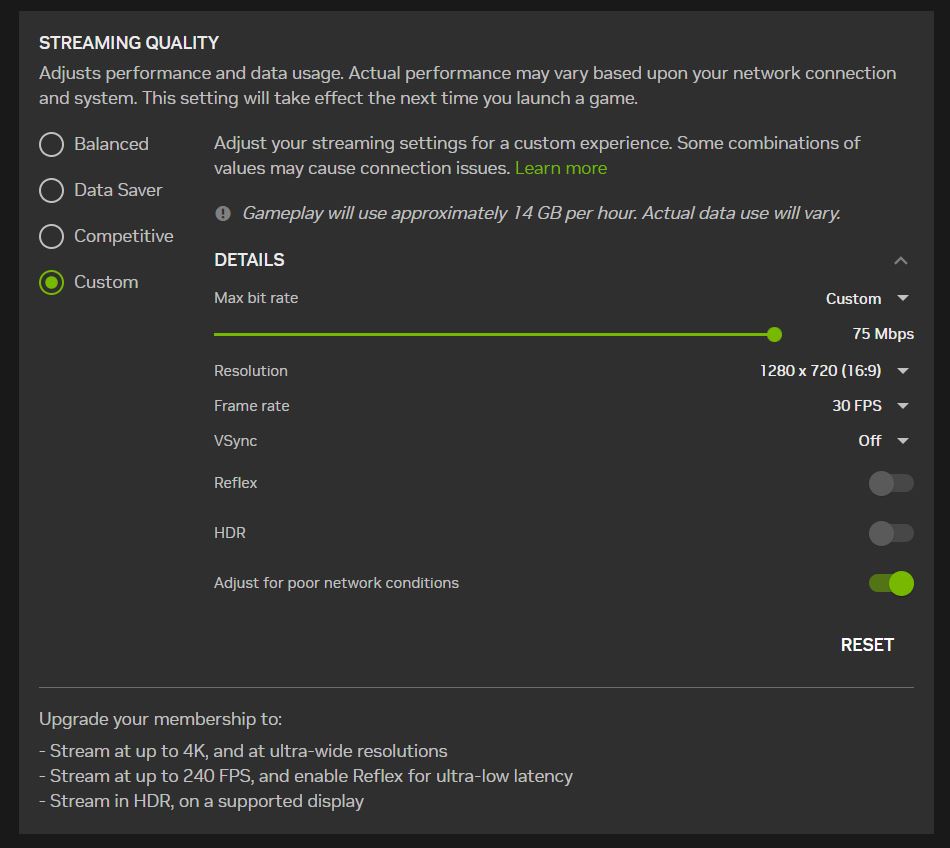
If you aren’t satisfied with your current GeForce Now Mac gaming experience, but you are stuck with the Internet that you have, it’s worth tinkering around with the Streaming Quality and Resolution settings to make the streaming less taxing on your bandwidth. Of course, note that lowering settings such as the streaming resolution and game frame rate will obviously decrease the image quality of the game, but will at least make the streaming smoother and less laggy.
Does GeForce Now work on Mac?
NVIDIA’s game streaming service GeForce Now works on Mac models released in 2009 or later and with macOS 10.11 or newer. To kickstart your cloud gaming experience, first visit NVIDIA’s official website, download the dedicated macOS app for the service, and proceed with its installation on your Mac. After setting it up, open the app and log in with your Nvidia account (you’ll need to create one now if you haven’t done that already). This grants you the capability to stream your favorite titles directly to your Mac. Just remember that, even though GeForce Now works on pretty much any Mac released in the past 14 years, you’ll still need good Internet to use the service and have a pleasant experience with it.
Finally, one crucial detail to bear in mind is that, while you’re free to play many titles, you must already own or purchase them separately, as GeForce Now isn’t a game store per se. Of course, if a given game is free-to-play, you can directly start it without needing to purchase anything. All you’ll need in such cases is an account for the respective gaming store, where that game is available (Steam, Epic, GOG, EA, etc.).
How to use GeForce Now on Mac?
As mentioned, to use GeForce Now on Mac, you can either download the dedicated macOS app and stream the games through it or directly run the game you want within your browser. However, before any of that, the first thing we recommend doing is checking the subscription plans for the service and subscribe to the one you like the best. After that, you can use GeForce Now on Mac in accordance with the plan you’ve chosen regardless of whether you decide to opt for the native app or stream the games in your browser. Below, we’ve provided a step-by-step guide that shows the process of setting up your GFN account and subscription, and starting to use the service.
- As a first step, be sure to register on the game store (Steam, Epic, etc.) that has the game you want to play and then purchase the game if it’s not a free-to-play title.
- After that, visit the GeForce Now site, click on Join Now, and select the Join button below the subscription plan that you want to register for.

- After you have done that, you need to create an account and fill in the required payment details if you’ve selected a paid plan.
- After that, go to your email and confirm the registration, then return to the GeForce Now site and log in again.
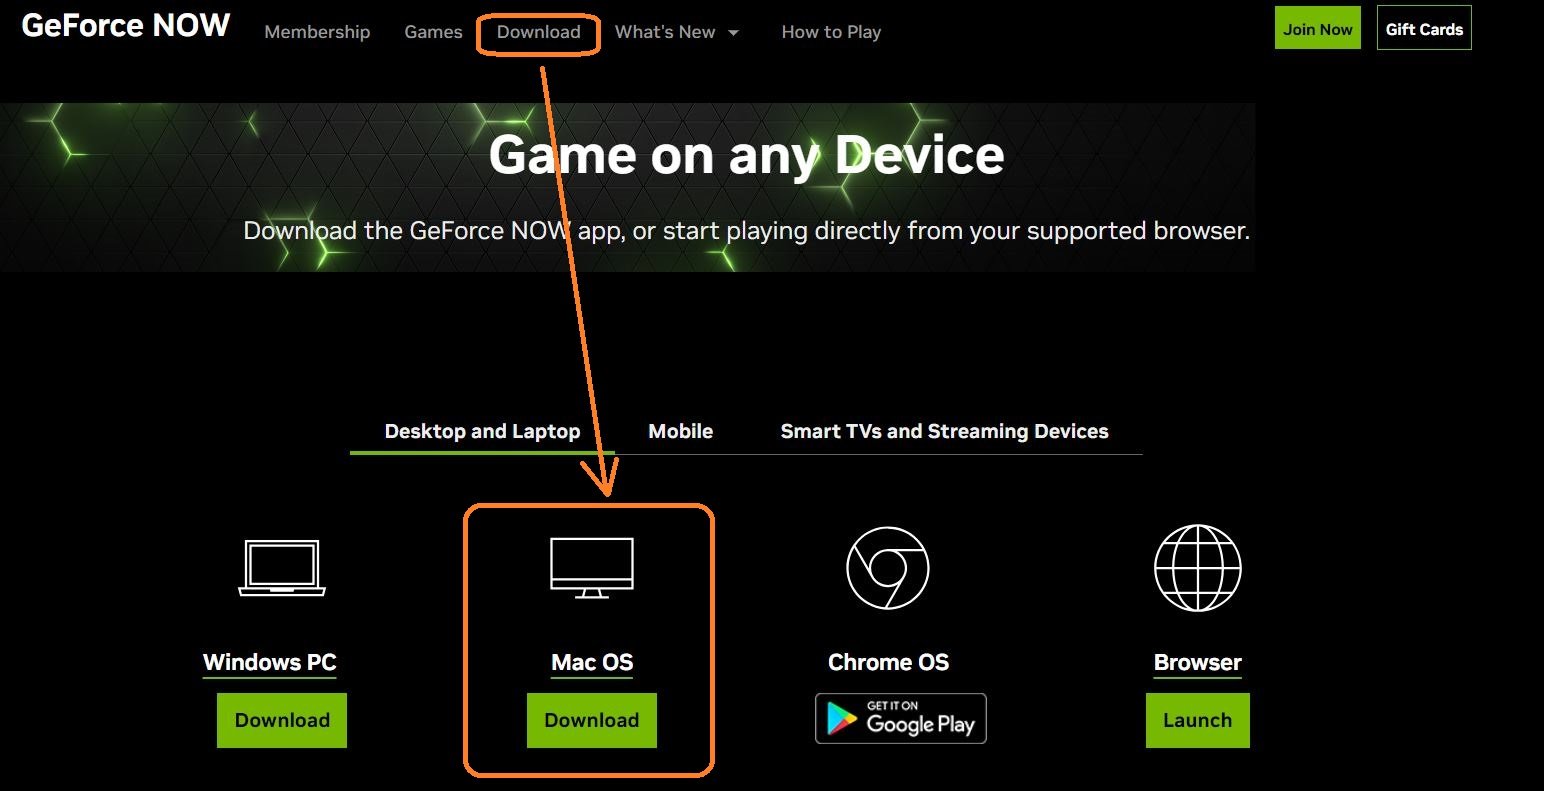
- Once you enter your GeForce Now account, click the Download section from the top.

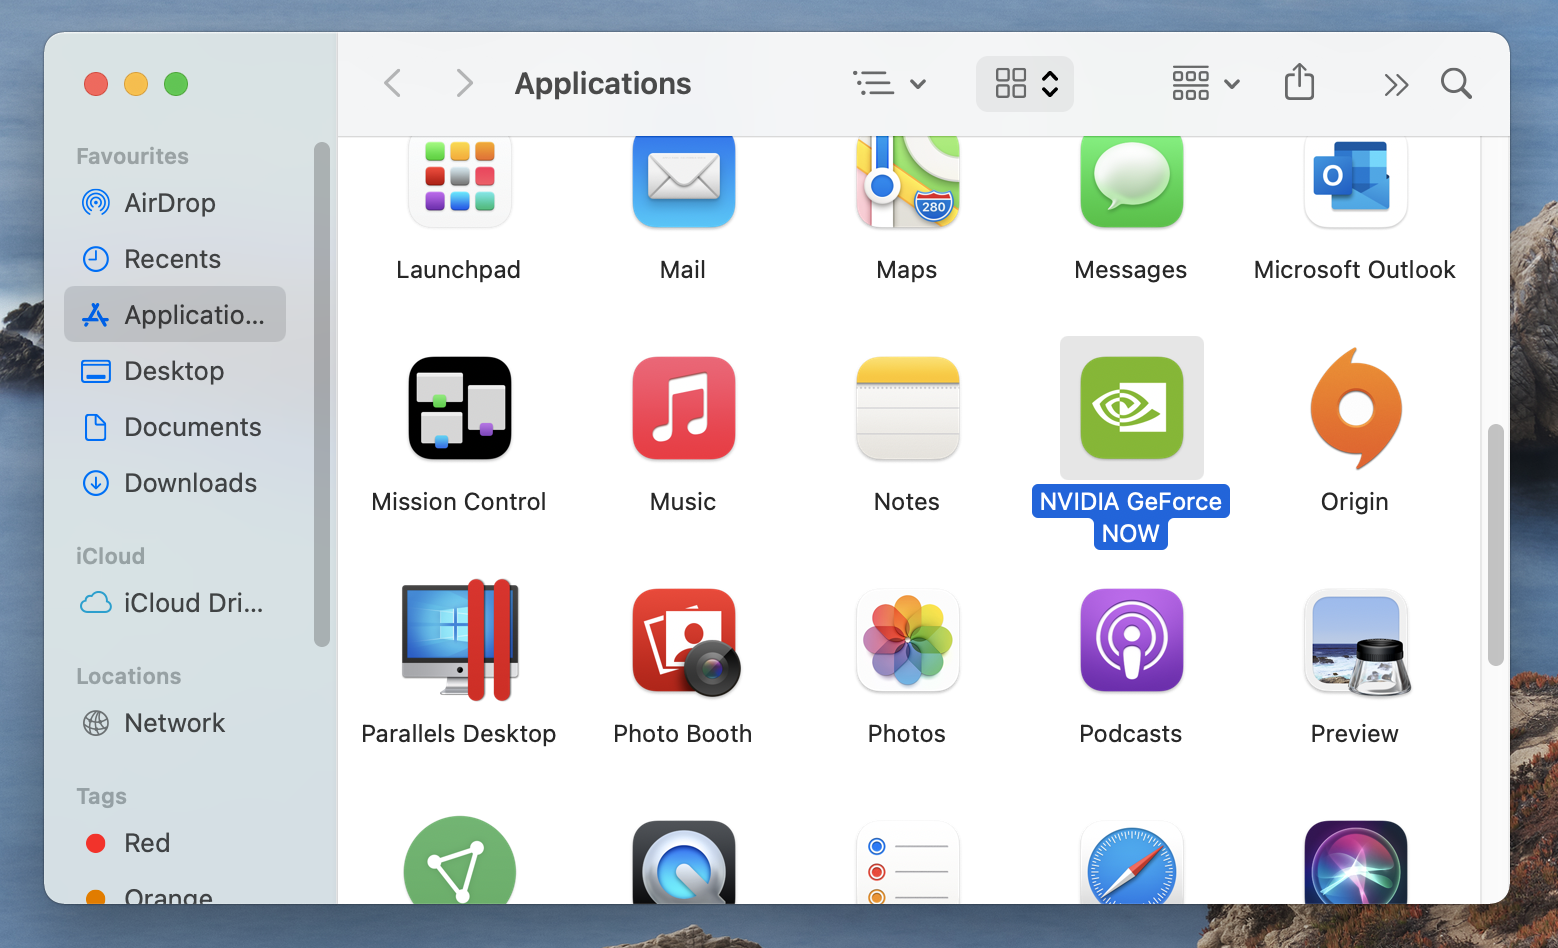
- Next, download the GeForce Now app for macOS, open the installation file, and install the app by dragging its icon to the Applications folder icon.
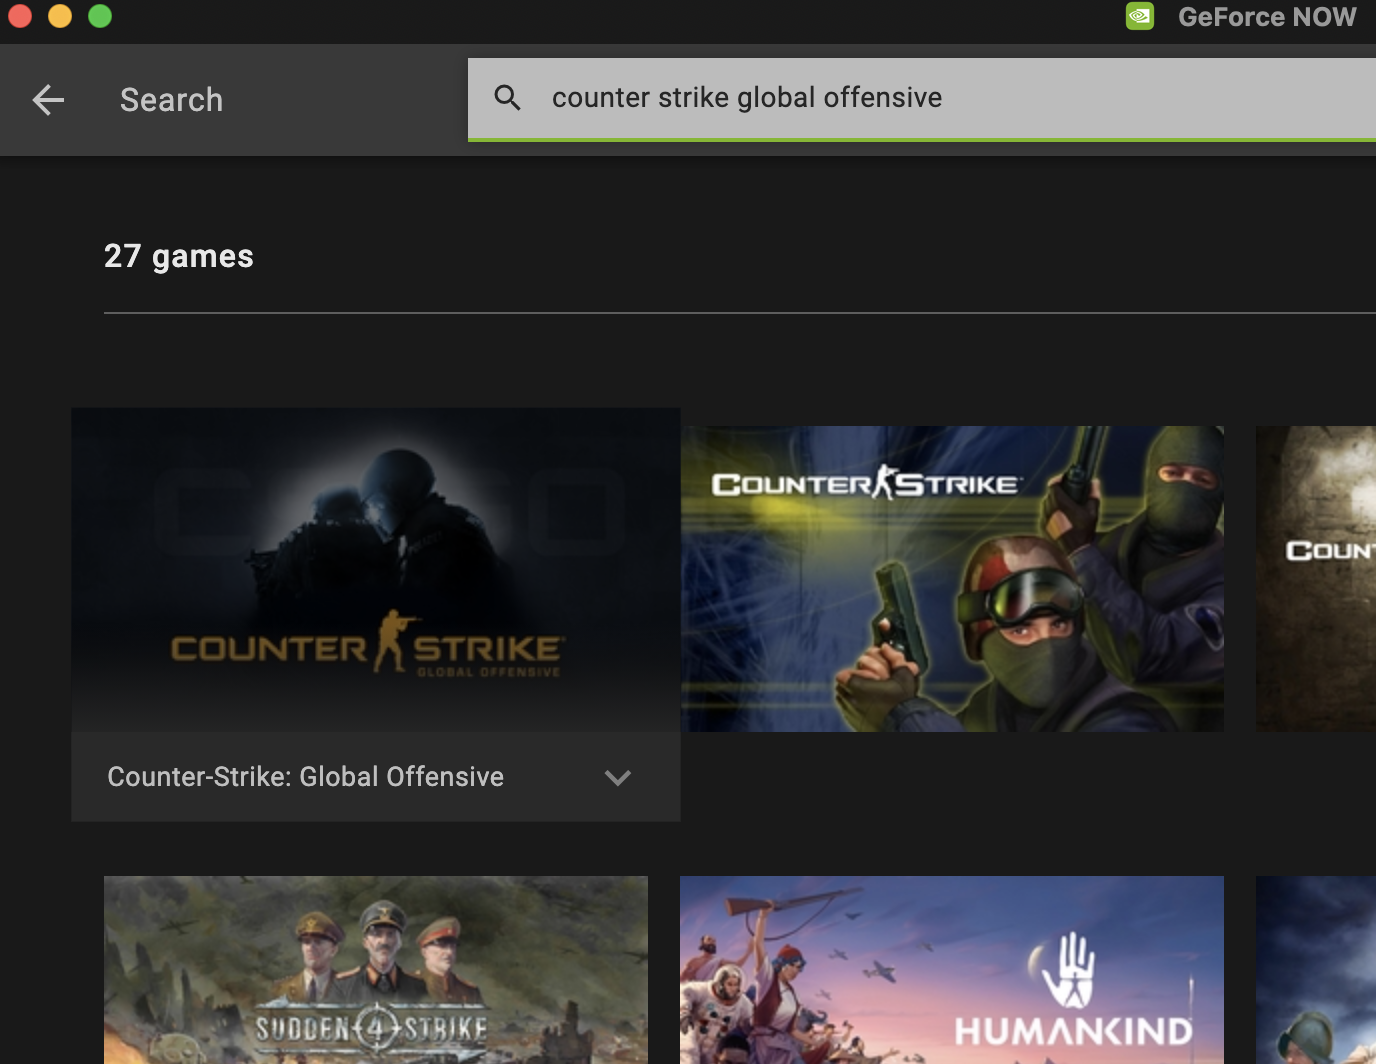
- Launch GeForce Now from your Applications folder, enter your account, and search for the game you want to play in the search bar.


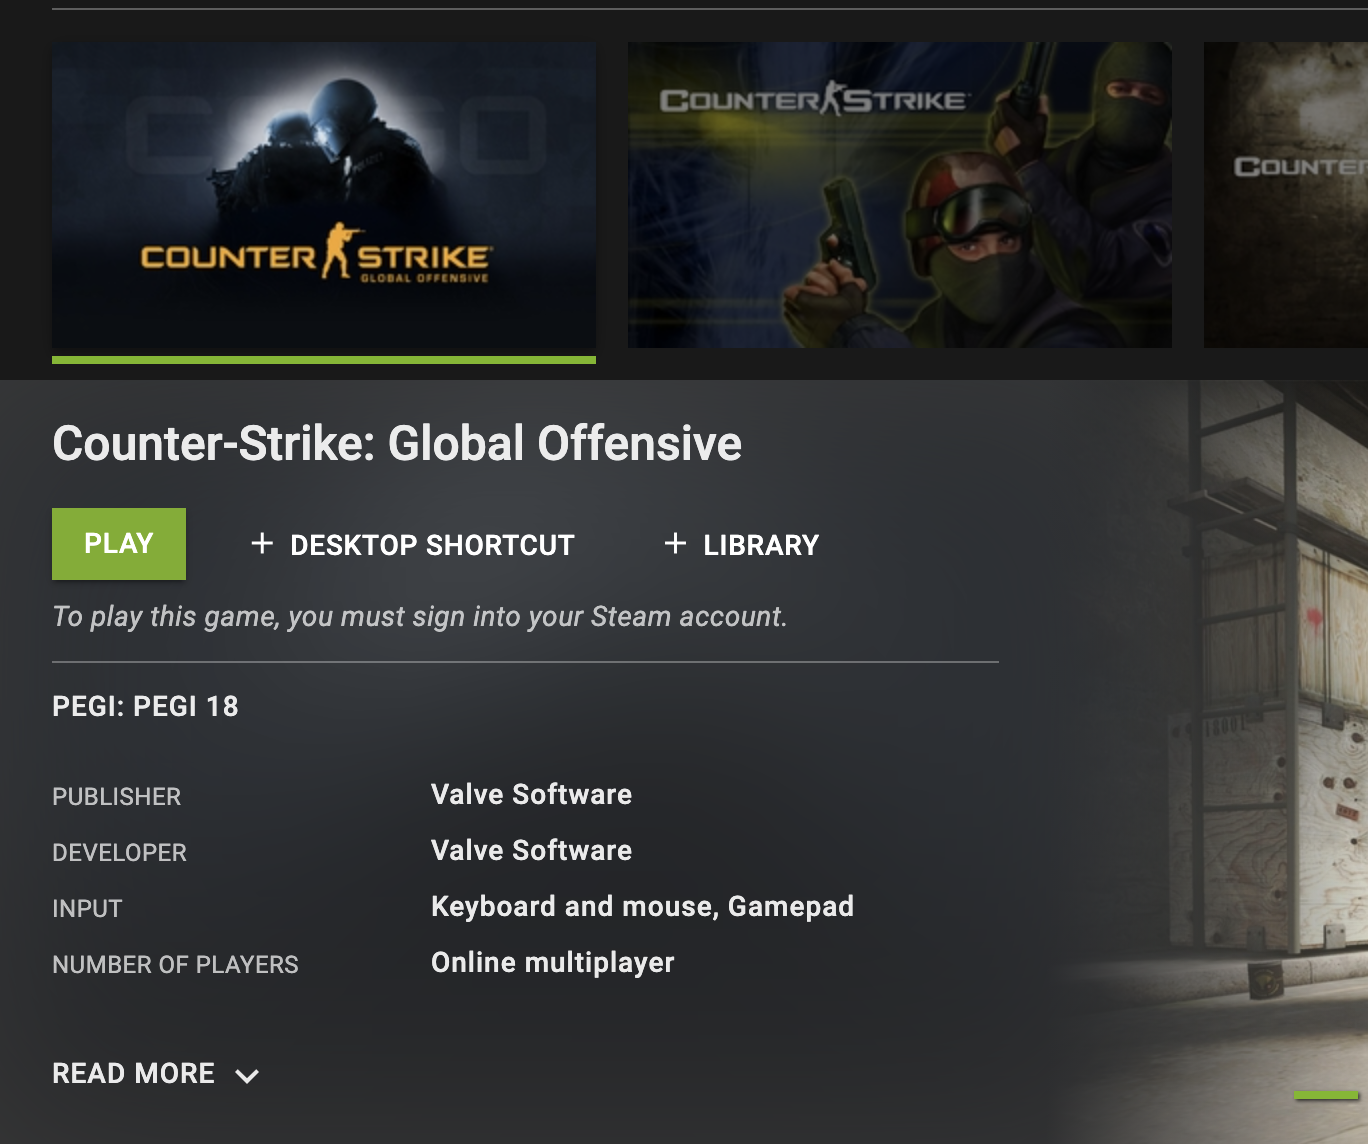
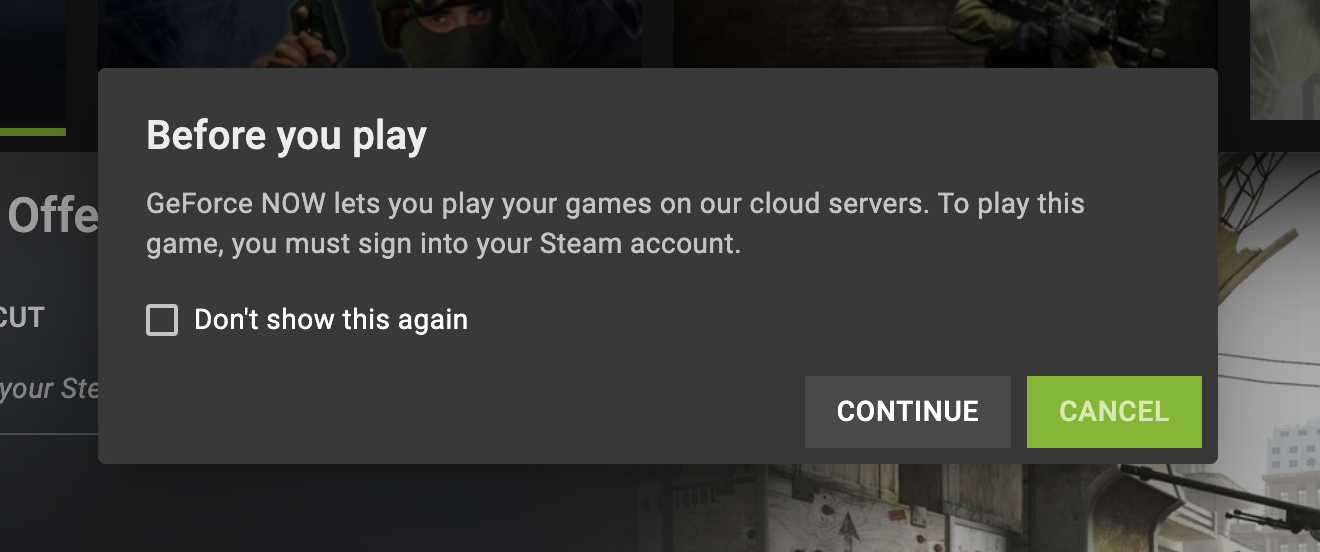
- Select the game, click on Play, and then, on the pop-up window, click Continue.


- You should wait for GeForce Now to test your connection. If you get a message that your Internet may not be good enough for cloud gaming, you can ignore that message and click Continue to start playing. Note, however, that if you got such a warning, you are likely to get a lot of lag while playing or the game may not be playable in case your Internet connection is bad.
- The last step before the game starts is to connect your GeForce Now to your Steam account. To do that, enter your Steam username and password and game should start in the GeForce Now app.
Leave a Reply