Table of Contents
Can You Play Rocket League on Mac
Rocket League is a free soccer sci-fi video game that once had an official macOS version for Mac users. However, official support for Mac and Linux ceased in 2020 and this made the game unavailable for full functionality on these systems. While older versions can still be played on Mac for single-player, split-screen, or LAN modes, achieving the complete Rocket League on Mac experience now requires alternative methods due to the discontinuation of official support. Fortunately, we fount that there are various methods that make playing Rocket League on Mac very much possible, and, on this page, we will share our experience using different methods on selected Mac models.
Rocket League Mac Methods and Instructions
For those who can’t wait to dive straight into the game and discover the most suitable method, here are the five effective Rocket League Mac methods and their instructions. If you’re interested in our firsthand experience with these options, you’ll find an overview below the next table for a more comprehensive understanding.
Boosteroid Cloud Gaming (Recommended method)
Features: Constant 1080p/60 FPS; Stable connection; Low bandwidth requirements (15 MBPS); Huge gaming library with all the latest AAA titles.
Pros
- Cheapest cloud-gaming option
- Compatible with all macs
- Hardware specs don’t matter
- You can play in your browser in about 15 minutes
Cons
- Requires a good internet connection
- You need to look if the game is supported with your chosen vendor
Extras: Here’s our review of Boosteroid with a comparison to GeForce Now; also check out our Boosteroid Games List.
Boosteroid is our recommended option for playing on a Mac unless you are a competitive gamer. The method is ideal if you simply want to enjoy the game on your Apple machine without jumping through any elaborate hoops, and gives a great combination of visuals and performance.

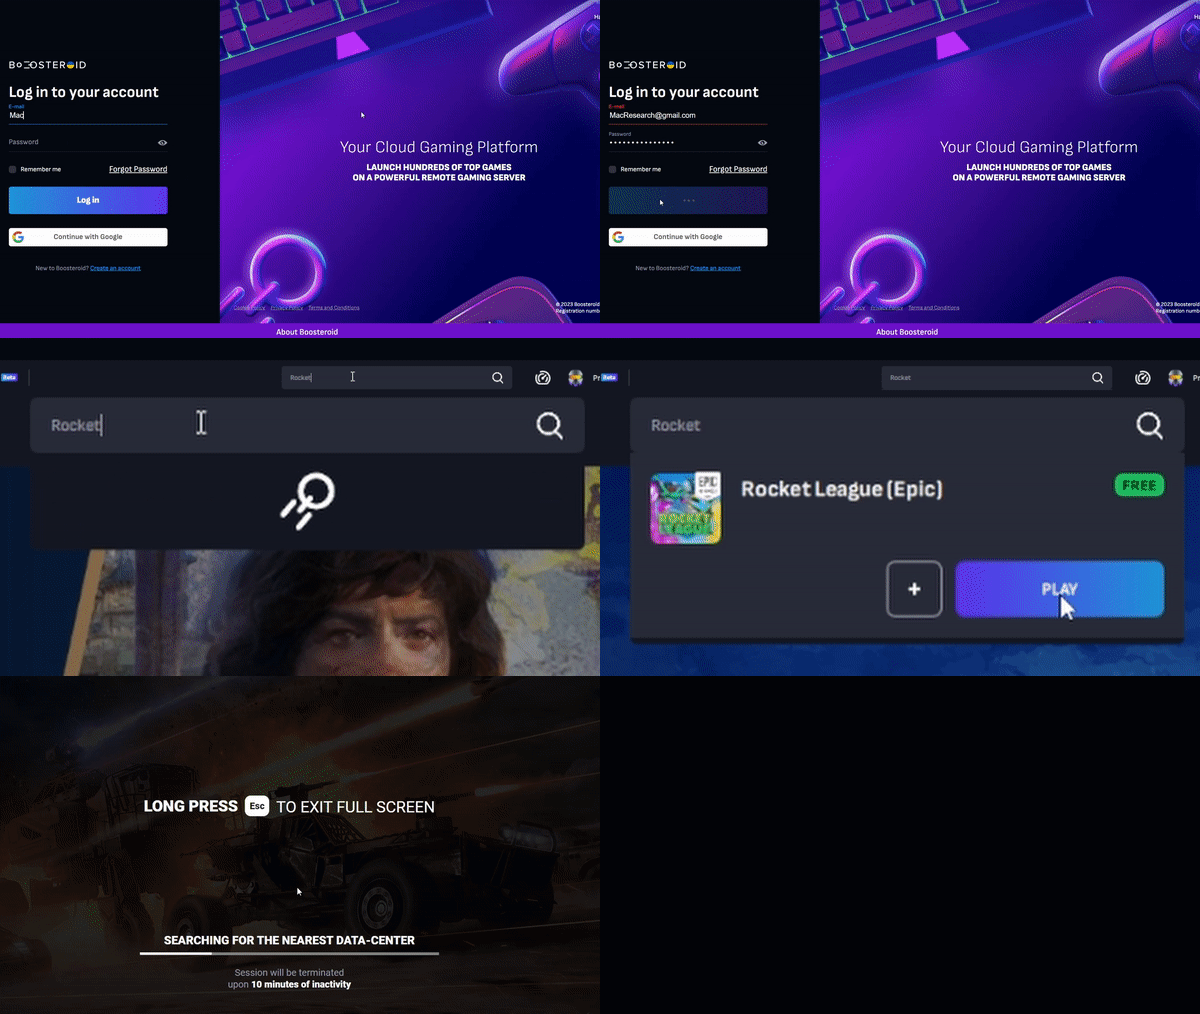
- Use the “Play with Boosteroid” button and go to the Boosteroid website. There, you need to create a new account or log in using your Google Account credentials.
- Go at the top-right corner of the screen and click on “My account”. To begin using Boosteroid, you need to activate a plan of your choice under the “My subscription” tab.
- Look for the game in the search tab on top to see which vendors Boosteroid supports. You need to own the game before you proceed with this method. Before playing Rocket League make sure you have an Epic Games Account. This is important as you won’t be able to play the game on cloud gaming services such as Boostorid. Here is a link to the official website for the game – Rocket League Account.
GeForce Now
Pros
- Access to a vast library of games.
- High-quality graphics and performance.
- No need for powerful local hardware.
- Cross-platform support.
Cons
- Requires a stable and fast internet connection.
- Limited to supported games.
- Potential latency issues in online games.
- Requires a subscription for some features.
GeForce Now is a cloud gaming service that offers an accessible way to enjoy a large selection of games on your Mac.
Note: Before playing Rocket League make sure you have an Epic Games Account. This is important as you won’t be able to play the game on cloud gaming services such as GeForce Now. Here is a link to the official website for the game – Rocket League Account.
- If you’re gaming on a Mac, GeForce Now can be a lifesaver. It opens up a whole library of games that you might not have been able to play otherwise. The best part? You don’t need a supercharged Mac because all the heavy lifting is done on NVIDIA’s servers. That means you can enjoy high-quality graphics and smooth performance, even on older Macs. Plus, it’s cross-platform, so you can switch between your Mac, PC, or even mobile device seamlessly while keeping your progress.
- Now, here’s the flip side. GeForce Now is pretty reliant on a solid internet connection. If your connection is spotty or slow, you might run into lag or visual hiccups. Another thing to keep in mind is that not all games are supported, so your favorite title might not be available. And while the basic service is free, some features, like priority access and extended play sessions, require a subscription fee. So, while GeForce Now is fantastic for many, it’s essential to have a reliable internet connection and check if your favorite games are on the platform.
Parallels Desktop
Features: Provides you with Windows OS functionality without the need for a separate Windows installation. Easy to set up and doesn’t take much space.
Pros
- Don’t need to buy the game
- M1/M2/Intel-compatible
- Hardware specs don’t matter
Cons
- Requires good Internet
- Console-based controls
- Available in few countries.
Note: Before playing Rocket League make sure you own the game and have an Epic Games Account. Here is a link to the official website for the game – Rocket League Account.
Parallels basically creates a virtual Windows PC within your macOS, so you can use it to run most software. The advantages of this method are that it’s also relatively easy to get up and running. It’s also more stable than CrossOver, so you are unlikely to get any errors or crashes. The main downside of Parallels Desktop is that it basically requires you to split your Mac to run two operating systems at once, meaning that it can only devote half of its resources to games running in the Windows virtual machine.
CrossOver + the Game Porting Toolkit
Pros
- It’s free
- Unlimited compatibility
- Stable and reliable
Cons
- Takes time to set up
- Takes tons of storage
Running Windows games natively on your Mac is made possible through Apple’s Game Porting Toolkit (GPTK). While GPTK offers powerful capabilities, its initial setup can be complex, involving Terminal commands. To simplify this process and enhance user-friendliness, it is recommended to integrate GPTK with CrossOver, which is a more accessible and user-friendly application. This integration streamlines installation and compatibility layer setup, making it easier for users to configure their systems.
1. Visit the CrossOver site by clicking the button below, and download and install CrossOver.
2. Open CrossOver and create a new Bottle from the Bottle menu.
3. Right-click the newly-created bottle, click Install Software in Bottle, and then search for and install Steam (or another game launcher if you own the game elsewhere).
4. Make sure that D3DMetal option is enabled if you are about to play a DirectX 11 or 12 game, and then launch and log into Steam, find the game in your library, install it, and click Play.
Boot Camp
Features: Provides a native Windows 11 experience. Allows running all Windows-compatible programs and games as long as the Mac’s hardware can support them.
Note: Not available for Apple Silicon models.
Pros
- It’s free
- Unlimited compatibility
- Stable and reliable
Cons
- Takes time to set up
- Takes tons of storage
- Unavailable for M1/M2
Note: Before playing Rocket League make sure you own the game and have an Epic Games Account. Here is a link to the official website for the game – Rocket League Account.
Boot Camp installs Windows in a separate partition on your Mac and allows you to run any Windows program without any compatibility issues.
- The strengths of this method is that it is the most stable one, so you won’t be getting any errors, crashes, or other weird stuff while playing this game on your Mac. Also, it’s a method that you can use for free, so the only thing you’ll have to pay for is the game itself.
- The downsides are that you’ll need a ton of hard drive space, because your Mac will need to accommodate both the game itself as well as the entire Windows 10 OS. Also, this method will allow to play the game on Intel Macs, so if you are using Apple Silicon, you’ll have to opt for one of the other alternatives. Finally, it’s the most time-consuming method, so you’ll need a couple of hours to set it up.

Rocket League for Mac – the methods that we tested
Rocket League on Mac with Cloud Gaming
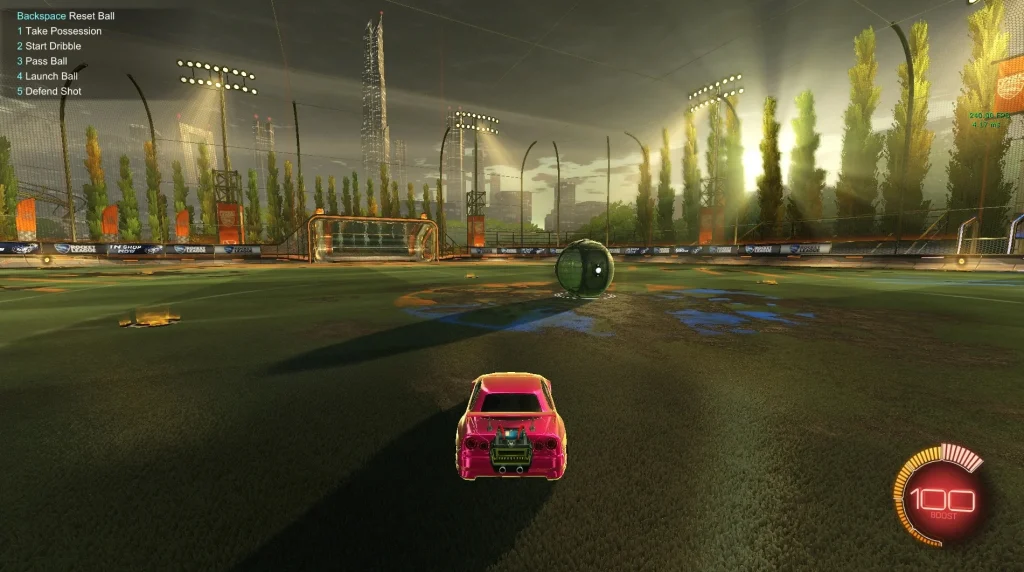
When it comes to playing Rocket League on the cloud, Boosteroid took the lead in providing a seamless and enjoyable gaming experience. The frame rates remained impressively stable, accompanied by high-quality graphics settings that enhanced the overall visual appeal. The responsiveness of the gameplay was noteworthy, with minimal latency and a consistent FPS, that contributed to our satisfying gaming session. The sharp resolution further added to the immersive experience, which made Boosteroid our preferred choice for enjoying Rocket League on Mac.
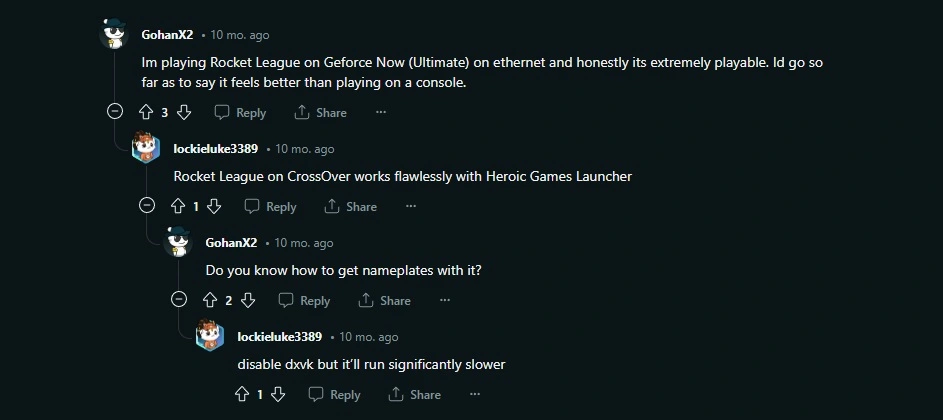
GeForce Now also delivered an excellent experience as the game ran smoothly with high frame rates and crisp resolution. The settings were automatically optimized for the best performance, which ensured an immersive gaming session. A Reddit user even shared that playing with this method is even better than playing on a console. But, for us, even though both platforms showcased their capabilities in handling fast-paced games on Mac, Boosteroid left a slightly more favorable impression with its stability and visual quality.

Rocket League on Mac with Local Gaming Methods
Crossover
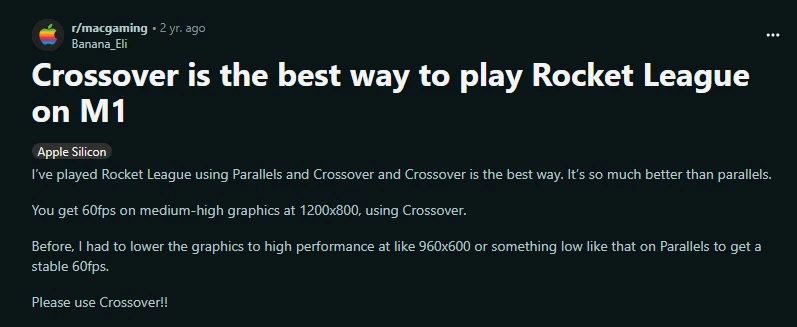
First, we decided to take Rocket League for a spin on our trusty MacBook Pro M1 Pro (14-inch, 2021) using Crossover inspired by what we found as a comment on this Reddit thread. To our delight, the game managed to hit a sweet spot, hovering around 55-60 FPS at high settings and a crisp resolution of 2704×1756. The gameplay was surprisingly smooth, though we did encounter a minor hiccup – some textures and nameplates were playing hide and seek. Our M1 chip warmed up to around 55-60 degrees Celsius, but nothing too dramatic; the heat didn’t throw a wrench in our gaming adventure.

Parallels
Next, we were curious to see how Rocket League performs with Parallels, and we put it to the test on our MacBook Pro M1 with a Windows ARM build. The game played nice at a resolution of 1440×900, with settings tweaked for optimal quality. Clocking around 45 FPS, it wasn’t the speed demon we found in some other methods, but the controller support was spot on, giving us a pretty enjoyable gaming session. So, from what we experienced, with Parallels, Rocket League found its groove, and we certainly had a good time scoring goals and pulling off acrobatic stunts.
BootCamp
Finally, we took Rocket League for a joyride via BootCamp on an Intel-based MacBook Pro (15-inch, 2019) and oh boy, it did not disappoint. The game ran like a dream – smooth, with frame rates that left us grinning from ear to ear. The graphics quality was top-notch, and it wasn’t just us who enjoyed such a performance – as it is visible from the comment below BootCamp is still the go-to choice for getting the most out of Windows-native games on your trusty Mac.

Conclusion and Recommendation for Mac Gamers
After testing these methods, it’s clear that each has its strengths. Cloud services like Boosteroid and GeForce Now offer ease of use and high performance without the need for complex setups. Local methods like Crossover, BootCamp, and Parallels provide more control over the gaming experience, with BootCamp standing out for its performance on Intel-based Macs. For Mac users, especially those with M1 chips, however, we recommend cloud gaming services for their simplicity and efficiency. For those who prefer a more hands-on approach, any of the local gaming methods is a viable option.
Leave a Reply