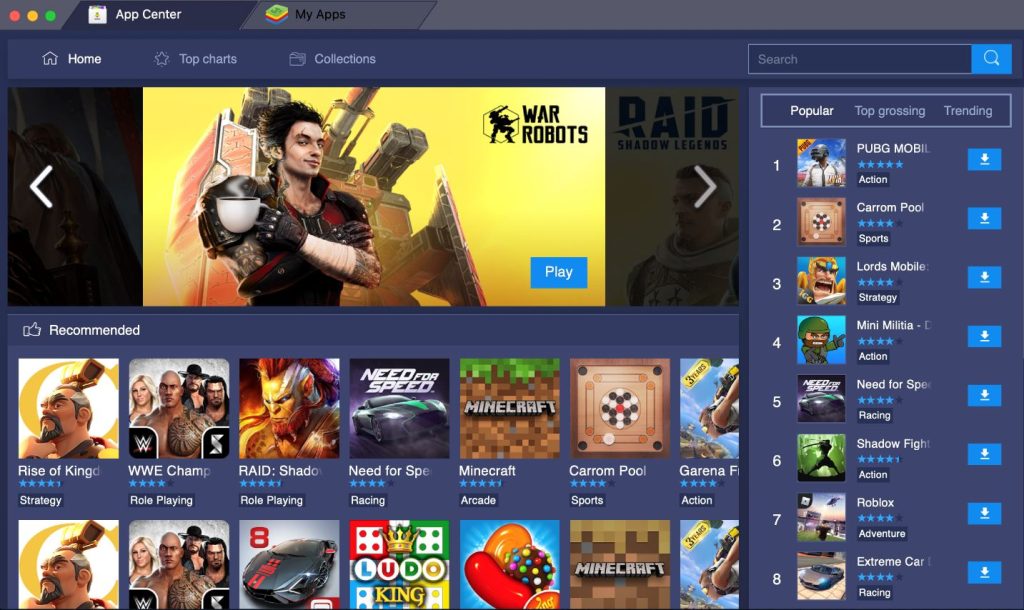
BlueStacks for Mac is a widely used emulator that enables Mac users with Intel chips to enjoy Android games such as Genshin Impact and PUBG after a simple setup process, which has been outlined below. Regrettably, it’s restricted to specific Mac models and macOS versions, excluding Macs with M1/M2 chips. However, if you own an Apple Silicon Mac, you can opt for PlayCover – an alternative emulatior functioning similarly to BlueStacks, but one that’s compatible with M1 and M2 machine. So, if you want to play your favourite mobile games on your Apple computer using BlueStacks, Mac users with Intel-based machines should check the instructions further down this page. As for owners of M1 or M2 Macs, you click the link below to go to our PlayCover article and guide.
If you get the “Your machine has new apple silicon processor which is currently not supported by bluestacks.” error message while trying to use BlueStacks, this means that you are trying to run the app on an M1 or M2 Mac, for which BlueStacks is currently not supported. The developer team behind BlueStacks has stated that they are working towards resolving this compatibility issue, but there’s no specified timeline as to when to expect the app to be updated with M1 and M2 support.
At the moment, BlueStacks isn’t compatible with macOS Ventura (13) or macOS Monterey (12). The latest macOS version for which BlueStacks has support is macOS Big Sur (11). Also, BlueStacks doesn’t work on versions of macOS older than macOS 10.12 (Sierra).
Currently, BlueStacks isn’t supported for either M1 or M2 Macs. The apps’ developers did address this lack of a compatibility in a Reddit post, stating that they are working on an update that will provide support for Macs with M1 and M2 chips.

Android games on BlueStacks employ touch controls akin to consoles, necessitating a controller for a seamless gaming experience on your Mac. However, if you lack a controller, prefer mouse-keyboard setups, or simply aren’t keen on this method, consider cloud gaming platforms like Boosteroid or GeForce Now. With easy setup procedures, these platforms provide access to a vast library of Windows games, that you can play on any Mac, be it Intel-based or with an M1 or M2 chip.
Is BlueStacks Mac M1 compatible?
Unfortunately for Apple Silicon users, the answer to the question of whether BlueStacks is Mac M1 compatible is still negative. While Intel Macs can leverage BlueStacks to explore a broad variety of Android games, M1/M2 Macs are left unsupported due to the fundamental differences in the chip architecture. This disparity presents a roadblock in emulator functionality, thus restricting the application’s use on these latest models. However, we remain hopeful that there will eventually be BlueStacks Mac M1 support. Until then, alternatives like PlayCover, cloud gaming, or CrossOver can fill the void for M1/M2 Mac users eager to play their favourite games on an Apple Silicon computer.
Will there be BlueStacks Apple Silicon support?
In a recent Reddit post from earlier this year, the developers of the addressed their ongoing efforts to provide BlueStacks Apple Silicon support. While BlueStacks 5 (the app’s latest version) currently lacks support for these newer Mac M1 and M2 models, the team is actively working to rectify this limitation. Though they have not provided a specific timeline for the M1/M2 compatibility upgrade, it is evident that they are prioritizing this significant enhancement to their product. Fans of the app can look forward to potential BlueStacks Apple Silicon compatibility, expanding the platform’s capabilities for Mac users worldwide. In the interim, users are advised to stay updated with the latest developments through the Release Notes page.
Does BlueStacks work on Mac?
BlueStacks does work on Mac systems, but there are specific limitations that need to be taken into account. As mentioned, currently, the app is compatible only with Macs equipped with Intel chips, excluding the latest M1 and M2 Macs. Additionally, BlueStacks works only with certain macOS versions, meaning some users may be unable to utilize it depending on their system’s software. These constraints, somewhat atypical for general-purpose software, can be restrictive for a subset of Mac users. However, the BlueStacks team is reportedly working on expanding its compatibility, showing promise for M1 and M2 support in the future. Despite these limitations, BlueStacks does work on many Macs, thus remaining a valuable tool for emulating Android games and applications.
To find out if you are among this group of users who can benefit from the functionality of the app, be sure to check its requirements below:
- Doesn’t work on Macs older than 2014.
- Compatible only with Intel Macs and not with M1/M2 models.
- Compatible with macOS versions 10.12 (Sierra) and newer, but isn’t supported for macOS 12 (Monterey and 13 (Ventura).
BlueStacks Mac instructions
- The first step from our BlueStacks Mac instructions is, obviously, to download the app from its official website.

- Next, open the downloaded installation file and install BlueStacks.
- Launch the app and use your Google account to sign in to the Play Store (if you are required to).
- Search for the game you want to play in the BlueStacks app and install it.
- After the installation completes, click the game’s icon in the BlueStacks home screen to start playing. As we said earlier, the BlueStacks Mac gaming experience requires you to have a controller that’s compatible with your machine, so be sure to connect one to the Mac in order to start playing.
Leave a Reply