Why is my camera not working on Microsoft
Teams on Mac?
“Why is my camera not working on Microsoft Teams on Mac” is a question that a lot of Mac users who are trying to use Microsoft Teams on their machines are asking. Generally, Microsoft Teams is a popular business communication platform that has versions not only for Windows but also for Linux and Mac. Therefore, it’s not uncommon for people with these systems to use it.
For the most part, the software works as intended, but there is a common issue that some Mac users experience with it where the camera is not working on Microsoft Teams when the app is started. The usual reason for this problem is a conflict between the Teams app and the security and privacy settings of macOS. However, there could be other causes for the issue and, on this page, we will do our best to help our readers solve this problem by showing them the most effective fixes.
Why is Mac Teams camera not working properly?
Generally, there can be several reasons why your Mac Teams camera is not working. Some of the common reasons could be that your camera is not connected properly or not turned on, another application is using the camera, your camera permissions are not set correctly, the camera drivers are outdated or Microsoft Teams needs to be updated. Sometimes, technical issues can also cause the “Mac camera not working on Teams” problem. In this case, what you can do is try restarting your Mac or reinstalling Microsoft Teams to see if it resolves the issue.
Microsoft Teams camera not working Mac fix
If you are looking for a Microsoft Teams camera not working Mac fix, below there are five troubleshooting steps you can try. Our first suggestion is to check your camera permissions in your Mac’s System Preferences as this is something that many Mac users forget. Also, you should make sure that no other application on your Mac is using the camera and update both your Microsoft Teams and your macOS if needed. You will find the steps for these and two more possible fixes to the teams mac camera not working problem in the next lines, so stay with us until the end.
How to enable camera on Microsoft Teams on Mac
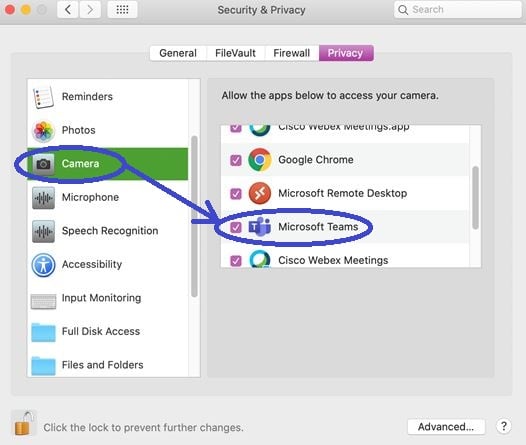
If you’re having trouble enabling the camera on Microsoft Teams on Mac, make sure that you have granted permission for Teams to access your camera in your Mac’s system preferences. To do this, go to “System Preferences” > “Security & Privacy” > “Privacy” > “Camera” and make sure Microsoft Teams is checked.
If that doesn’t resolve the issues and the Macbook Teams camera not working problem persists, there could be other causes for the issue, such as temporary bugs, conflicts with other apps, outdated software, and more. Here, we will offer our readers a Teams camera not working Mac fix by showing them some proven and effective solutions.
Teams camera not working Mac fix
The main Teams camera not working Mac fix is to еnable the app to use the camera from the system settings as explained above. If this Teams camera not working Mac fix doesn’t help, then the problem is likely linked to a conflict between apps or outdated software.
Solution 1: Give Microsoft Teams the necessary permission
This solution tackles the most common cause for the problem, namely the default setting of macOS that prevents third-party software from using the machine’s camera.
- First, you need to go to the Apple Logo icon from the top.
- From the drop-down menu, open System Preferences and go to Security and Privacy.
- Find in the sidebar to the left the Camera icon and select it.

- Now, in the right panel, find the icon of the Microsoft Teams entry and check it, so that it will now be allowed to use the camera. If you are unable to check Microsoft Teams, you may need to first click on the padlock icon in the bottom-left corner and then try again.
- Note that this won’t immediately enable the camera on Teams if the app is currently open. You must quit Teams and then start it again, and then the camera should be working as intended.
Solution 2: Resolve conflicts with other apps
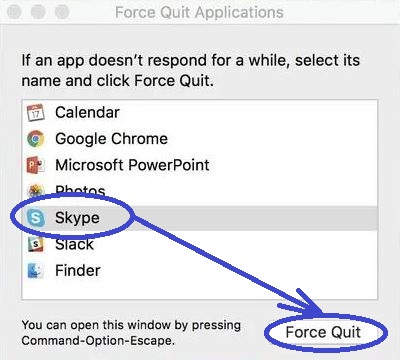
If you have another app on your Mac that also needs to use the camera (for instance, Skype), it is highly likely that there’s a conflict between the two apps and that the other app has “stolen” the camera and so Teams cannot use it. Usually, simply quitting the other app should be enough to resolve the issue. To be sure that the other app is no longer active, we suggest force-quitting it in the following way:
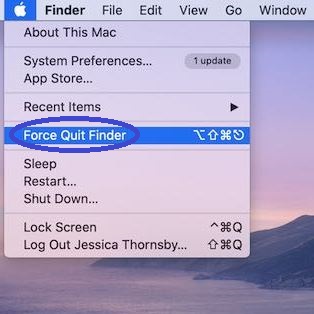
- Select the Apple Logo menu and click on Force Quit.

- Select the app you think may have taken over the camera.
- Click on the Force Quit option in the bottom-right of the window.
If you’ve done everything up until now and Teams still can’t use the camera, then you can try to prohibit the conflicting app from using the camera. To do this, go back to System Preferences > Security and Privacy > Camera as we showed you above, find the conflicting app in the list to the right and untick its entry, so it no longer has permission to use your Mac’s camera.
Solution 3: Update your software
Problems like this one are often caused by outdated software and/or conflicts between older and newer versions of the problematic app and the macOS. In either case, it is recommended to update both your Microsoft Teams app and your macOS to their latest versions. Normally, such updates should happen automatically, but sometimes it may take some time before the automatic update takes place, and so you may need to perform a manual update to fix problems resulting from the presence of outdated software.
Update macOS
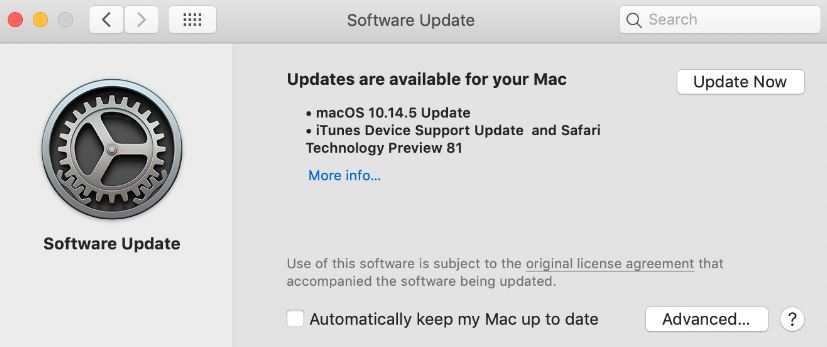
- To update macOS on your Mac, go to the Apple Logo menu, select System Preferences, and then click on Software Update.
- In the next window, first look at the status of the Automatically keep my Mac up to date option – if it isn’t checked, check it if you’d like new updates to be installed automatically.
- In that window, you will see if there’s an uninstalled update for your macOS and if there is, select the Update/Upgrade button.
Note: Many older Macs cannot officially support macOS Big Sur, so if you are using an older machine, you may not be able to install Big Sur the intended way (probably for the best, since Big Sur has higher system requirements than previous macOS versions). If, however, you think your machine is powerful enough to support it, you can learn how to install macOS Big Sur on an older Mac on this page.
Update Microsoft Teams
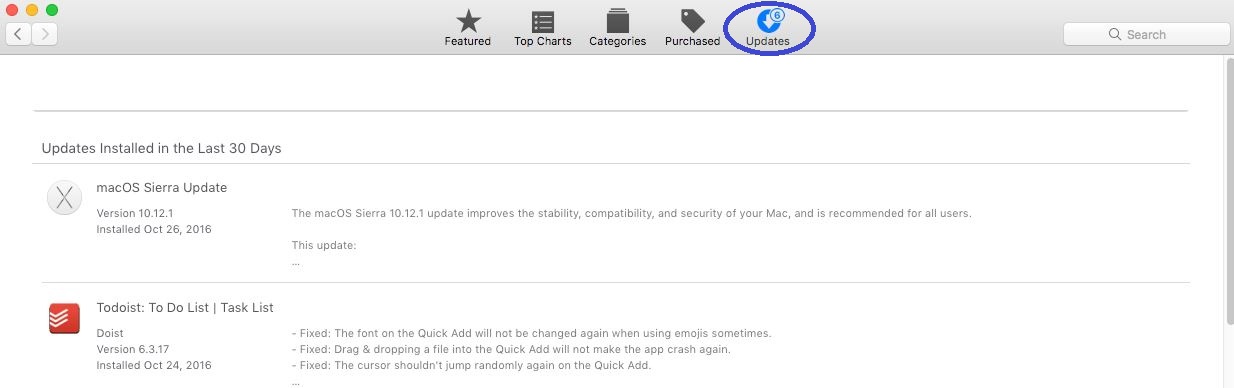
Updating apps on Mac that you’ve downloaded from the Mac App Store is done through the Store:
- Once again, open the Apple menu and select App Store.
- Select the Updates section.
- See if there are any updates for Microsoft Teams that are waiting to be installed and if there are, install them.
Solution 4: Use Terminal commands
Users on Microsoft support forums have proposed a fix that might work in some situations; however, it requires running Terminal commands and is highly context-dependent (such as the current latest version of both Microsoft Teams and macOS). So, this fix might be out of date already. Furthermore, it is recommended that users with little to no technical expertise refrain from trying it, but those who are experienced might want to give it a go.
Still, we will put it here if anyone wants to give it a try. Note, however, that you’d be doing that at your own discretion.
- Open Finder > Applications > Utilities.
- Open the Terminal app.
- Type the following commands in the Terminal exactly as they are shown, and hit Enter after each to execute them. The only change you should make to the command is the location of the Teams app if it is saved in a location on your Mac that’s different from the one shown in the commands, the way they are written below.
- xcode-select –install – execute this command only if Xcode isn’t already installed on your Mac!
- sudo codesign –remove-signature “/Applications/Microsoft Teams.app”
- sudo codesign –remove-signature “/Applications/Microsoft Teams.app/Contents/Frameworks/Microsoft Teams Helper.app”
- sudo codesign –remove-signature “/Applications/Microsoft Teams.app/Contents/Frameworks/Microsoft Teams Helper (GPU).app”
- sudo codesign –remove-signature “/Applications/Microsoft Teams.app/Contents/Frameworks/Microsoft Teams Helper (Plugin).app”
- sudo codesign –remove-signature “/Applications/Microsoft Teams.app/Contents/Frameworks/Microsoft Teams Helper (Renderer).app”
Solution 5: Fix hardware problems
If you haven’t had any luck with the previous suggestions and your Mac has been dropped, hit, or otherwise subjected to physical harm, the hardware of your camera may be broken. If this happens to you, there is no easy solution; rather, you will need to take your Mac to a technician who is qualified to repair Mac computers and MacBooks.
Leave a Reply