About Windowserver – mac high CPU
Windowserver on Mac causes high CPU usage when resource-intensive programs that constantly change what’s happening on the screen are running on the Mac. It’s common for Windowserver on Mac to consume lots of CPU power when the user is running games or video-editing software.
Windowserver is an important macOS process that’s constantly running and is responsible for the communication between the apps that are running on your Mac and Mac’s display. Basically, the windowserver process is responsible for the visualization of every app that you open and use on the computer. For this reason, it wouldn’t be surprising if windowserver starts using up significant amounts of CPU in order to function. High CPU usage caused by this process is especially likely if you are running any visually-intensive software, such as video-editing apps or video games. In such cases, if you want to decrease the CPU that’s being used, you’d need to close those programs. Obviously, if you need to use the visually-intensive software that’s triggering the increased CPU usage, you’d need to put up with the potentially decreased performance of your Mac.
In some cases, however, it’s possible that the high use of CPU that’s coming from windowserver is triggered by a bug in a program that you are running. If, for instance, you’ve noticed that a certain app that shouldn’t be too resource-intensive is causing an unusual increase in CPU usage, then, if you know that the app is legitimate, you can contact its developer and let them know about the potential issue they may need to fix. On the other hand, if you are uncertain about the program’s trustworthiness, it may simply be best to uninstall it.
It’s also possible that the windowserver process is using lots of CPU power even when you don’t have any resource-intensive programs open on your Mac. In such cases, there are several possible fixing methods that you can try in order to troubleshoot this issue. We will explain those methods in the troubleshooting section of this article that you will find down below.
About Mac kernel_task – high CPU
Mac kernel_task using high CPU amounts is normal, and you shouldn’t worry about it if it doesn’t affect the performance. If your Mac is slower due to the Mac kernel_task using lots of CPU power, there are several things you can try to fix it.
The “kernel” of your Mac is a very important part of your system – it loads first when you start your Mac, and it is responsible for the communication between your macOS and the software you run on it, on the one hand, and your Mac’s hardware components, on the other. The kernel_task is a macOS process related to your Mac’s kernel, and it’s normal if that process consumes large amounts of system resources. In fact, it is designed that way with the goal to make use of all available resources (especially memory) at any given time, even if no resource-intensive tasks are being run at the moment.
Obviously, if you are running any programs or tasks that require a lot of resources, the kernel_task process may start using up even more of your CPU and memory, which is to be expected. However, if the task seems to be causing slower performance due to increased CPU usage even when no demanding apps are open on your Mac, then you may need to dig a bit deeper to find out what the source of the issue is and troubleshoot it.
There are different potential causes for unusually high and performance-affecting CPU usage caused by kernel_task. A common example in the past that could still be seen on older Macs is when Adobe Flash is causing spikes in CPU usage. If you still have Flash on your Mac, disabling it may help relieve some of the used CPU. Another thing you can try is you can reset the SMC of your Mac – SMC stands for System Management Controller, and it’s a chip within your Mac that controls various functions of the computer. Errors or bugs in the SMC can trigger various issues such as increased CPU usage, and the way to take care of this issue is through an SMC reset.
A more advanced solution that has helped some users relieve the high CPU use coming from kernel_task is to disable third-party kernel extensions (also known as kexts). This is a more advanced troubleshooting method, but if the previous suggestions didn’t work for you, it may be worth giving it a try. Below, we will guide you through the process, so that you should be able to disable those third-party extensions without any issue.
About Mds_stores – high CPU
Mds_stores high CPU usage is typically triggered when Spotlight needs to index a large number of items, typically after adding new data or deleting data. If the Mds_stores high CPU usage persists, the Spotlight index is likely corrupted and needs to be rebuilt.
Mds_stores is yet another important macOS process, which is related to Spotlight, so if you notice that it is in your Activity Monitor and that it’s using large amounts of CPU (or memory), do not worry – it is not uncommon for this process to require lots of resources from time to time. If, however, mds_stores (or the other mds processes) is constantly slowing down your Mac’s performance by using up large portions of the computer’s memory and/or CPU, then you may need to do something about it.
The main reason why mds_stores have high CPU usage is that your Mac’s Spotlight is in the process of indexing files that are present in your Mac. In fact, the indexing process is happening very often, and in most cases, it shouldn’t be causing any performance problems. However, if the mds_stores process seems to be using too much of your CPU for an extended period of time and this is causing your Mac to operate at a slower speed, then you may want to do something about it.
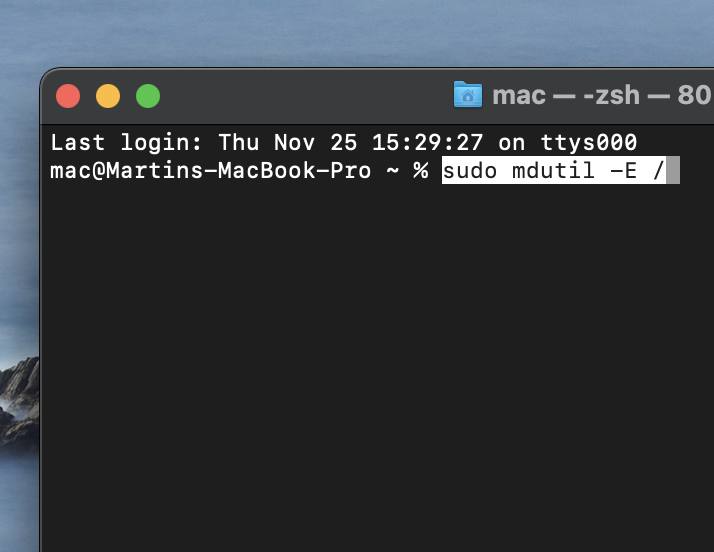
The main solution here is to manually rebuild your Spotlight index. There are two main methods of doing this: you can either add your Mac’s drive to the Excluded Locations list and after that remove it from the exclusions list, or you can run the sudo mdutil -E / in the Terminal.
Other things that you can try are to prevent Spotlight from searching in certain locations and folders, remove some directories from Spotlight, or, if nothing else helps, you can also disable Spotlight.
Mac high CPU Fix Checklist
- Restart your Mac
- Restart your Mac in Safe Mode
- Update your Mac’s software
- Reset SMC
- Free up storage space
- Reduce Transparency
- Reset NVRAM
- Rebuild Spotlight Index
Some Mac high CPU fix methods you can try are to restart your Mac, quit unneeded apps, or update your Mac’s software through System Preferences. The more advanced high CPU use fixes for Mac depending on the process that’s responsible for the issue.
There are many different causes for increased CPU usage on Mac. In most cases, if your Mac is using too much of the system’s resources, the cause for this would probably be that you are either running some demanding program (such as a video-editing app or a video game) or that you are running a big number of apps at the same time (or possibly both of those variants at once). The obvious solution here is to only run the software that you need to use at the moment and close everything else. If that software is still being too demanding for your Mac and is slowing down its performance, there’s little else you could do other than put up with the slower performance or use alternative software that’s less demanding.
If, however, your Mac seems to be using lots of CPU for no apparent reason (you aren’t running any resource-intensive programs or a large number of programs), then there are several typical troubleshooting methods that you can try:
Restart your Mac
The most obvious troubleshooting method is to simply restart your Mac – oftentimes this would fix any small bugs or errors that may be triggering the increased CPU usage.
Restart your Mac in Safe Mode
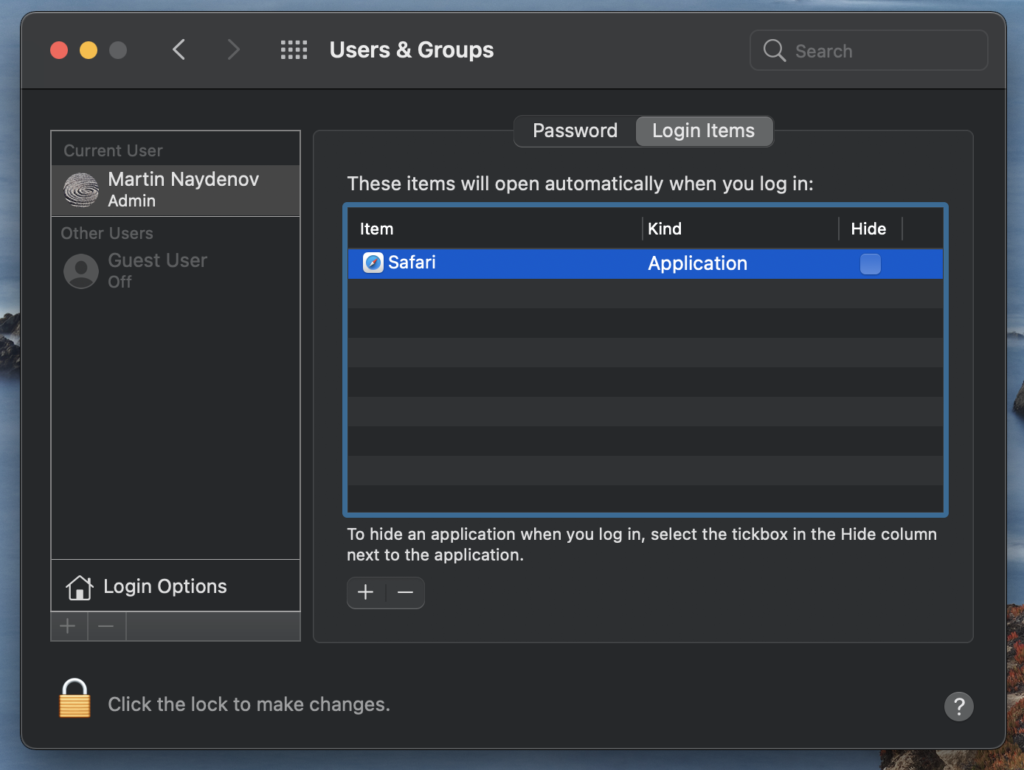
You can also restart your Mac in Safe Mode to see if the CPU usage goes down when the computer is in Safe Mode. The difference would be that third-party software won’t be allowed to start automatically, and so if the CPU usage when in Safe Mode is decreased/back to normal, then you’d know that the likely cause of its increase when in normal mode is such third-party software. If this turns out to be the case, one thing you can try is to go to System Preferences > Users & Groups > Login Items and disable any unnecessary and/or demanding software shown there so that it doesn’t automatically start when you log in to your Mac account.
As for restarting your Mac in Safe Mode, here’s how to do it:
For Intel Macs – Turn off your Mac, wait for several seconds, then press the Power button, and right after that press and hold down the Shift key from your keyboard. Release the key when you see the Apple logo and log in to your Mac account.
For M1 Macs – Shut down the computer, wait for a bit, press and hold down the Power button, and release it when the Startup Options screen appears. Select the startup disk of your Mac, hold down Shift, select Continue in Safe Mode, and then release the Shift button.
Update your Mac’s software
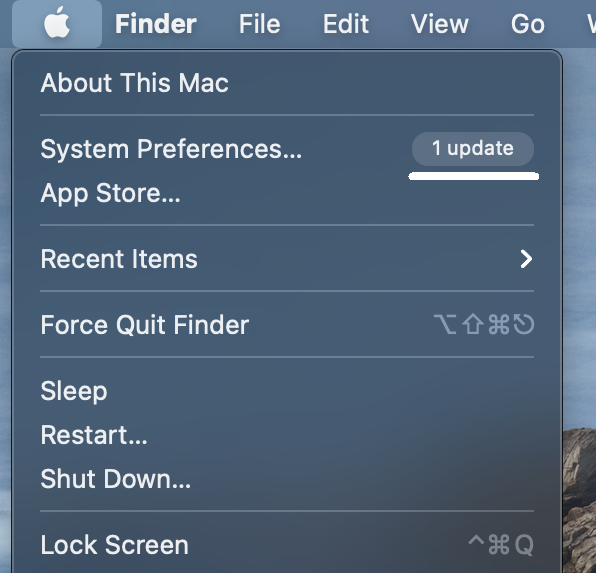
A possible cause for performance issues and increased use of CPU in your Mac is if there are software updates that need to be installed. To see if there are any available updates, open the Apple Menu – if there’s an update notification next to System Preferences, click on System Preferences.
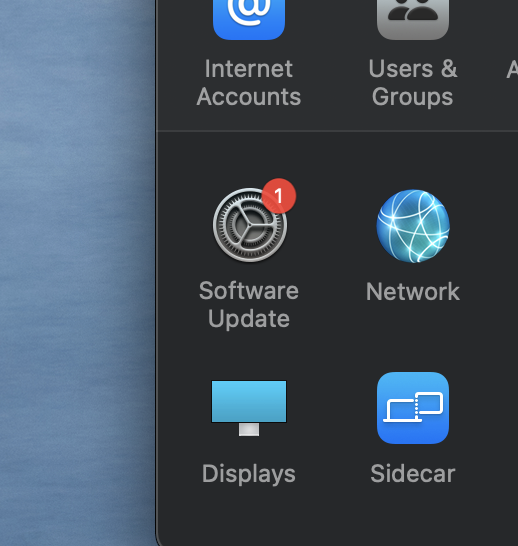
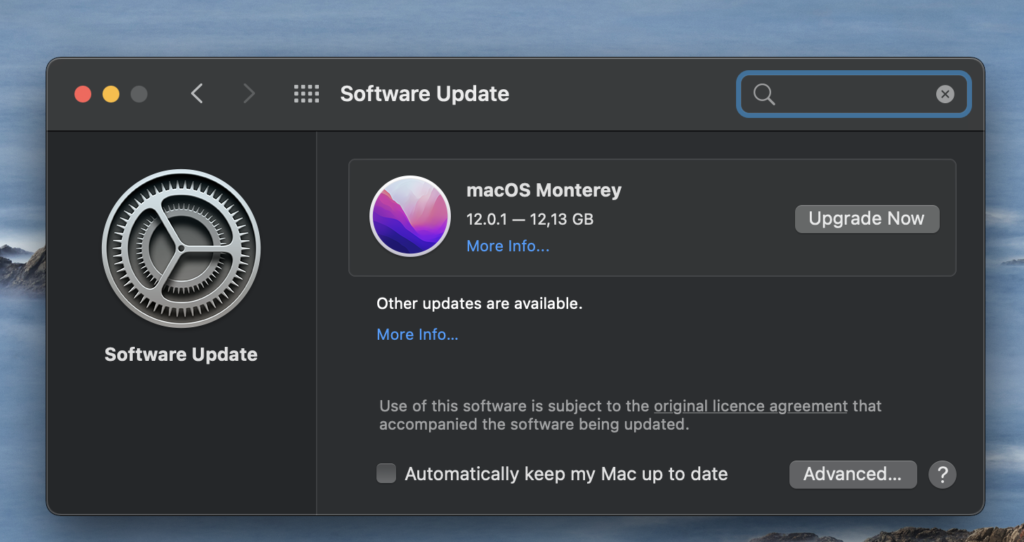
Next, see which of the icons there has a small number over them that indicates an available update, and open them to install the update.
Reset SMC
Resetting the SMC is a standard troubleshooting procedure for many different Mac issues, including unusually high CPU use. You can learn how to perform an SMC reset on the guide available on this page.
Free up storage space
If there’s little to no free storage space left on your Mac, different problems may start taking place, including increased use of CPU. In such cases, it’s strongly recommended to free up some space on your Mac by deleting unnecessary software.
Check for unwanted/rogue software
You could still get malware on a Mac computer, even though macOS systems have very strong security. Even if your Mac doesn’t have an actual harmful virus in it, a potentially unwanted piece of software such as a browser hijacker or adware could still trigger uncreased CPU usage. If you have any sketchy apps on your Mac, especially ones downloaded from untrusted sources, it may be a good idea to uninstall them.
Now that we’ve gone through the generic solutions for high CPU use, it’s time to get more specific. There are several types of macOS system processes (mentioned above) that could oftentimes lead to performance slow-downs due to their high consumption of CPU power. Below, we will show what you can do about each of them in order to reduce the amount of CPU that they use and hopefully improve the performance of your Mac.
Windowserver mac high CPU fix
The typical windowserver high CPU usage fix for Mac is to simply close the program that’s triggering the spike in CPU usage, or close all other programs. If the windowserver high CPU use persists, another possible fix is to reduce the transparency of on-screen items.
As already mentioned, the main reason why the windowserver process on your Mac may be using lots of CPU power is that some visually-intensive program is currently running on your Mac. If closing any such programs doesn’t help and the processor use is still high, here are some other things you can try:
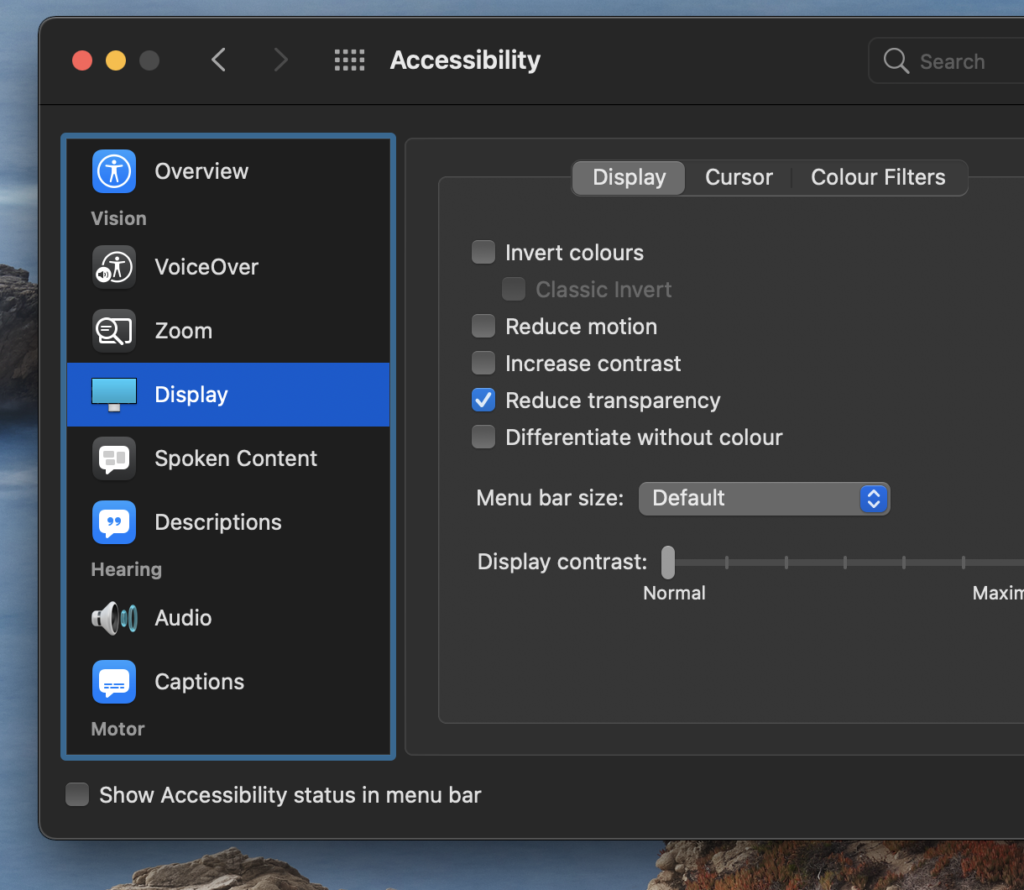
Reduce Transparency
Some users have reported getting better performance from their Mac once they reduce the transparency of items shown on their screens, so here’s how to do this:
- Open Apple Menu > System Preferences.
- Click on Accessibility and then select Display from the panel to the left.
- Enable the Reduce Transparency option.
Reset NVRAM
An error in your Mac’s Non-Volatile Random-Access Memory also known as NVRAM can sometimes cause certain processes, such as the windowserver one, to misbehave. Resetting NVRAM could, therefore, help solve the problem – click the link to learn how to perform an NVRAM reset.
Mac kernel_task high CPU fix
The usual kernel_task high CPU usage fix is to reset your Mac’s System Management Controller (SMC). Other potential fixes for the kernel_task high CPU usage problem are to disable Flash on your Mac if you still have it or to disable third-party kernel extensions.
If the kernel_task is only getting occasional CPU usage spikes or if it isn’t affecting the performance of your Mac, then you should probably not bother with the methods shown below. However, if your Mac is noticeably slower for the majority of the time due to high CPU use from this process and none of the generic solutions shown above helped you resolve the problem, you can try disabling third-party kernel extensions (kexts) by following the next instructions:
- Boot your Mac in Safe Mode (see the Safe Mode instructions for Intel Macs and M1 Macs that we’ve included above).
- Open the Activity Monitor and see if the kernel_task process is no longer using an increased amount of CPU power.
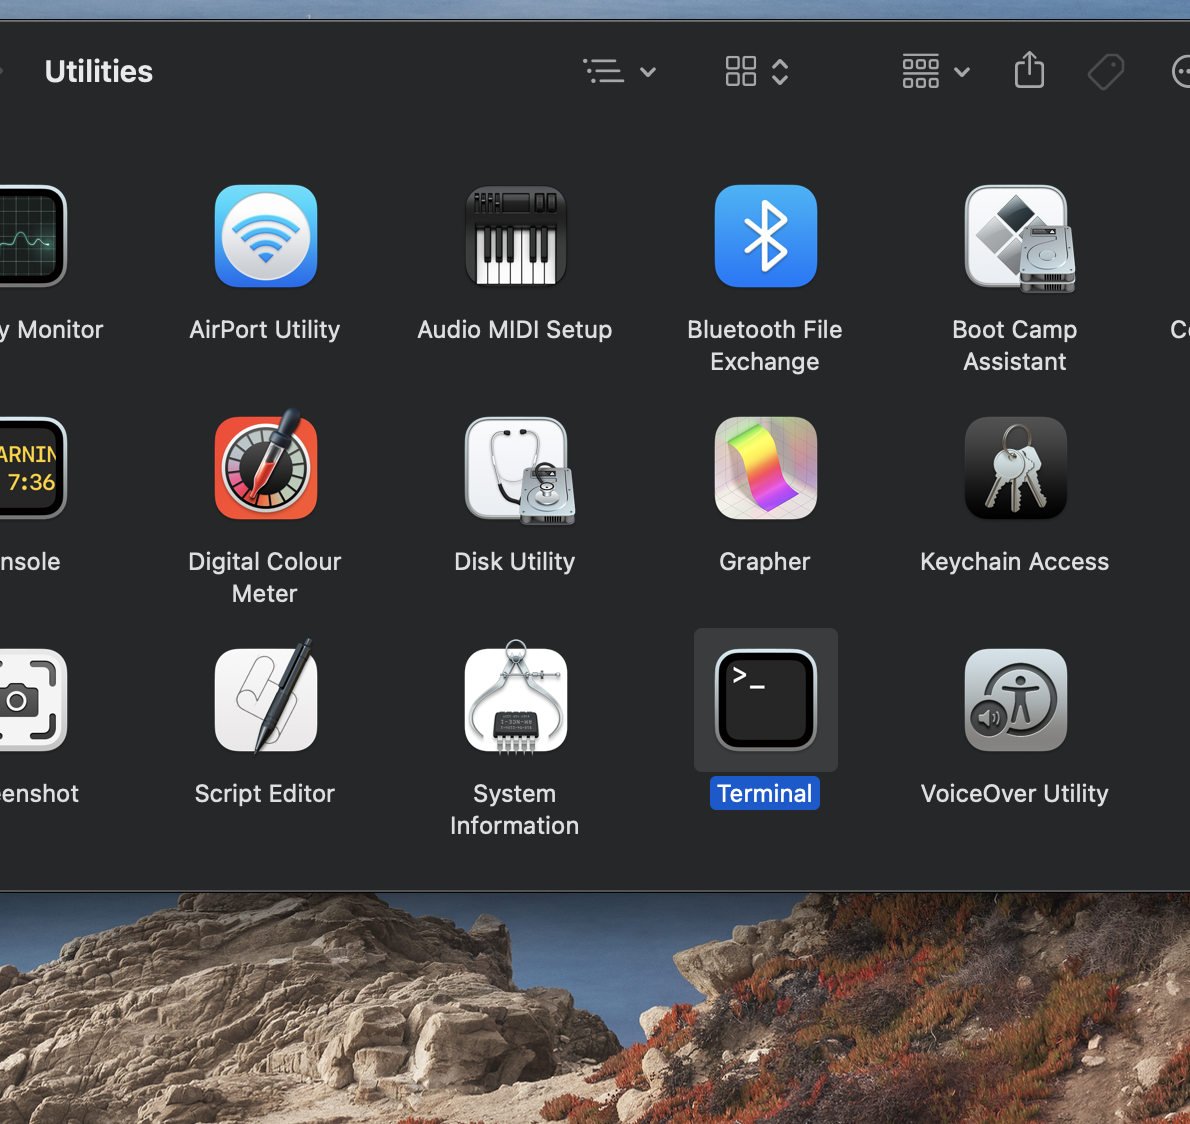
- If the CPU usage is normal now, this means that some third-party kernel extensions may be the culprit – in this case, restart your Mac normally, go to Utilities, and open the Terminal app.
- Type/copy-paste the following command in Terminal and hit Enter to execute it: kextstat.
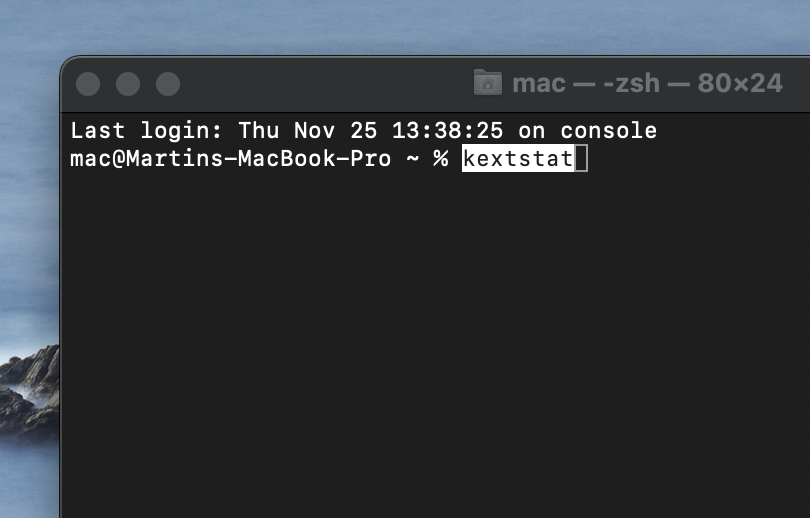
- If you are required to provide your Admin password, type it and hit enter to execute the command. When typing your password in Terminal, the characters you are typing will be invisible, so do not be surprised if you don’t see anything being typed – type your password anyway and press Enter.
- When you see all kernel extensions listed in the Terminal, take note of the ones that aren’t from Apple. The Apple extensions would look like this: com.apple.[etc].
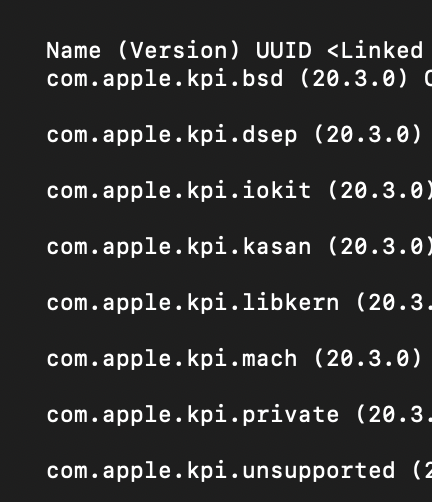
Remember (or write down) the extensions that aren’t from Apple. - Next, find the apps those extensions are associated with and uninstall those apps by dragging them to the Trash. If you need any of the related applications and don’t want to uninstall them, you may need to put up with the increased CPU usage.
Mds_stores high CPU fix
The mds_stores high CPU usage fix that should resolve the problem is to rebuild the Spotlight index. The quicker way to perform this mds_stores high CPU usage fix is to run the sudo mdutil -E / command in the Terminal app of your Mac.
Use the following methods if you’ve already tried the solutions shown under Mac high CPU fix, and they didn’t manage to fix the problem. Note that these next solutions should help with other Spotlight-related processes such as mds and mdworker, so if you are having problems with them as well, performing the fixes for the mds_stors high CPU usage problem should for them too.
Rebuild Spotlight Index
- Go to Utilities and start the Terminal app.
- Type in it the following command and hit Enter: sudo mdutil -E /.
- Type your password and press Enter to execute the command if you are required to (do not be surprised if no symbols are appearing in the Terminal while you are typing the password – your keystrokes are still getting registered, it’s just that the characters are invisible).
Note that this process may take a while – be sure that your Mac doesn’t get turned off and that its lid doesn’t get closed until the Spotlight Index is rebuilt.
Prevent Spotlight from searching in certain locations or folders
- Open System Preferences and select Spotlight.
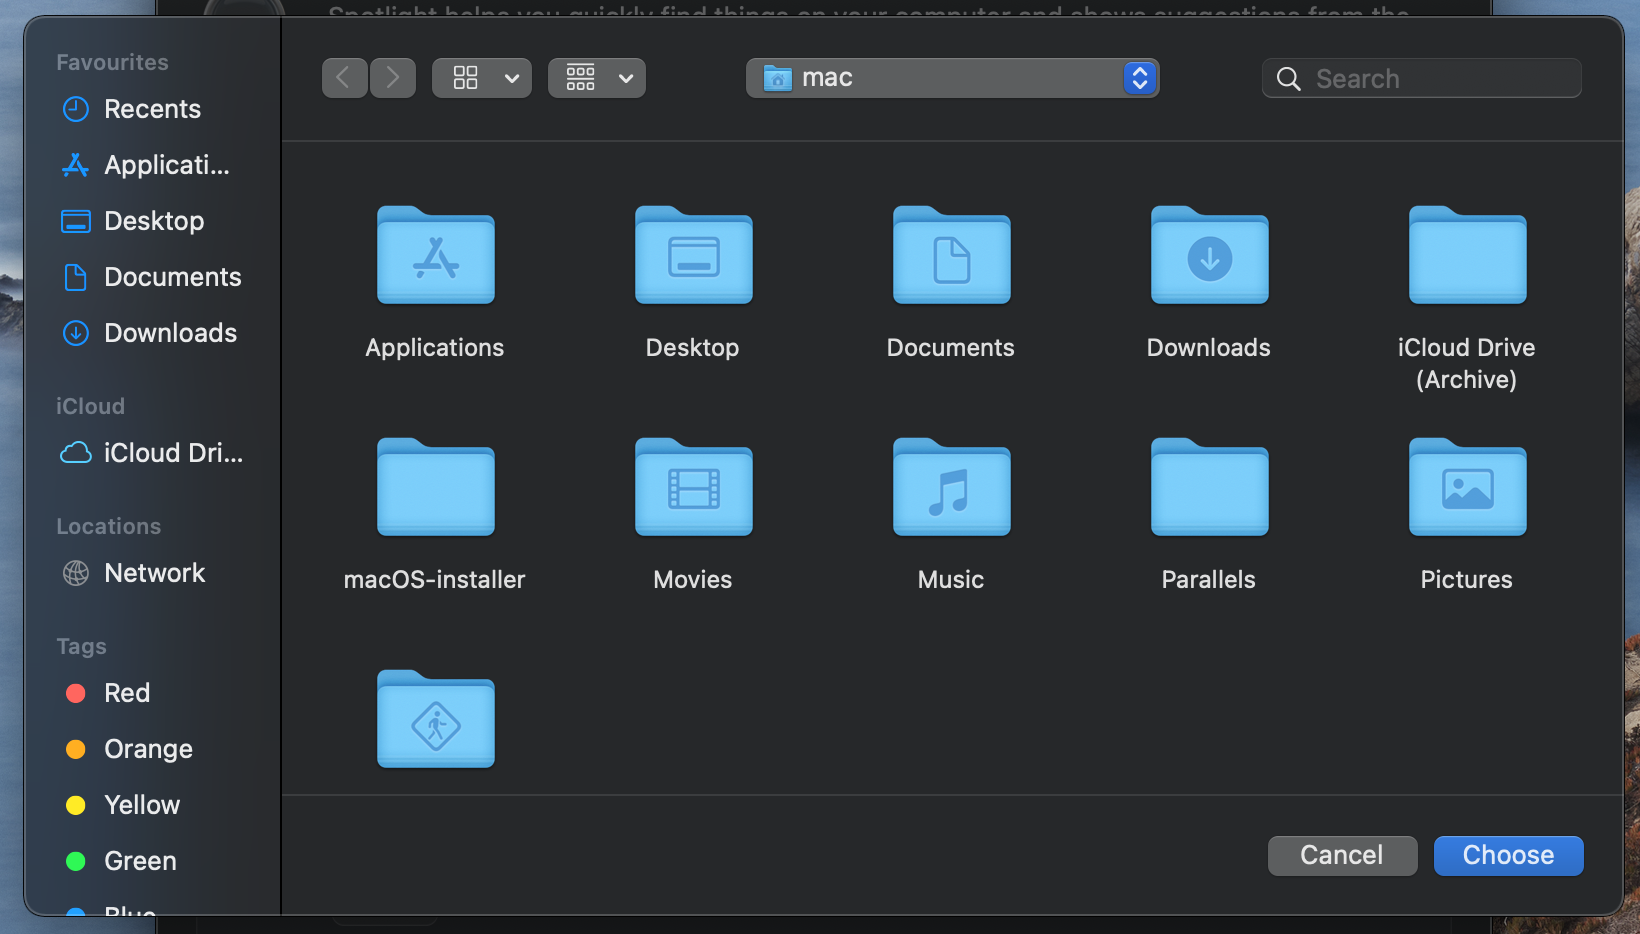
- Click on Privacy and select the + button below the list.
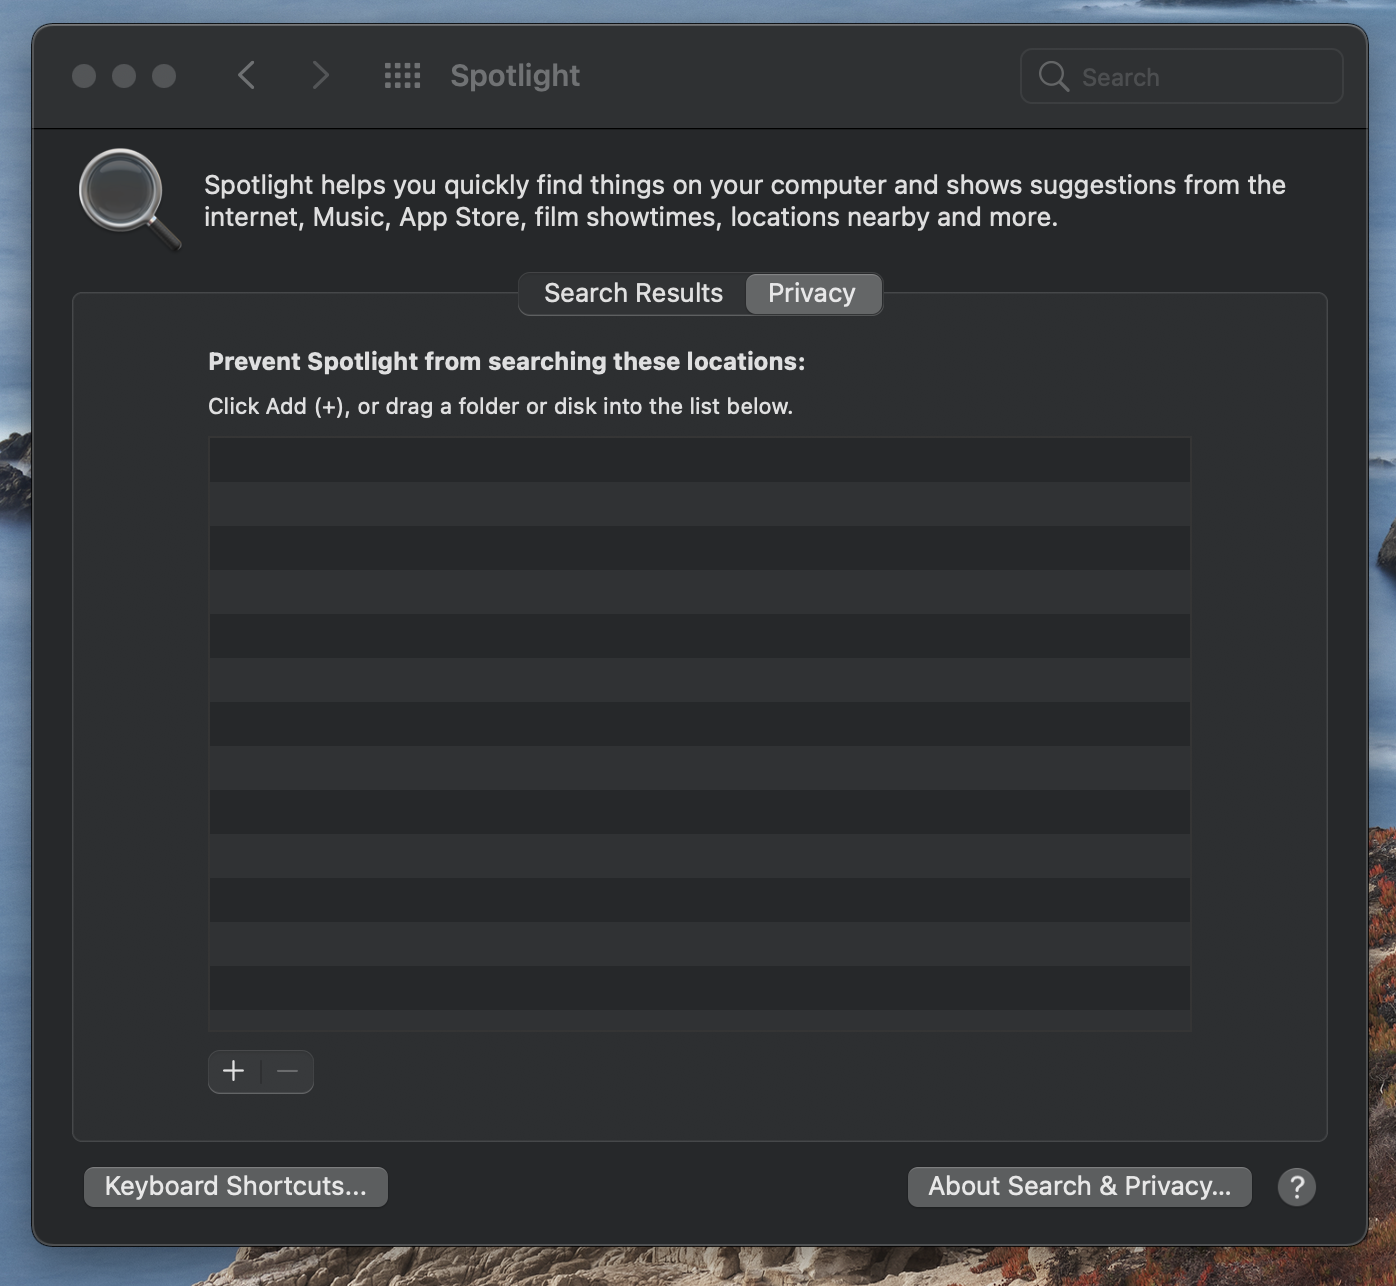
- Add folders that you rarely use so that Spotlight won’t spend time and resources indexing the items in those folders.
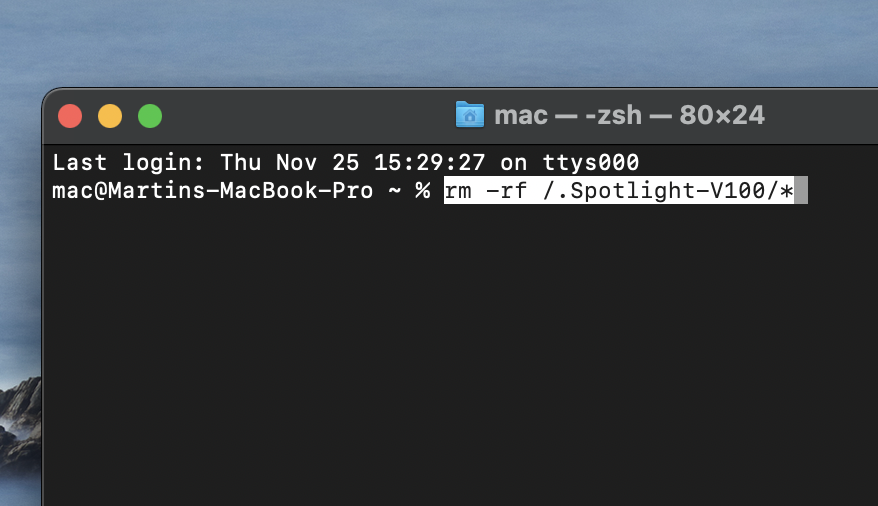
Remove certain directories from Spotlight
- Open the Utilities folder, and start Terminal.
- Copy-paste the following command in it and press Enter to execute it: sudo rm -rf /.Spotlight-V100/*.
- Enter your password and press Enter again if you are required to.
- Perform the steps from the previous fix method – any directories/folders you add in the Privacy section of Spotlight will not be indexed.
- Restart your Mac and wait for Spotlight to re-index the files in your Mac. It may take some time for the command to be executed – be patient and do not turn off your Mac or close its lid.
- Restart your Mac again and see if the problem has been fixed.
Disable Spotlight
To disable Spotlight, you need to run the sudo mdutil –a –ioff command in Terminal.
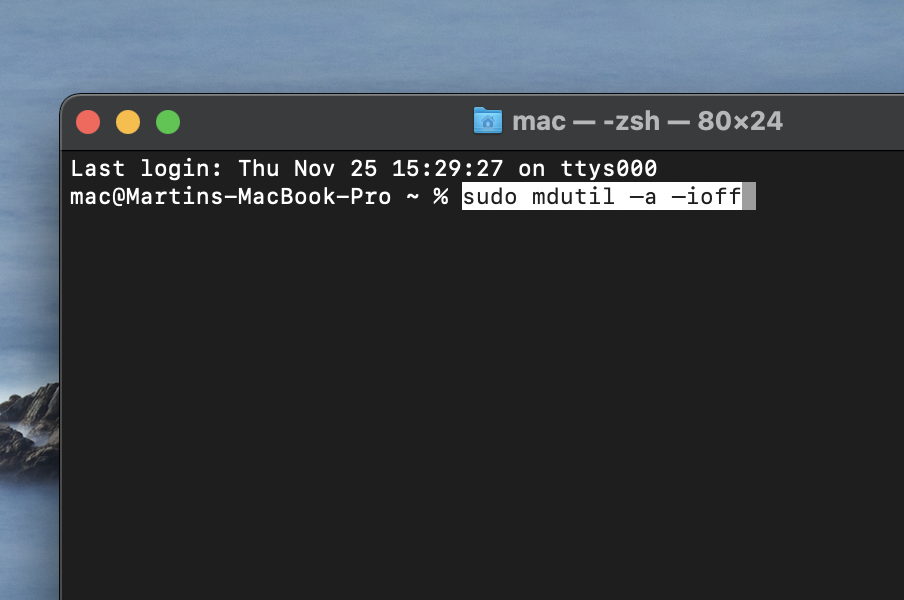
This will turn off the Spotlight feature and should immediately result in decreased CPU usage from the mds_stores process. If you want to re-enable Spotlight, open Terminal again and run the sudo mdutil –a –ion command.
Leave a Reply