This is the first of what will hopefully be a series of tutorials on Apple’s own scripting language Applescript. I should perhaps begin with a confession, “I’m not a programmer”, by training I’m a chemist and I spent the majority of my career as a Medicinal Chemist. This might actually make me the ideal person to write this since I’ve always thought of Applescript as the programming language for the rest of us. Applescript is a scripting language that allows users to automate reptitive or complex tasks, or customise applications and as such it is really useful for lttle tools or widgets that make life easier. An added benefit is that it easy to read Applescript code, so the many free applescripts that are available make an invaluable resource for beginners.
Getting Started
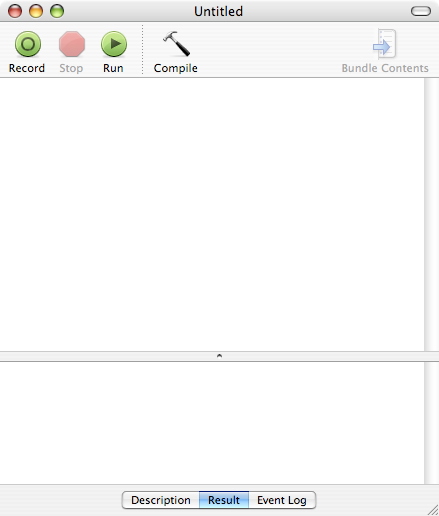
One of the beauties of Applescript is that you don’t have to install anything, the standard Mac OS X install includes everything you might need to get started. If you look in the Applications folder you will see a folder called Applescript, in there is the Script Editor application. Doubler click on it to open it and you should see a window like this.
Your First Script On Mac
In the text box type:
display dialog "My first Script"
Then click on “Compile”, then on “Run” and you should see a dialog box pop up as shown in the image below. Click on “OK” when you are finished admiring your handiwork. Click on the “Description”, or “Event Log” tabs at the bottom of the Script Editor window and rerun the script to get more information of what is actually happening. If you want you can save the script for posterity :-).

And now for something more interesting.
The other button on the Script Editor window is “Record” this allows you to record a set of actions. Open a new Script Editor window, click “Record” and then double click on the Macintosh HD icon on your desktop, then double click on the “Applications” folder. Now click on the “Stop” button in Script Editor. You should find that it has kept a record of your actions.
tell application "Finder"
 activate
 select window of desktop
 select window of desktop
 make new Finder window to startup disk
 select Finder window 1
 select Finder window 1
 set target of Finder window 1 to folder "Applications" of startup disk
end tell
If you now click “Run” it should open another Finder window and navigate to the “Applications” folder. We can now save this as an application, Choose “Save AS” and then select application as the File Format, check “run Only” and uncheck “Startup Screen”, then save it to your desktop.
Now double click on the “App_Folder” icon and a Finder window should open displaying your applications folder. You could put this in the “Dock” for easy access, obviously a shortcut to the applications folder is not very useful, but you could use it to navigate to a deeply buried folder. There are simpler ways to write this but this works!
Checking to see if a folder exists, and if it does not create one.
So navigating to an existing folder is easy, what happens if the folder does not exist, Especially if the rest of the script relies on the presence of a specific folder? Well we can get Applescript to check if a folder exists and if not create one. Suppose we need a folder called “TIFF Images” in the users folder. First we define the name of the folder we need to check for “TIFF Images”, then since there may be multiple user accounts we get the path to the current user folder and set this to the variable “this_folder”. The display dialog is not really needed but it serves to show the format of paths in Applescript, in particular the use of “:” as the separator. We could hardcode the path into the script as shown on the next line (the — means this is a comment only, and will be ignored when the script is run) but then it would only work in the defined user account. Next we tell the “Finder” if the folder “TIFF Images” does not exist then make a folder called “TIFF Images”
property new_foldername : "TIFF Images"
set this_folder to (path to current user folder)
display dialog (this_folder as text)
--set this_folder to "Macintosh HD:Users:username:" as alias

tell application "Finder"
 if not (exists folder new_foldername of this_folder) then
  make new folder at this_folder with properties {name:new_foldername}
 end if
end tell
You will quickly learn that there are many ways to achieve the same action in Applescript, for instance, this also works.
tell application "Finder"
 if (exists folder new_foldername of this_folder) is false then
  make new folder at this_folder with properties {name:new_foldername}
 end if
end tell
Bossing Applications
Whilst we don’t usually think of the “Finder” as an application it really is and as we have seen we can control it with Applescript, many applications support Applescript to a greater or lesser extent. Lets see what we can do with Mail, the applescript below uses a dialog box to capture user input and then puts it into a new mail message. So the first part opens up Mail, activate brings it to the front. We are now using the display dialog to get user input, the text result of the input is
put into the variable the_text. Mail is than told (we are still in the “tell application Mail” block) to make a new message with the content set to this_text. If the user does not type anything into the dialog box then the text set in the property at the start of the script is used instead.
property this_text : "Afraid to type?"
tell application "Mail"
 activate
 display dialog "Enter some text" default answer "" buttons {"Cancel", "Continue"} default button 2
 set the this_text to text returned of the result
 set this_message to make new outgoing message at end of outgoing \
      messages with properties {content:this_text, visible:true}

 tell this_message
  make new to recipient at end of to recipients with properties {address:"[email protected]"}
 end tell

end tell
The syntax for creating the mail message is not that intuitive, and this is probably a good point to look at the scripting dictionary. In Script Editor under the “File” menu you will find “Open Dictionary”, click on this and in the dialog box that opens navigate to Mail and click on “Open”. You should see the display below.
If you select “Mail” in the first panel and “outgoing message” in the second you can see the applescript properties of an outgoing email message. So we could have set all the properties of the email using applescript as so.
set this_message to make new outgoing message at end of outgoing messages \
     with properties {content:this_text, sender:sender_text, subject:subject_text, visible:true}
You then need to tell the new message to add a recipient.
tell this_message
 make new to recipient at end of to recipients with properties {address:"[email protected]"
end tell
Let’s do something useful
ChemDraw from CambridgeSoft has excellent Applescript support. I’m sure many chemists use ChemDraw to create the structures and figures for publications, and whilst ChemDraw can produce beautiful graphics some publishing companies insist on all graphics being submitted in “TIFF” format. This means that you have to open each of the ChemDraw files and then save them in “TIFF” file format. You can’t only work in “TIFF” format because the image then loses all the chemical information that is available in the ChemDraw native “CDX” format. A repetative opening of files and then saving in another file format, just the task for Applescript!
A copy of the Folder Action script is available here as a zip file. It needs to be stored in “Macintosh HD:Library:Scripts:Folder Actions”. The following is a description of how the script works.
The first part of the script sets up a few properties like Folder names and the types of files that will be processed, and provides a little useful information/explanation.
--Requires ChemDraw
property done_foldername : "TIFF Images"
property originals_foldername : "Original CD Files"
property newimage_extension : "tiff"
-- the list of file types which will be processed
-- eg: {"CDX", "CML"} for chemdraw or chemical markup language
property type_list : {"CDX", "CML", "MOL"}
-- since file types are optional in Mac OS X,
-- check the name extension if there is no file type
-- NOTE: do not use periods (.) with the items in the name extensions list
-- eg: {"cdx}, NOT: {".cdx"}
property extension_list : {"cdx", "cml", "mol"}
The second part of the script is the “Folder Action” and it tells the script what to do when items are added to the folder. The first part should be familiar since it is concerned with checking folders exist and creating them if they don’t. It then works through all the items added to the folder and puts the ChemDraw files in the “Originals CD Files” folder so we don’t lose anything using a repeat loop. This is somewhat convoluted because file types are optional in MacOSX and we might need to use the extension. This is handled in the resolve_conflicts sub-routine which we can ignore for the moment.
on adding folder items to this_folder after receiving these_items
 tell application "Finder"
  if not (exists folder done_foldername of this_folder) then
   make new folder at this_folder with properties {name:done_foldername}
  end if
  set the results_folder to (folder done_foldername of this_folder) as alias
  if not (exists folder originals_foldername of this_folder) then
   make new folder at this_folder with properties {name:originals_foldername}
   set current view of container window of this_folder to list view
  end if
  set the originals_folder to folder originals_foldername of this_folder
 end tell
 try
  repeat with i from 1 to number of items in these_items
   set this_item to item i of these_items
   set the item_info to the info for this_item
   if (alias of the item_info is false and the file type of the item_info is in the type_list) or \
                              (the name extension of the item_info is in the extension_list) then
    tell application "Finder"
     my resolve_conflicts(this_item, originals_folder, "")
     set the new_name to my \
        resolve_conflicts(this_item, results_folder, newimage_extension)
     --set the source_file to \
        (move this_item to the originals_folder with replacing) as alias
     set the source_file to (move this_item to the originals_folder with replacing) as text
    end tell

    process_item(source_file, new_name, results_folder)
   end if
  end repeat
 on error error_message number error_number
  if the error_number is not -128 then
   tell application "Finder"
    activate
    display dialog error_message buttons {"Cancel"} default button 1 giving up after 120
   end tell
  end if
 end try
end adding folder items to

on resolve_conflicts(this_item, target_folder, new_extension)
 tell application "Finder"
  set the file_name to the name of this_item
  set file_extension to the name extension of this_item
  if the file_extension is "" then
   set the trimmed_name to the file_name
  else
   set the trimmed_name to text 1 thru -((length of file_extension) + 2) of the file_name
  end if
  if the new_extension is "" then
   set target_name to file_name
   set target_extension to file_extension
  else
   set target_extension to new_extension
   set target_name to (the trimmed_name & "." & target_extension) as string
  end if
  if (exists document file target_name of target_folder) then
   set the name_increment to 1
   repeat
    set the new_name to (the trimmed_name & "." \
       & (name_increment as string) & "." & target_extension) as string
    if not (exists document file new_name of the target_folder) then
     -- rename to conflicting file
     set the name of document file target_name of the target_folder to the new_name
     exit repeat
    else
     set the name_increment to the name_increment + 1
    end if
   end repeat
  end if
 end tell
 return the target_name
 display dialog target_name
end resolve_conflicts
This is the part of the code that actually process the ChemDraw files, first we tell ChemDraw to activate and to open a file, and notice we need to use the correct full application name. We then save the file in the “TIFF Images” folder as a tiff image. Notice that the variable target_path includes the path to the “TIFF Images” folder and the new file name.
Occasionally there will be problems and rather than have scripts hanging we have added error messages, but with a time out. So if you are processing a large number of files overnight you don’t want to arrive in the morning to find a dialog box sitting there after only processing the first couple of structures.
-- this sub-routine processes files
on process_item(source_file, new_name, results_folder)

 try

  -- the target path is the destination folder and the new file name
  set the target_path to ((results_folder as string) & new_name) as string
  with timeout of 900 seconds

   tell application "CS ChemDraw Ultra"
    activate

    open file source_file

    save first document in target_path as "TIFF"
    close first document
   end tell

  end timeout
 on error error_message
  tell application "Finder"
   activate
   display dialog error_message buttons {"Cancel"} default button 1 giving up after 120
  end tell
 end try
end process_item
Now you have the script you need to attach it to a folder. Create a folder somewhere and call it images, control-click (or right click) on the folder to bring up the contextual menu. By default, Folder Actions is not enabled. To turn on the Folder Actions architecture, select Enable Folder Actions from the contextual menu. Folder Actions will now be enabled system-wide. Now bring up the contextual menu again and select Attach a Folder Action, navigate to and select “Convert_ChemDraw_to_TIFF.
You are now already to use it. Draw a structure in ChemDraw and save it to the images folder, you should find that the script is activated, it creates two folders (the first time it is used) “Original CD Files” and “TIFF Images”, you should find your original ChemDraw image in “Original CD Files” and a copy of the image in TIFF format in “TIFF Images”. There is more information on Folder Actions on the Apple website here
Leave a Reply