How to screenshot an entire webpage on Mac
The easiest way to screenshot an entire webpage on Mac is to use the Shift + Command + 3 combination. Alternatively, you can use built-in browser screen capture features to screenshot an entire webpage on Mac, but the way to do this would depend on the browser.
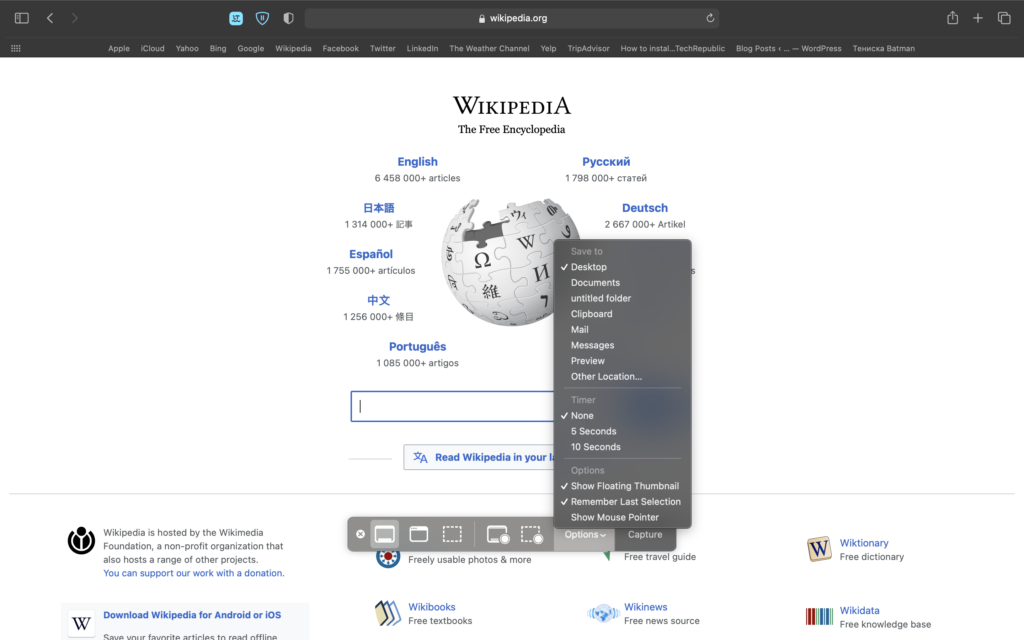
Taking a screenshot on a Mac computer is very easy – all you need to do is press Shift + Command + 3 and this will create a screenshot using the built-in Screenshot mac utility. This app actually has several useful options, so, to actually open it and gain access to those options you can search for them in Spotlight by typing Screenshot and opening the first result. You can also use the Shift + Command + 5 combination from your keyboard to directly open the Screen capture utility. Once you open it, at the bottom of your screen, you’d be given the different options of the app – to screenshot the entire screen or a specified selection, or to record a video of your entire screen or of a selection. If you want to take a screenshot of the whole screen, click the first button from left to right (should be labeled Capture Entire Screen) and then click anywhere on your screen. A screenshot image file will soon be saved in a location specified in the settings of the Screenshot utility. To see what that location is and to change it if you want, click Options when the Screenshot utility is open and see what folder is checked below Save to. If you want, you can change that folder to another location.
If you want a quick way of making screenshots of specified selections of the screen, you can instead use the Shift + Command + 4 keyboard combination. This will directly turn your cursor into a selection tool. To use it, click and hold somewhere on your screen and then drag the cursor over the area of your screen that you want to capture. Once you’ve selected the area you want, release the click and a screenshot will be taken and saved to the Save to the location of the Screenshot utility.
This is the easiest way to take screenshots on Mac, but note that a lot of browsers offer their own screenshot utilities and functions. Below, we will show you how to take a screenshot of a webpage using Chrome and Firefox.
How to screenshot a webpage in Chrome on Mac
- Open the Chrome browser on your Mac and go to the page you want to screenshot.
- Press the Command + Option + I keyboard combination, and you will see a window appear to the right.
- Next, press Command + Shift + P and then type “Screenshot” in the Run field.
- You will see several screenshot options (Capture area screenshot, Capture full size screenshot, etc.) – choose the option you want to use to create a screenshot.

- If you chose the Capture area screenshot feature, click-hold on your screen and drag the cursor while holding the click to select the area you want to screenshot and then release the click. Any screenshots you create in this way will be saved to the Google Chrome download location, but you can also directly open the screenshot by clicking it from the bottom of your screen, as it should appear there after you take it.
How to screenshot a webpage in Firefox on Mac
- Launch Firefox and visit the page that you need to screenshot.
- Right-click anywhere on the page and click the Take Screenshot option.
- If you want the screenshot to be of the entire page, click the Save full page option in the small options window that should be in the top-right. Then click on either Copy to copy the captured image to your clipboard, or Download, to download the screenshot as a PNG file to your Mac. Captured screenshots will go to the download location for files downloaded from Firefox.
- If you want to screenshot a selection of the webpage, hold-click somewhere on the page and drag the cursor to frame the area you want to capture, then release the click to screenshot that area. Again, click either Copy or Save to get the screenshot.
Leave a Reply