PuTTY for Mac
If you’ve ever dabbled in networking or server management, you’ve probably heard of PuTTY. It’s a popular SSH, Telnet, and Rlogin client used by many to establish secure connections over the internet. But what about PuTTY for Mac? Is it available? How do you install it? And are there any alternatives? Don’t worry, we’ve got you covered! In this comprehensive guide, we’ll answer all these questions and more. So, let’s dive right in!
PuTTY SSH for Mac explained
Before we delve into the specifics, let’s take a moment to understand what PuTTY SSH for Mac is. Essentially, PuTTY is a popular SSH (Secure Shell) client primarily used on Windows operating systems, but it is also available for Mac. Unlike many other SSH clients, PuTTY provides a graphical user interface (GUI) that makes it easier for users to interact with SSH servers. Additionally, PuTTY allows users to save their login credentials and session details for convenient access in the future.
To use PuTTY for Mac, you can take advantage of its macOS port, which enables Mac users to enjoy the benefits and features of PuTTY on their machines. This allows Mac users to leverage PuTTY’s capabilities and connect to SSH servers using a familiar interface.
PuTTY is a software tool that allows users to establish secure connections to remote servers using the SSH and telnet protocols. Originally developed for Windows, PuTTY has also been adapted to work on Mac systems, providing Mac users with access to its features and functionalities. The availability of PuTTY for Mac OS offers users the opportunity to utilize this widely-used and freely available tool regardless of their operating system.
Putty is known for its reliability and popularity as an SSH client on Windows. Using PuTTY as a Mac SSH client can be highly beneficial for users who are already familiar with using PuTTY on Windows. The tool enables you to customize its built-in terminal emulator and conveniently save your settings as part of a session. This means that if you switch to a Mac, you can continue to enjoy the familiar functionalities and customization options provided by PuTTY, making the transition between operating systems smoother and more seamless.
Yes, you can download PuTTY for Mac. PuTTY is a freely available and open-source SSH and telnet client that has been traditionally associated with Windows. However, developers have also adapted PuTTY specifically for Mac users. This allows Mac users to benefit from the features and functionalities of PuTTY, despite it being originally designed for the Windows platform.
PuTTY is a popular SSH client primarily designed for Windows users, but it has also been adapted for Mac users. Mac users can obtain PuTTY through its macOS port, ensuring compatibility and functionality on their devices.
Is PuTTY on Mac?
Now, you might be wondering, “Is PuTTY on Mac?” Generally, PuTTY is not designed specifically for Mac, so it lacks the native look and feel of macOS applications. It was originally developed for Windows and is widely used in that environment, but developers have made it available to Mac users, too. That being said, your Mac already comes with a pre-installed SSH client called Terminal, which is located in the Utilities folder and both, Terminal and PuTTY can be used in a similar way for SSH connections.
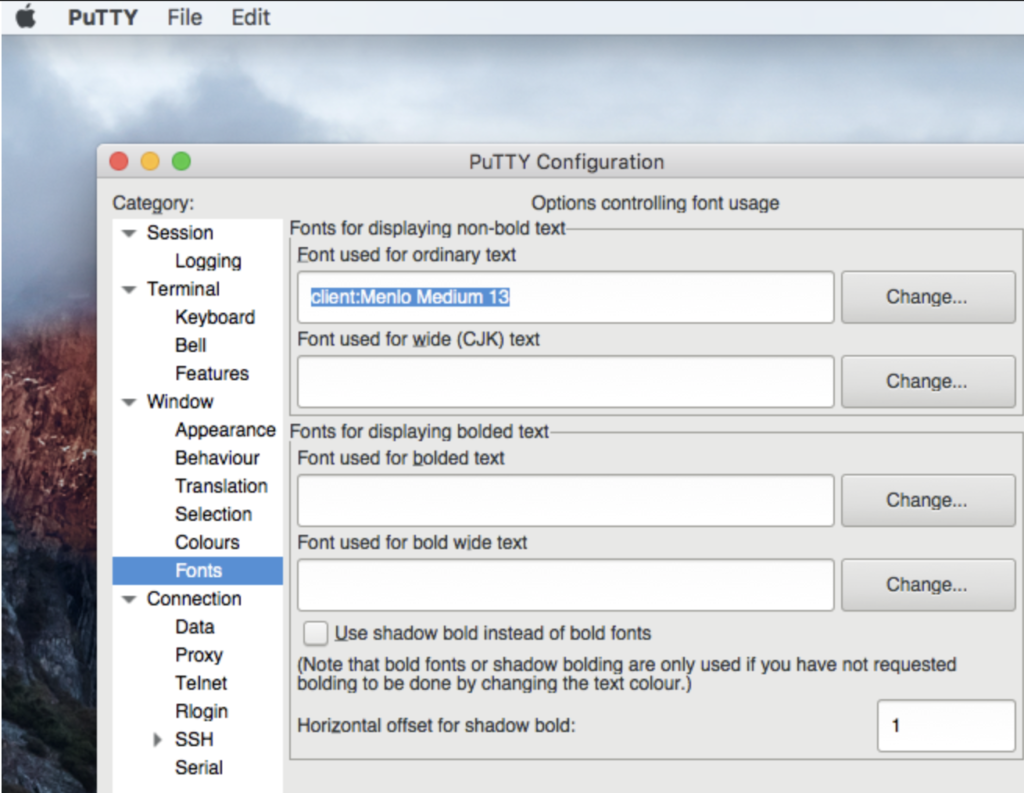
However, as we mentioned above, PuTTY on Mac offers an advantage in the form of a graphical user interface (GUI). This GUI allows for easier customization of PuTTY’s settings compared to using Terminal, where you would have to rely on command-line inputs for configuration. While most of the work still requires command-line commands, having a GUI for PuTTY’s settings can be beneficial and more user-friendly.
Another notable feature that PuTTY on Mac offers, which Terminal does not, is the ability to save your login credentials and session information. This feature enables you to quickly log back into SSH servers in the future and switch between different servers with ease. Saving this information reduces the need to manually enter login details each time, saving time and simplifying the process of managing multiple SSH connections.

Is there a PuTTY Mac Download?
While there isn’t a direct PuTTY Mac download, there are ways to get PuTTY on Mac. This is exactly what we will explain in the next paragraph. Generally, the process of downloading PuTTY on Mac can be a bit complex, and it involves some preparation to ensure a smooth installation. However, the great thing is that all of these steps can be completed without any cost. So, if you’re willing to invest some time and effort into following the installation instructions and completing each step, you’ll be able to download PuTTY on Mac without spending any money. Just be prepared to be patient throughout the process to ensure successful installation and usage.
How to Download PuTTY for macOS?
To download PuTTY for macOS, you must first download and install Xcode and download and install Xcode Command Line Tools. Next, accept the Xcode license agreement, install MacPorts, and after that use the built-in Terminal app to finally install PuTTY on your Mac.
Here are the detailed steps of how to download PuTTY for macOS explained with images and numerated instructions:
- First, go to the Mac App Store, search for Xcode, and click the Xcode app (which should be the first result).
- Click Get and install Xcode.
- Note that, at the time of writing, in order to install Xcode on your Mac, your macOS will need to be upgraded to macOS Monterey.
- Next, go to this link, enter your Apple ID username/email and password, and log in. This is two-factor authentication, so you will be shown a code that you must enter before you can finally log in.
- Once you are logged in, click View Details under the Command Line Tools for Xcode entry and then click the Command Line Tools for Xcode .dmg file to download it.
- Open the downloaded file and perform the Command Line Tools for Xcode installation by following the prompts.
- Next, go to Applications > Utilities, open the Terminal app, copy-paste in the Terminal the following command, and hit Enter to execute it. If required, enter your Admin password – you won’t see anything being typed, but this is because the symbols are hidden, so type the password anyway and hit Enter again. Here is the command you must execute:
- xcodebuild -license
- xcodebuild -license
- Next, click Enter once more – this will show you the license agreement for the Xcode tools.
- After that, scroll down to the end of the license agreement, type “Agree”, and hit the Enter key to accept the license agreement.
- Next, you need to download MacPorts: go to this link and click the macOS version you are using at the moment, and download the file.
- Open the downloaded file and follow the on-screen prompts to install MacPorts.
- Now click here, download the XQuartz.dmg file on the page that opens, open the downloaded file, and complete the prompts to install XQuartz.
- After that, go back to the Terminal, enter this command sudo port -v selfupdate, and press the Enter key to execute it (you will likely need to enter your password again).
- Next, enter the sudo port install putty command in the Terminal, and execute the command – once again, your password will be required.
- You must now type Y in the Terminal and press Enter to continue.
- This will complete the PuTTY installation, but we also recommend creating a PuTTY shortcut: copy the following command and execute it in the Terminal and a shortcut for PuTTY will be created on your Mac’s Desktop:
- cp /opt/local/bin/putty ~/Desktop/PuTTY
Should you install PuTTY on Mac?
It is not that complicated to install PuTTY on Mac and you can do so using the Terminal app. But there are a few steps that require your attention and need to be followed carefully. For instance, you have to keep in mind that, before installing PuTTY on Mac, you’ll need to have Xcode, Xcode Command Line Tools, and MacPorts set up on your macOS.
However, if you don’t have a specific reason to install PuTTY on Mac, it might be more convenient to stick with the built-in Terminal tool on your Mac. The Terminal tool offers similar functionality to PuTTY, with just a few differences. But if the graphics user interface (GUI) and the login and session data saving features that PuTTY provides are important to you, you can follow the detailed instructions above to download and install PuTTY on Mac.
How to Install PuTTY for Mac M1?
To install PuTTY for Mac M1, you can follow a similar process as described above. Here are the steps:
- Install XCode: Go to the Apple App Store and download XCode. Once installed, open the Terminal app and type “xcodebuild -license” to accept the XCode license agreement.
- Install MacPorts: Download and install MacPorts, as explained in the previous instructions.
- Install XQuartz: Download and install XQuartz, following the detailed instructions provided earlier.
- Update MacPorts: Open the Terminal app and run the command “sudo port -v selfupdate” to update MacPorts.
- Install PuTTY: In the Terminal app, enter the command “sudo port install putty” to install PuTTY on your Mac.
By following these steps, you should be able to successfully download and install PuTTY on your Mac M1. If you’re using a Mac with an M2 chip, the process is the same.
PuTTY Alternatives for Mac
If you’re looking for PuTTY alternatives for Mac, there are several options available. The main ones are Terminal, iTerm2, Termius, and ZOC Terminal. Here’s a breakdown of each:
- Terminal: This is the default command-line tool that comes preinstalled on every Mac. It’s a powerful tool for accessing SSH servers and should be sufficient for most users. However, some familiarity with command-line usage is recommended.
- iTerm2: Designed as a full replacement for Terminal, iTerm2 offers more customization options and a wide range of features that can enhance your command-line experience. If you’re already familiar with Terminal, transitioning to iTerm2 should be relatively easy. iTerm2 is available as a free download for your Mac and can be installed with the help of this guide.
- Termius: If you’re specifically looking for an SSH client with a graphical user interface (GUI) for secure file transfer, Termius is a great choice. It eliminates the need for using command-line commands to transfer files between devices connected via SSH. Termius is available for both computers and mobile devices, and it has both a free and a paid version, with the paid version offering the data transfer GUI.
- ZOC Terminal: Similar to iTerm2, ZOC Terminal offers extensive customization options for the command-line interface. It includes features like split panels, multiple tabs, color-coding for different SSH servers, and more. ZOC Terminal is a free tool, but it doesn’t have a GUI.
For more detailed information on each of these alternatives, you can refer to the article linked here.
And there you have it! By following these steps, you can download PuTTy on Mac. However, remember, while PuTTY is a powerful tool, it’s not the only one available for managing SSH connections on your Mac. Always explore your options and choose the tool that best fits your needs.
We hope this guide has been helpful. If you have any other tech-related questions or if there’s a specific topic you’d like us to cover, feel free to let us know. We’re here to help you navigate the digital seas and make the most out of your Mac.
Leave a Reply