About VRChat on Mac
VRChat can be played on Mac computers only if you first install Windows on the Mac. To install Windows and play VRChat on your Mac, you can either use the Boot Camp Assistant app if you have an Intel-based Mac or use virtualization software.
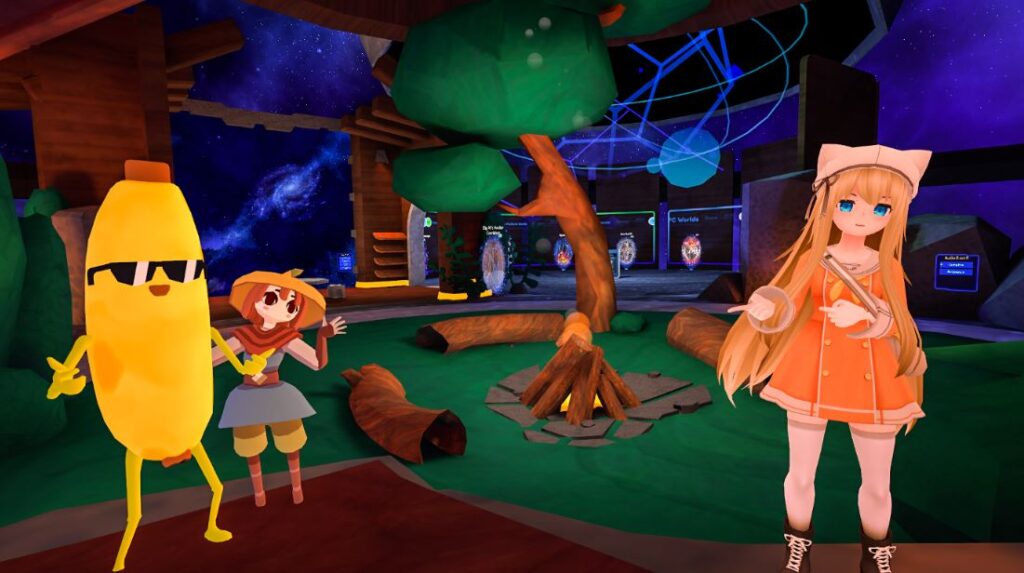
VRChat is a free online game/virtual environment created by Jesse Joudrey and Graham Gaylor and was first released back in 2014. In it, the users can interact with objects in the virtual world and with one another via customized 3D avatars. VRChat is designed to be accessed via VR headsets, and a lot of the interaction options in it are tied to the way VR headsets function. However, there’s also a desktop version of VRChat that retains most of the game’s features, though there are certain interactions and actions that aren’t possible through the desktop version.
VRChat largely centered around the freedom given to users to shape the virtual world according to their preferences and desire. A Unity software development kit is available for the game that allows users to build their own virtual online worlds and mini-games and share them with other users, as well as create personalized avatars and import them into the game. When a VR headset is being used to access VRChat, the player’s avatars would support eye-tracking, blinking, full range of motion, and audio lip-syncing. Most of those advanced features are not available on the desktop version of the game. For instance, interactions that require the use of both hands cannot be performed with the desktop version and the user cannot freely move their avatar’s limbs.

Can you play VRChat on Mac?
Yes, you can play VRChat on Mac, but only if you already have Windows installed on the computer. The game doesn’t have a Mac version and isn’t available on any cloud gaming service, so the only way to play VRChat on Mac is through Windows.
Since its release, the only platform/OS VRChat has been available on is Windows. Until 2020, the game was also accessible through GeForce Now and that was a viable way for Mac users to play it. However, since this is no longer an option, other workaround methods need to be employed in order to get VRChat running on a Mac. As mentioned at the start, there are two main options to do this – to install Windows on your Mac using Boot Camp Assistant or to set up a Windows virtual machine using virtualization software. Neither option is perfect, and you will likely not get the best performance, even though the game itself isn’t particularly demanding. Still, if you are willing to jump through a couple of hoops in order to try to get VRChat running on your Mac, we may be able to help you with that. Below, you will find detailed instructions for both of the aforementioned methods, so go ahead and see what works for you.
VRChat on Mac M1
VRChat can currently be played on Mac M1 only by using virtualization software to create a Windows virtual machine on the Mac. A program that can let you set up a Windows virtual machine and play VRChat on your Mac M1 is Parallels.
With Parallels, you can get Windows 10 on an Intel Mac and Windows 11 on an M1 Mac. The Windows 10/11 OS would be running on something called a Virtual Machine (VM). This is basically an app that contains the entire Windows 10/11 operating system and, once you are in it, your Mac would work as a Windows computer and would be able to run the Windows programs, apps, and games. However, since this is a workaround method of running Windows-exclusive software on a Mac, it may not always work perfectly.
In the case of VRChat, though the game itself isn’t very demanding, the abundance of poorly-optimized user-imported content in it means that, in order to play this game, a computer would need to have significantly higher characteristics than the official system requirements of VRChat. On top of that, the fact that, with Parallels, you’d be running Windows 10/11 within an app and not in a separate partition, means that your Mac would need enough hardware power to support both macOS and Windows at the same time. In other words, you won’t be able to use all of your Mac’s RAM, CPU cores, and VRAM for Windows and, in turn, VRChat, as some of the system’s resources would need to be left for macOS. For this reason, it’s recommended to only try this with a Mac that has no less than 12 GB of RAM and 6 CPU cores.
Parallels is a paid virtualization software that offers its potential customers a 14-day free trial. We strongly recommend making use of the trial period as it can let you test everything out and see if you can get a performance that satisfies your needs when playing VRChat from within the Parallels VM. Below, we’ve shown you exactly how to set up such a Windows VM on M1 Macs, that you can use for gaming on your Mac. Parallels can also be used in Intel Macs, with the only significant difference in the installation process being that you will need to download a different Windows installation file.
- Go here, scroll down a little, and click Register.
- Use your Microsoft account to log in, or create a new account if you currently don’t have one.
- On the next page, agree to the Terms and Conditions, then click Register, and after that click Start Flighting.
- Now open this link and click the Windows Client ARM64 Insider Preview button, and start downloading the Windows 11 installation file on your Mac.
- If you don’t see the download button at first, it’s probably because you aren’t signed in, so click the Sign in icon in the top-right, enter with your Microsoft account, and the download button should appear on your screen shortly.
- If you don’t see the download button at first, it’s probably because you aren’t signed in, so click the Sign in icon in the top-right, enter with your Microsoft account, and the download button should appear on your screen shortly.
- While you are waiting for the ARM file to download, go to the Parallels site, select the Download free trial option, then click Download now, and download the installation file for Parallels on your Mac.
- Open the installation file, double-click Install Parallels, and wait for the files necessary for the installation to download.
- After the download process finishes, enter the password of your Mac, and then provide your permission on all the prompts that Parallels shows on your screen. If, at any point, your Mac warns you that the program you are trying to install is from the Internet, simply click Open to continue.
- Once Parallels is installed, click Continue Trial and wait for the Windows 11 file to download.
- After the download completes, click the Continue button in Parallels, then select the Install Windows or another OS from a DVD or an image file option, and select Continue again.
- Now go to the downloaded ARM file, and drag-and-drop it into Parallels.
- Select Continue/Next and select the Games Only option so that the VM would be optimized for gaming.
- On the next page, enable the Customize setting and click on Continue.
- When you get the Configuration window on your screen, go to the Hardware section, select CPU & Memory from the left, and click on Manual. If you the Manual option is unavailable, click the Padlock icon, and enter your password to unlock this function.
- Next, set the number of CPU cores and the amount of Memory to the maximum allowed value.
- Note that you cannot go above 8 GB of RAM in Parallels if you are using the free trial version. To use more RAM for the VM, you will need to upgrade to Parallels Pro.
- Once you are ready with the VM customization, close the configuration window and select Continue.
- Provide your permissions on the request prompts that appear on your screen as the VM is being installed, and the installation should soon be completed.
- After the VM installs and starts, you will likely have to wait for a bit more as the available Windows 11 updates are being installed. After the updates finish installing, restart the VM.
- When the virtual machine starts again, Parallels will automatically start installing a bunch of tools that are needed for the proper functioning of the VM. Once this is done, restart Windows 11 once again, and then you should be ready to start playing.
If you are using an Intel Mac and want to try the Parallels method, follow the same installation steps that are shown above, but instead of downloading the specified Windows 11 ARM file, go to this page, and download from there the 64-bit Windows 10 ISO file and then use that for the VM installation.
How to play VRChat on Mac Intel
To play VRChat on Mac, you can use Parallels to create a Windows 11 virtual machine and then play the game in Windows 11. You can also play VRChat on Mac by installing Windows 10 on the computer via the Boot Camp Assistant app.
Note that neither of those methods is perfect, and you will need a powerful Mac if you are to get any decent performance while playing. One problem with VRChat that’s not present in other games is that the majority of the in-game content is created by regular users, a lot of which are inexperienced when it comes to creating performance-optimized content. In other words, though the base game doesn’t have particularly high system requirements, the abundance of badly-optimized imported by users is prone to causing one’s computer to use much higher amounts of system resources than the game is supposed to require. This is even more noticeable if you are using a VR headset instead of only playing the desktop version of VRChat. For this reason, as already mentioned earlier, it’s highly recommended that your Mac has at least 12 GB of RAM if you want to try any of the methods shown here.
Above, we already showed how to use the Parallels method on M1 Macs. If you own an Intel-based Mac, you can still use Parallels to set up a Windows VM – the only difference is that you will need a Windows 10 ISO file for the installation instead of a Windows 11 ARM VHDX file. For Intel-based Macs, however, there’s also a second option – the use of the built-in Boot Camp Assistant app (that isn’t present in the new M1 Macs). Below, we’ve shown the process of using this app to install Windows 10 on an Intel Mac, so follow the instructions if this is the method you’ve decided to try.
- Download the Windows 10 ISO file from this page – first confirm your preferred Windows 10 edition (we suggest picking the regular Home version) and language, and then click on the e 64-bit Download button.
- Next, wait for the large ISO file to download and go to Applications > Utilities and there open the Boot Camp Assistant app.
- In the Boot Camp Assistant, click on Continue, then select the Choose button, find the file you just downloaded, select it, and click Open.
- Next, make sure that both the macOS and the Windows partitions are given enough free storage space – you can change the storage space distribution by dragging the dot between the two partitions to the left or to the right.
- VRChat requires very little storage space (around 1 GB), so you only need to give the Windows 10 partition enough space to accommodate the Windows files and some additional “buffer” storage – 100 GB in total should do just fine. However, if you also intend to play other games through the Windows partition in the future, it may be better if you give that partition more storage space, for example, 200 GB.
- Be sure to always leave at least 50 GB of free space for the Mac partition, or else the computer may become slow and unresponsive if there’s not enough free space left in either partition.
- Once you’ve selected the ISO file and given both partitions enough free storage, click Install. You will need to wait for some time and will then be asked to enter your password – type your Admin password and continue.
- Your Mac will restart and will boot into a Windows logo screen. There, choose your location, select a language of your preference, and continue to the next screen.
- On the Enter your product key page, if you have a key, enter it and click Next and if you don’t, simply select the Skip or I don’t have a product key option, and you’ll be allowed to continue.
- You may need to choose a specific Windows 10 edition – if you are asked to do this, we recommend opting for the Home version of Windows 10. Windows 10 Pro isn’t necessary unless you actually need a feature that is only present in it. For gaming purposes, there isn’t any difference between the Home and Pro versions.
- On the next page, you must agree to the terms of use and then click Next to begin the installation.
- If you are on a MacBook, it’s recommended that the machine stays plugged into a power source – the Windows 10 installation may take a while and so you shouldn’t risk your MacBook running out of battery and shutting down mid-process.
- After the Windows installation finishes, the Mac will restart again, and boot into Windows 10. Before you can start using the new OS, however, there are a few more steps. Firstly, you will need to customize the settings of the OS. If you don’t want to do this now, you can choose to use the default settings, but we’d still recommend spending a couple of minutes to go through the customization process.
- Next, type in a username for your Windows 10 account, create a password, and move to the next step.
- You can now activate Cortana – the Microsoft version of Siri – as well as customize her settings, but you can also skip this step.
- After that, your Mac should finally boot into the Windows 10 OS. You are almost ready to start playing – just a few more things to take care of.
- When your Mac enters Windows 10, the Boot Camp Assistant should be open on your screen – simply click Next, then Agree, and then Next again and this will start the process of installing different Apple drivers that your Mac needs in order to properly run on Windows. Give your confirmation whenever an Admin permission is required to continue the installation and once everything’s ready, restart your Mac.
- Optional Step: To ensure everything runs as smoothly as possible, do the following two things before you try to install VRChat on your Mac:
- Enter Windows 10, click the Start Menu, search for Apple Software Update, open it, and perform the installation of any available Apple updates. Then restart your Mac again.
- Use the Windows 10 Start Menu to go to the Update & Security settings and there click on Windows Update. Once you open this section, Windows will automatically start looking for available updates and installing them. Once it installs everything, you must restart your Mac once more.
And there you have it – if everything went as desired, you should now have Windows 10 installed on your Mac, that you can access whenever you start the computer. To download, install, and play VRChat from Windows 10 on your Mac, check out the brief instructions shown below.
How to install VRChat on your Mac
Once you’ve created a Windows VM or installed Windows in a separate partition on your Mac, it’s time to actually install the game and get it running. You can get the game from its official website or from Steam. In the next instructions, we will show you how to download it from Steam.
- Start the Parallels Windows virtual machine or boot your Mac from its Windows 10 partition.
- Open Steam, log in to your account or create a new account now, and click on Install Steam.
- Download the Windows Steam client version and install it on your Mac.
- Launch Steam, go to Store, type VRChat in the search box, and click on the game’s icon.
- Since VRChat is a free-to-play game, you don’t need to purchase it – simply click on Play Game and then follow the prompts to download and install the game.
- After the installation, you can start VRChat from the icon on your Desktop (if you’ve chosen to create one or you can launch it through Steam.
If you have a VR headset, you can connect it to get the full gameplay experience. However, even if you don’t, you can still play the VRChat as a desktop game.
Leave a Reply