Table of Contents
About Mac Checking Status Update is Stuck
“Mac checking for updates is stuck” is a Mac issue that can sometimes occur when the Mac tries to install an update. The Mac checking for updates stuck problem can be attributed to a wide variety of possible causes that require different solutions.
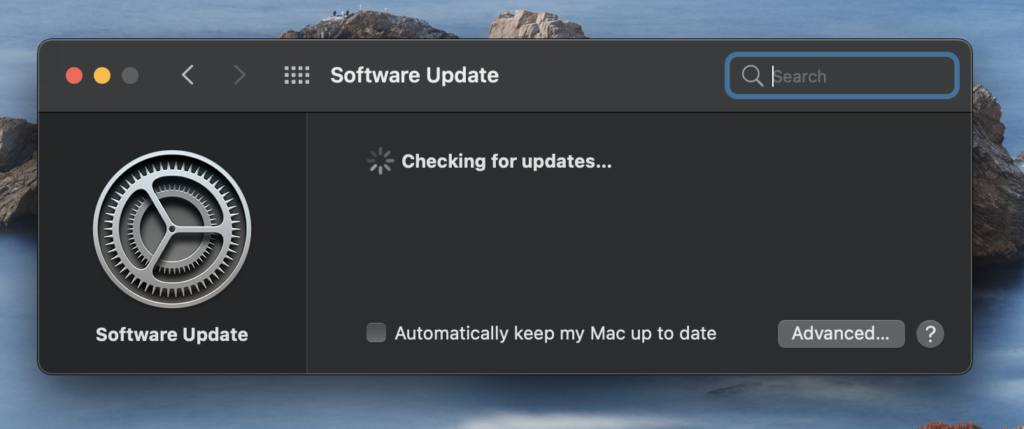
In most instances when this problem occurs, its cause should be something minor that can easily be fixed with a simple system restart or maybe a restart of the Wi-Fi router in case the problem stems from one’s Internet connection. In other cases, the root of the problem could be a temporary bug in the NVRAM or the SMC of the computer that is causing the update process to get stuck. Within this post, we will go over the main potential reasons for encountering this issue on your Mac, and then show you the troubleshooting techniques that can be used to fix it.
Problems with your Internet connection
If your Mac is having problems finding and/or installing new updates, then the cause behind this could be a problem with your Internet connection. In many cases, it may seem like you are connected to the Internet while, in reality, a problem with your Wi-Fi or cable Internet is not allowing the computer to find and download the available updates. You can quickly check the current status of your Internet connection – simply type in Google “Internet connection test”, open one of the many results with free online Internet testing tools, and perform the test to see if there are any problems with your connection.
NVRAM bug
NVRAM is a part of your Mac’s RAM memory, and it is responsible for storing certain settings that your Mac uses. If there’s a bug in it, this could lead to a wide variety of errors and unexpected issues, such as the one addressed in this article. Typically, restarting the NVRAM should fix any problems related to it – we will show you how to do this down below.
SMC bug
SMC (System Management Controller) is a system in your Mac that manages a lot of different parts in your Mac and if there’s a bug in it, this could affect the behavior of the computer and cause certain errors. The stuck update issue is not very likely to be caused by an SMC bug, but it may still be worth it to perform an SMC reset to see if this changes anything.
Lack of sufficient storage space
If your Mac manages to check for updates and finds ones that need installing but get stuck when trying to download and install them, then a probable cause of this could be the lack of sufficient space on its drive. It’s always a good idea to have at least 50 GB of free space left on your Mac so that such issues do not occur. If at the moment, your Mac’s drive is almost full, this may be why the system is unable to install any new updates.
Bug in new macOS release
New macOS releases tend to come with small problems that need to be polished out with subsequent patches. The latest major macOS release, macOS Monterey, came out a couple of months ago, so any bugs in it that may cause such errors should have been taken care of by now, but if you are still using the first version of macOS Monterey, 12.0.1, and not its latest version, 12.1, this may be a possible reason why you are experiencing this problem.
Another undetermined issue/bug
Since this type of update error is a rather broad topic that can encompass a whole lot of different specific issues, it is often hard to determine what is the precise cause of the problem. The examples shown below are only a few of the many potential bugs and issues that could result in one’s Mac getting stuck while searching for new updates or while trying to install them. Regardless, the troubleshooting methods we are about to show you below should adequately resolve such problems in the majority of instances. If you are still unable to get your Mac to find and/or install new updates even after trying each of the suggested solutions, you may need to get your Mac to a certified Mac technician.
Mac checking for updates stuck fix
The “Mac checking for updates stuck” fix solutions include freeing up storage space, resetting the NVRAM of the Mac, and installing the updates through Terminal, among others. The ultimate “Mac checking for updates stuck” fix is to reinstall your Mac’s macOS.
The following fix solutions have been shown, starting from the ones that are simpler and easier to complete to ones that are more complex and time-consuming, so we suggest performing the solutions in the order they are given.
1. Wait for a couple more minutes
You may be used to getting a list of available updates after waiting for only several seconds once you click on Software Update in System Preferences, but sometimes, depending on different factors, your Mac may take a bit more to show you what updates are available, so it may be a good idea to simply wait for a bit before you actually try anything.
2. Restart your Mac and router
You’ve probably already tried this, but in case you haven’t, it may be a good idea to first restart both your Mac and Wi-Fi router, so that if there’s some minor problem in the computer or the router, then restart would take care of it and things could back to normal.
- If your Mac is connected to the Internet via an Ethernet cable rather than via Wi-Fi, unplug the Ethernet cable from the Mac, restart your Mac, and then plug it back in.
3. Use Safe Mode
Safe Mode keeps non-essential processes from starting automatically so that if there’s a third-party software on your Mac that may be causing disturbances on your Mac that could lead to the problem in question, that software wouldn’t be allowed to start on its own.
Enter Safe Mode on your Mac, then go to Apple Menu > System Preferences > Software Update and try to search for and install any available updates that way. Here is a detailed guide on entering Safe Mode for both Intel-based and M1 Macs.
4. Change DNS settings Mac Stuck Fix
Sometimes, your Mac may be having difficulties finding the best servers from which to get its latest software updates. You can help point it in the right direction by manually changing its DNS (Domain Name System) settings in the following way:
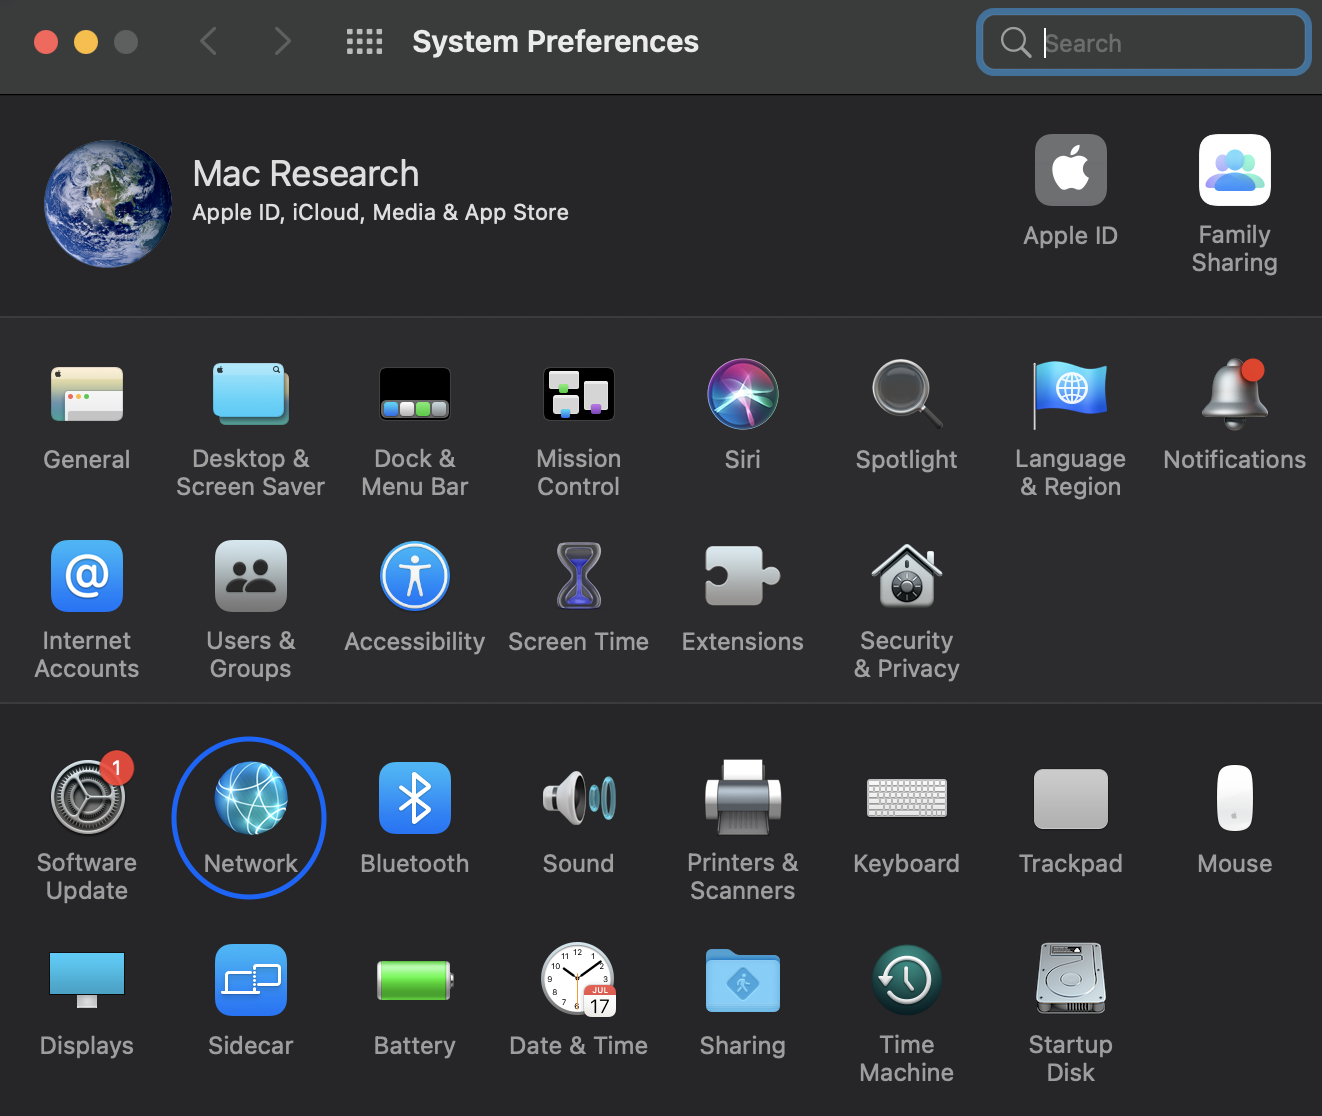
- Open Apple Menu, and go to System Preferences > Network.

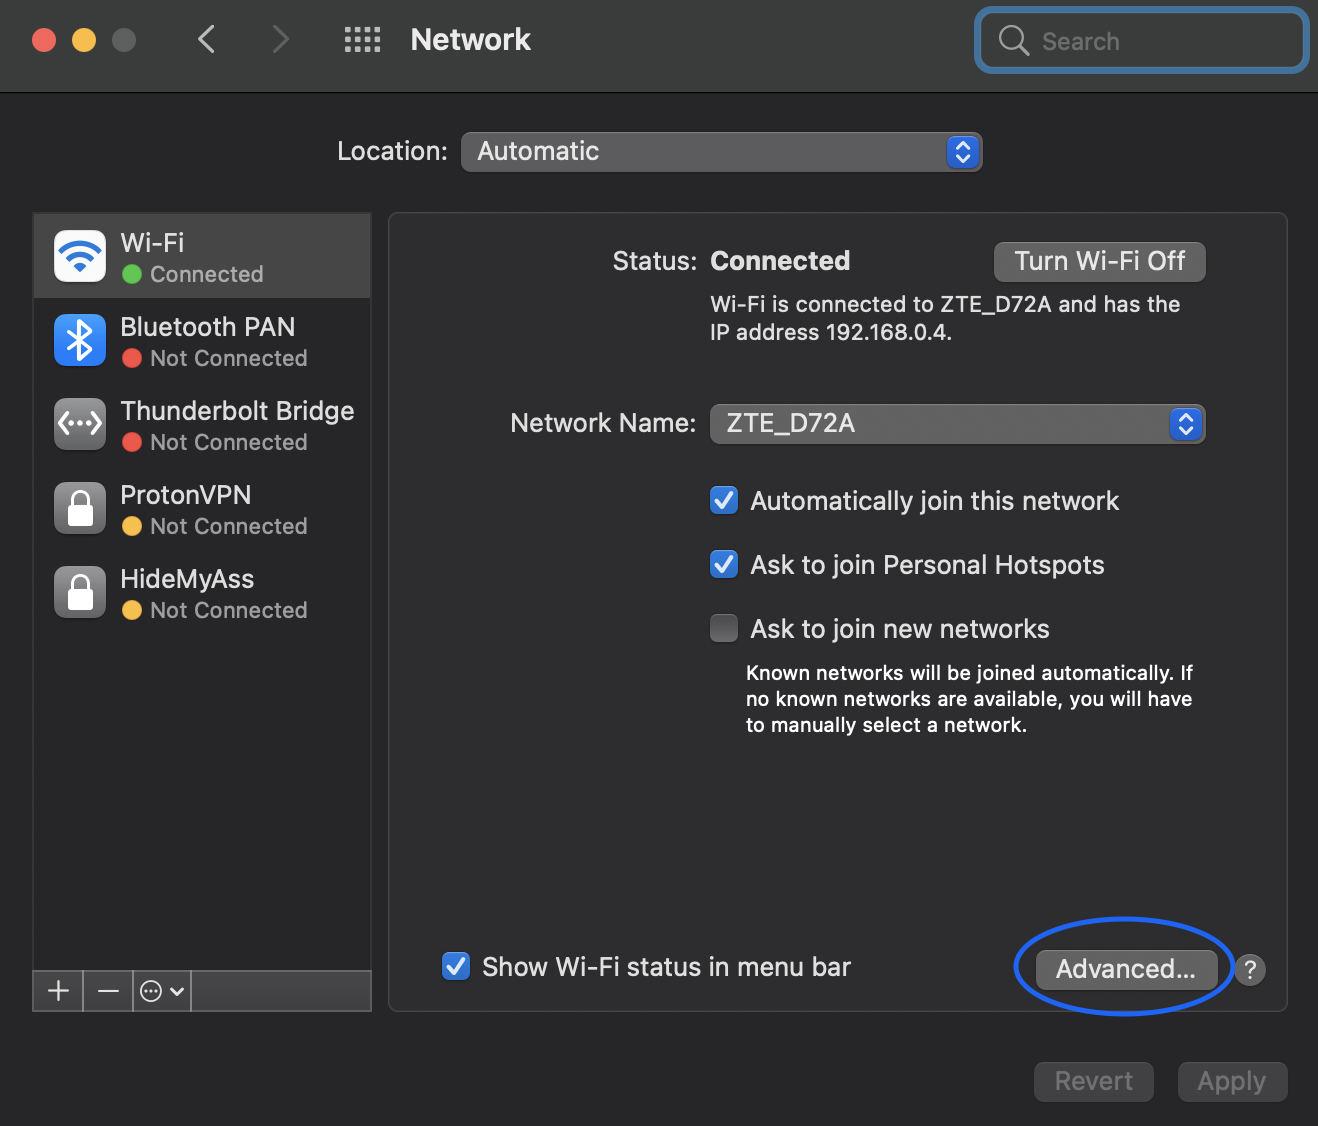
- Make sure that Wi-Fi is selected in the left panel and then click on Advanced.

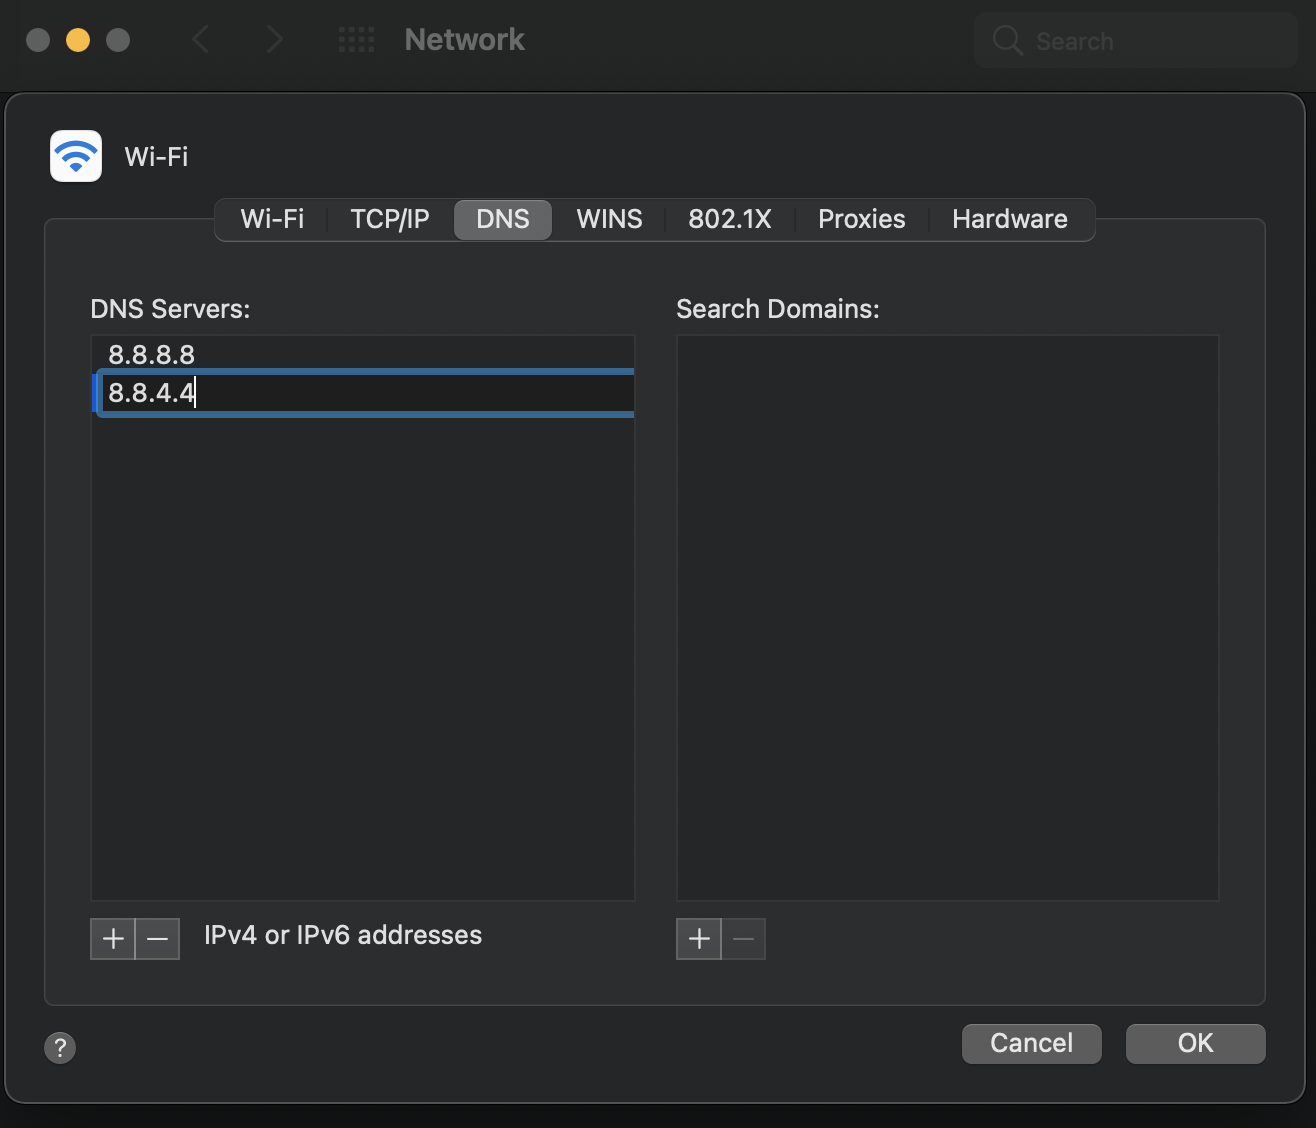
- Open the DNS tab in the Advanced window, and then add either of the following two sets of DNS servers:
- 8.8.8.8 and 8.8.4.4

- 208.67.222.222 and 208.67.220.220
- 8.8.8.8 and 8.8.4.4
- Then click on OK, exit System Preferences, restart your Mac, and try again to update its software.
5. Free up storage space
As mentioned, lack of sufficient space on your Mac’s drive could be triggering problems with your Mac’s software updates. If you currently have less than 20 GB of free storage on your Mac, the chances that this is the root of the problem are high, so you should free up space and then try to update again. As mentioned, it’s best to have at least 50 GB of unoccupied storage on your Mac at all times, so this is what you should aim for whenever possible. If you have too much important data and your Mac’s internal drive cannot accommodate everything and still have free space on it, consider getting an external storage drive. You can find our list of the best external storage drives for Mac on this page.
6. Restart NVRAM and SMC
We already told you about the significance of the NVRAM memory and the SMC system of your Mac and why resetting them may be helpful in a variety of situations, including the current one. Now we will show you exactly how to reset your Mac’s NVRAM and how to reset its SMC – click the respective links and follow the steps shown there. We recommend that you first reset your Mac’s NVRAM, then try to update your Mac’s software to see if the problem is fixed, and only if the update fails again, try the SMC reset.
7. Check for Disk errors
If there are any disk errors on your Mac that are preventing it from properly installing new updates, you can use the built-in Disk Utility app to check for disk errors and repair them. If you need help with using the Disk Utility app, go to our How to use Mac’s Disk Utility guide, and follow the instructions there.
8. Update using the Terminal
You don’t have to update your Mac through its System Preferences window. You can instead use Terminal commands to perform the update installation. This could often prove to be a more reliable way of updating the system, as it may bypass any bugs standing in the way of properly updating your Mac, so it might be worth giving it a try. Here is how to perform a software update using the Terminal command-line app on your Mac:
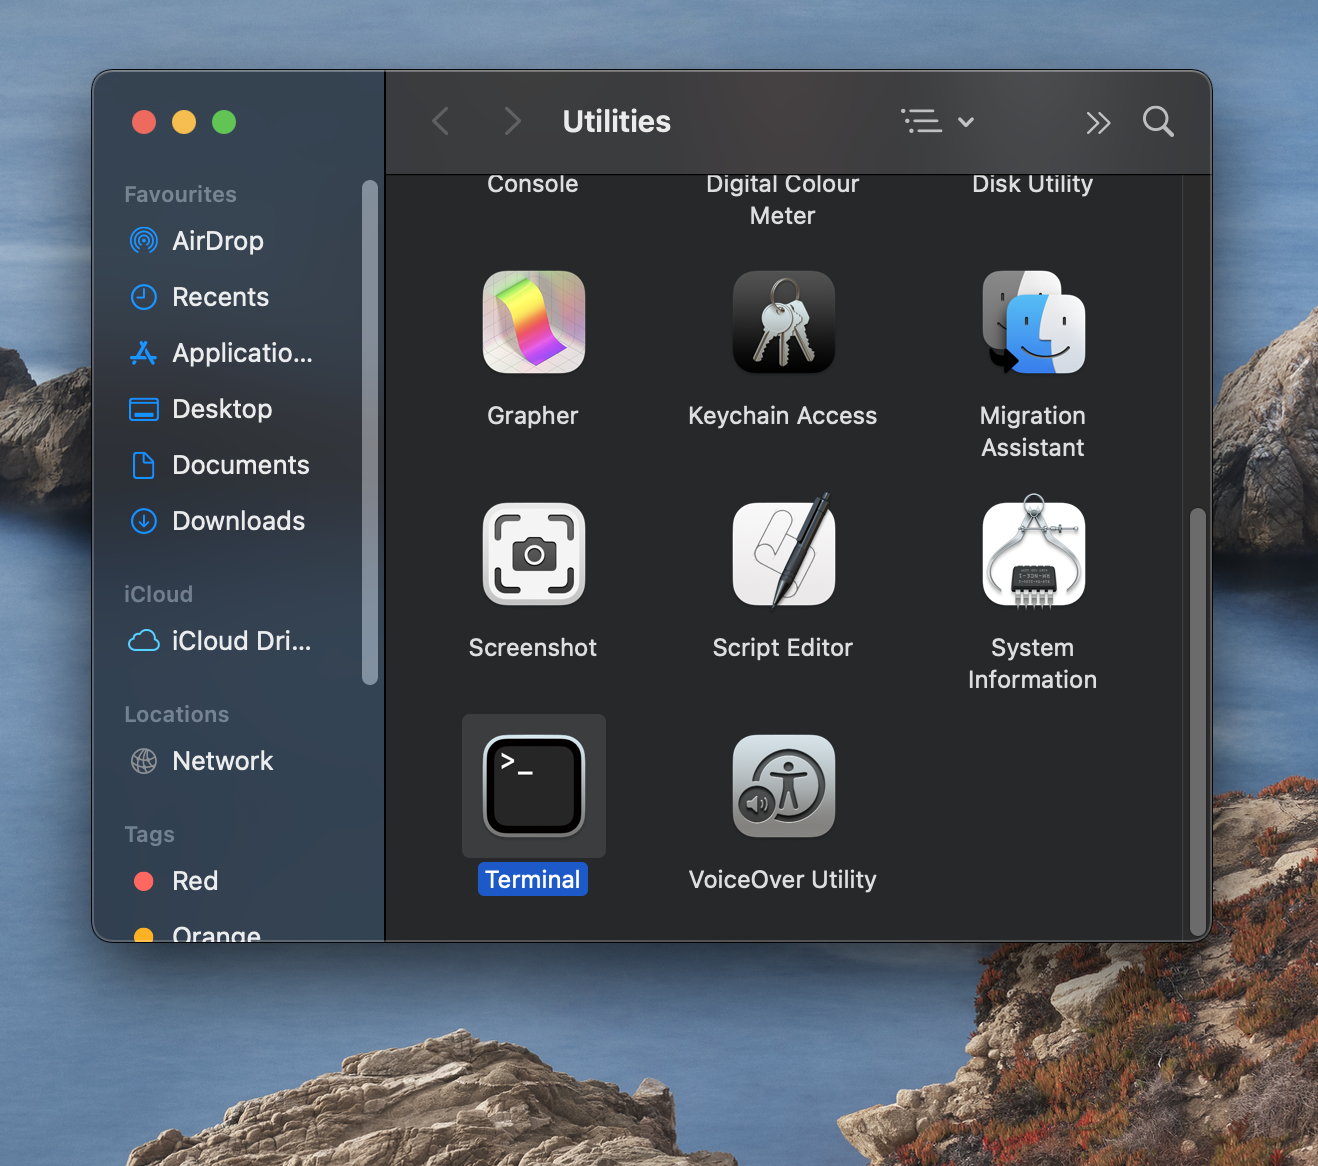
- First, you will need to go to Applications > Utilities and from there start the Terminal app.

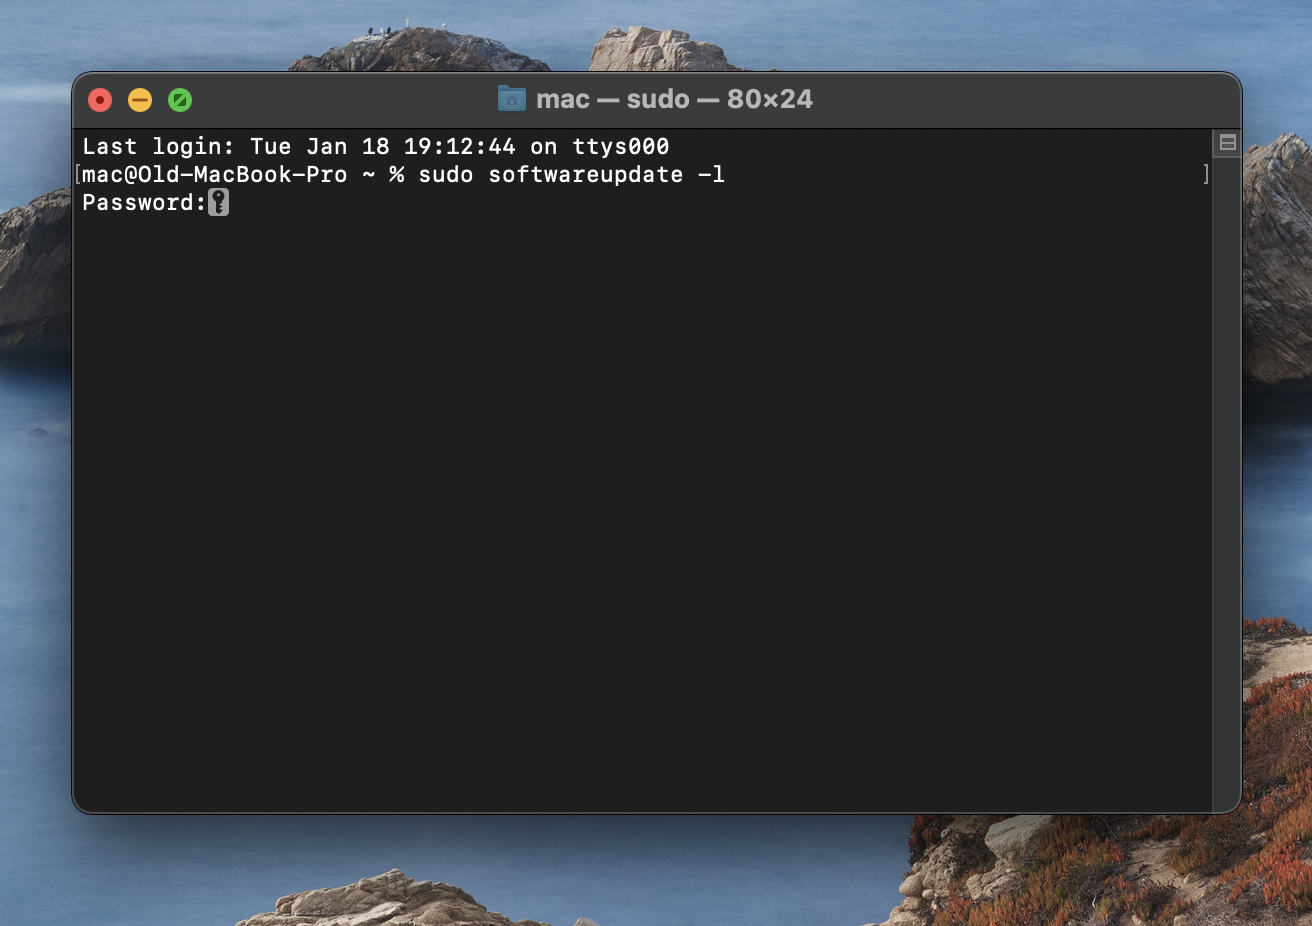
- In Terminal, type the following command and press Enter/Return to execute it: sudo softwareupdate -l
- Next, type in your password and press Enter/Return again. Note that, while typing your password, no new characters will appear in the Terminal – this is because the symbols of your password that you type would be hidden – simply type the password as normal and hit enter.

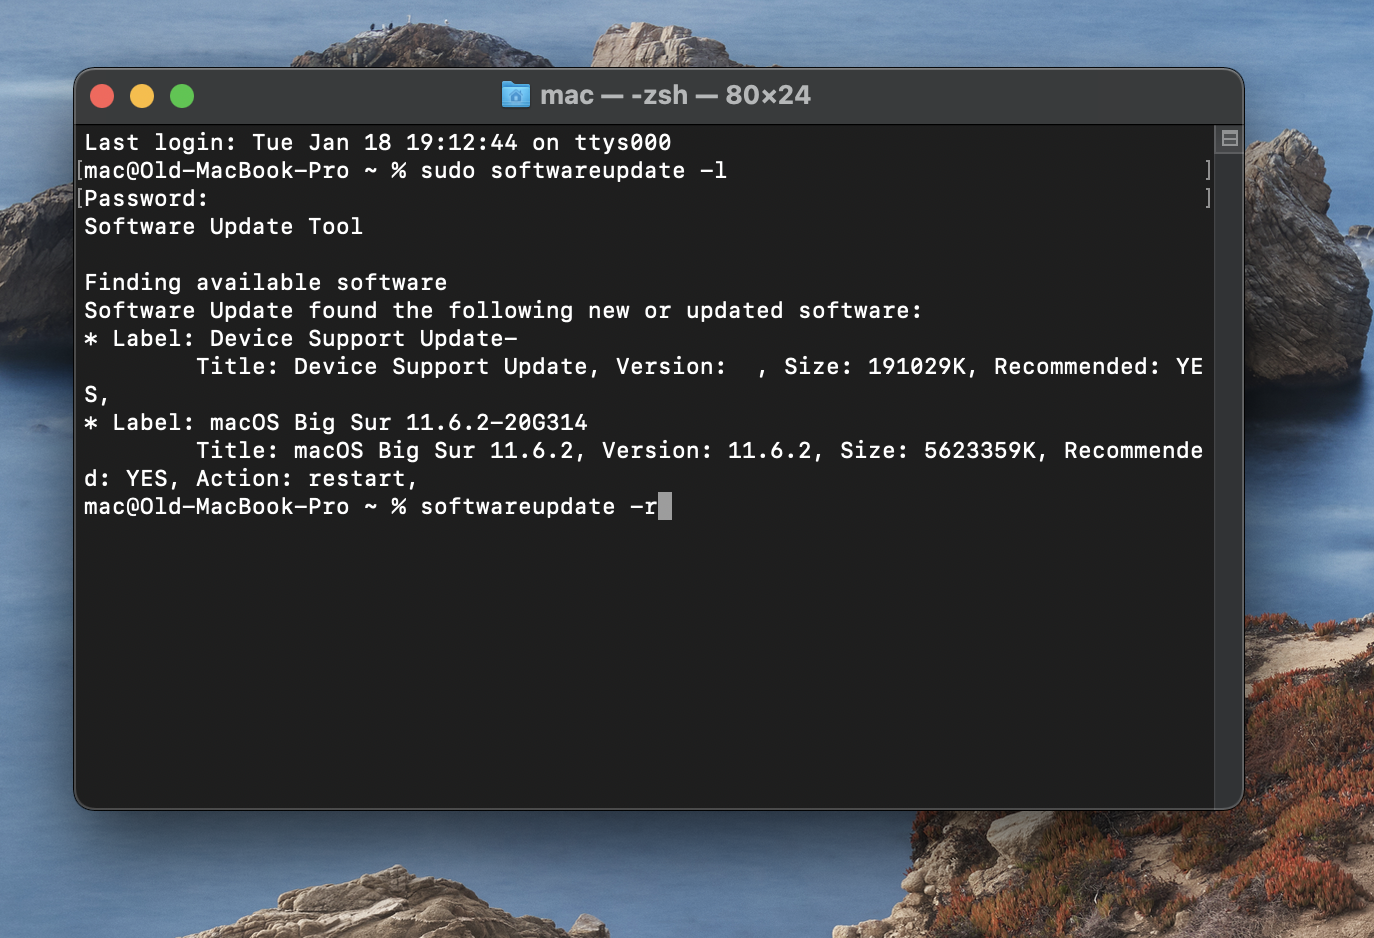
The sudo softwareupdate -l command will search for available software updates and then list them in the Terminal window. Note that listing all available updates may take some time to complete, so be patient and wait until the results are loaded in the Terminal. - Next, if you want to install all recommended updates from the ones listed in the Terminal, execute this command: sudo softwareupdate -r

- If you, instead, want to install a specific update, see what its name is among the listed results and then execute the following command: sudo softwareupdate -i *UPDATE NAME*
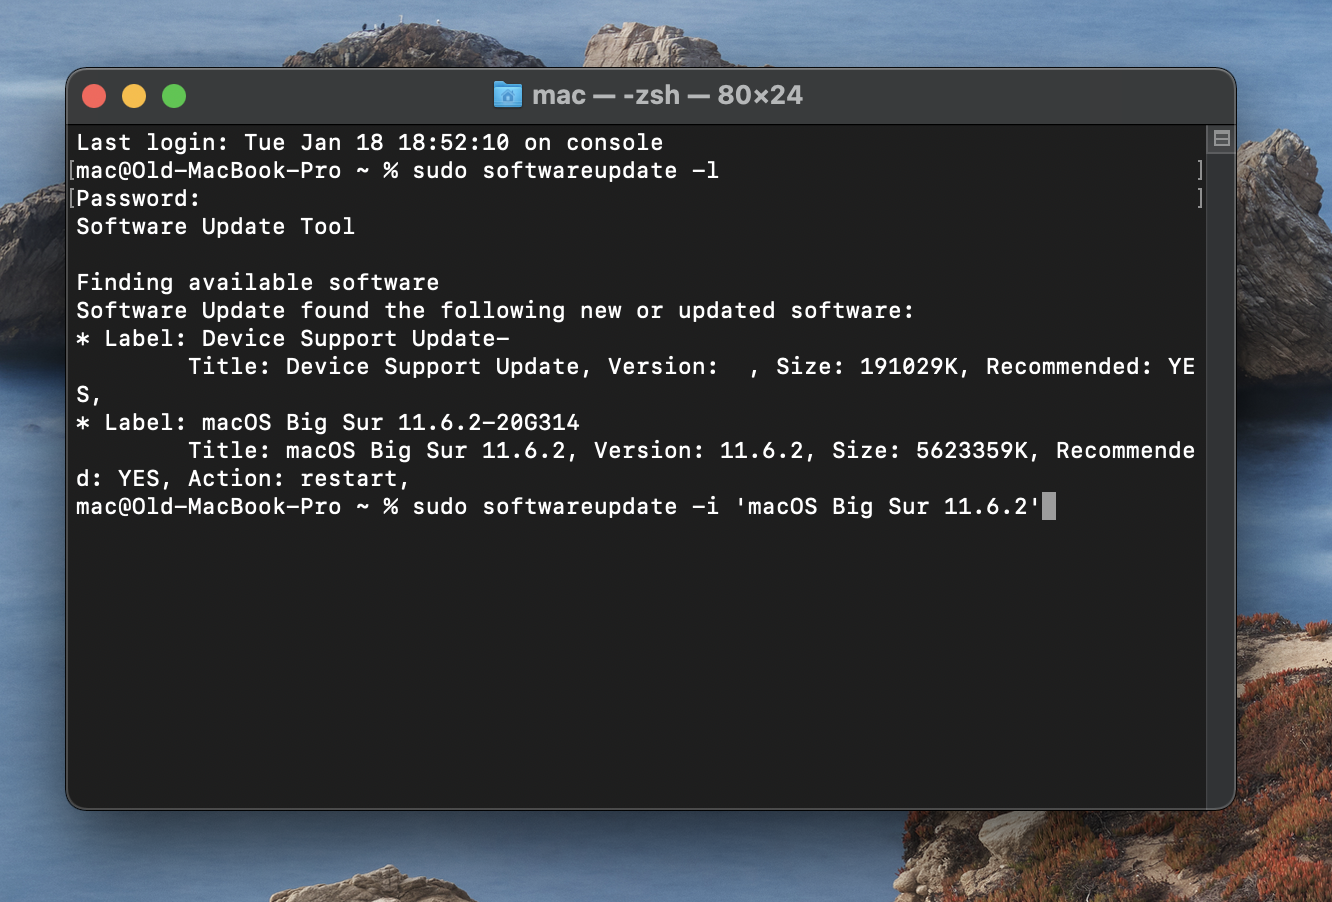
In the place of *UPDATE NAME*, put the name of the specific update, as listed in the Terminal. For example, if the name of a given update is listed as macOS Big Sur 11.6.2, then the entire command should look like this: sudo softwareupdate -i ‘macOS Big Sur 11.6.2’
- Note: use single quotes to enclose update names that contain single spaces, as shown in the example above.
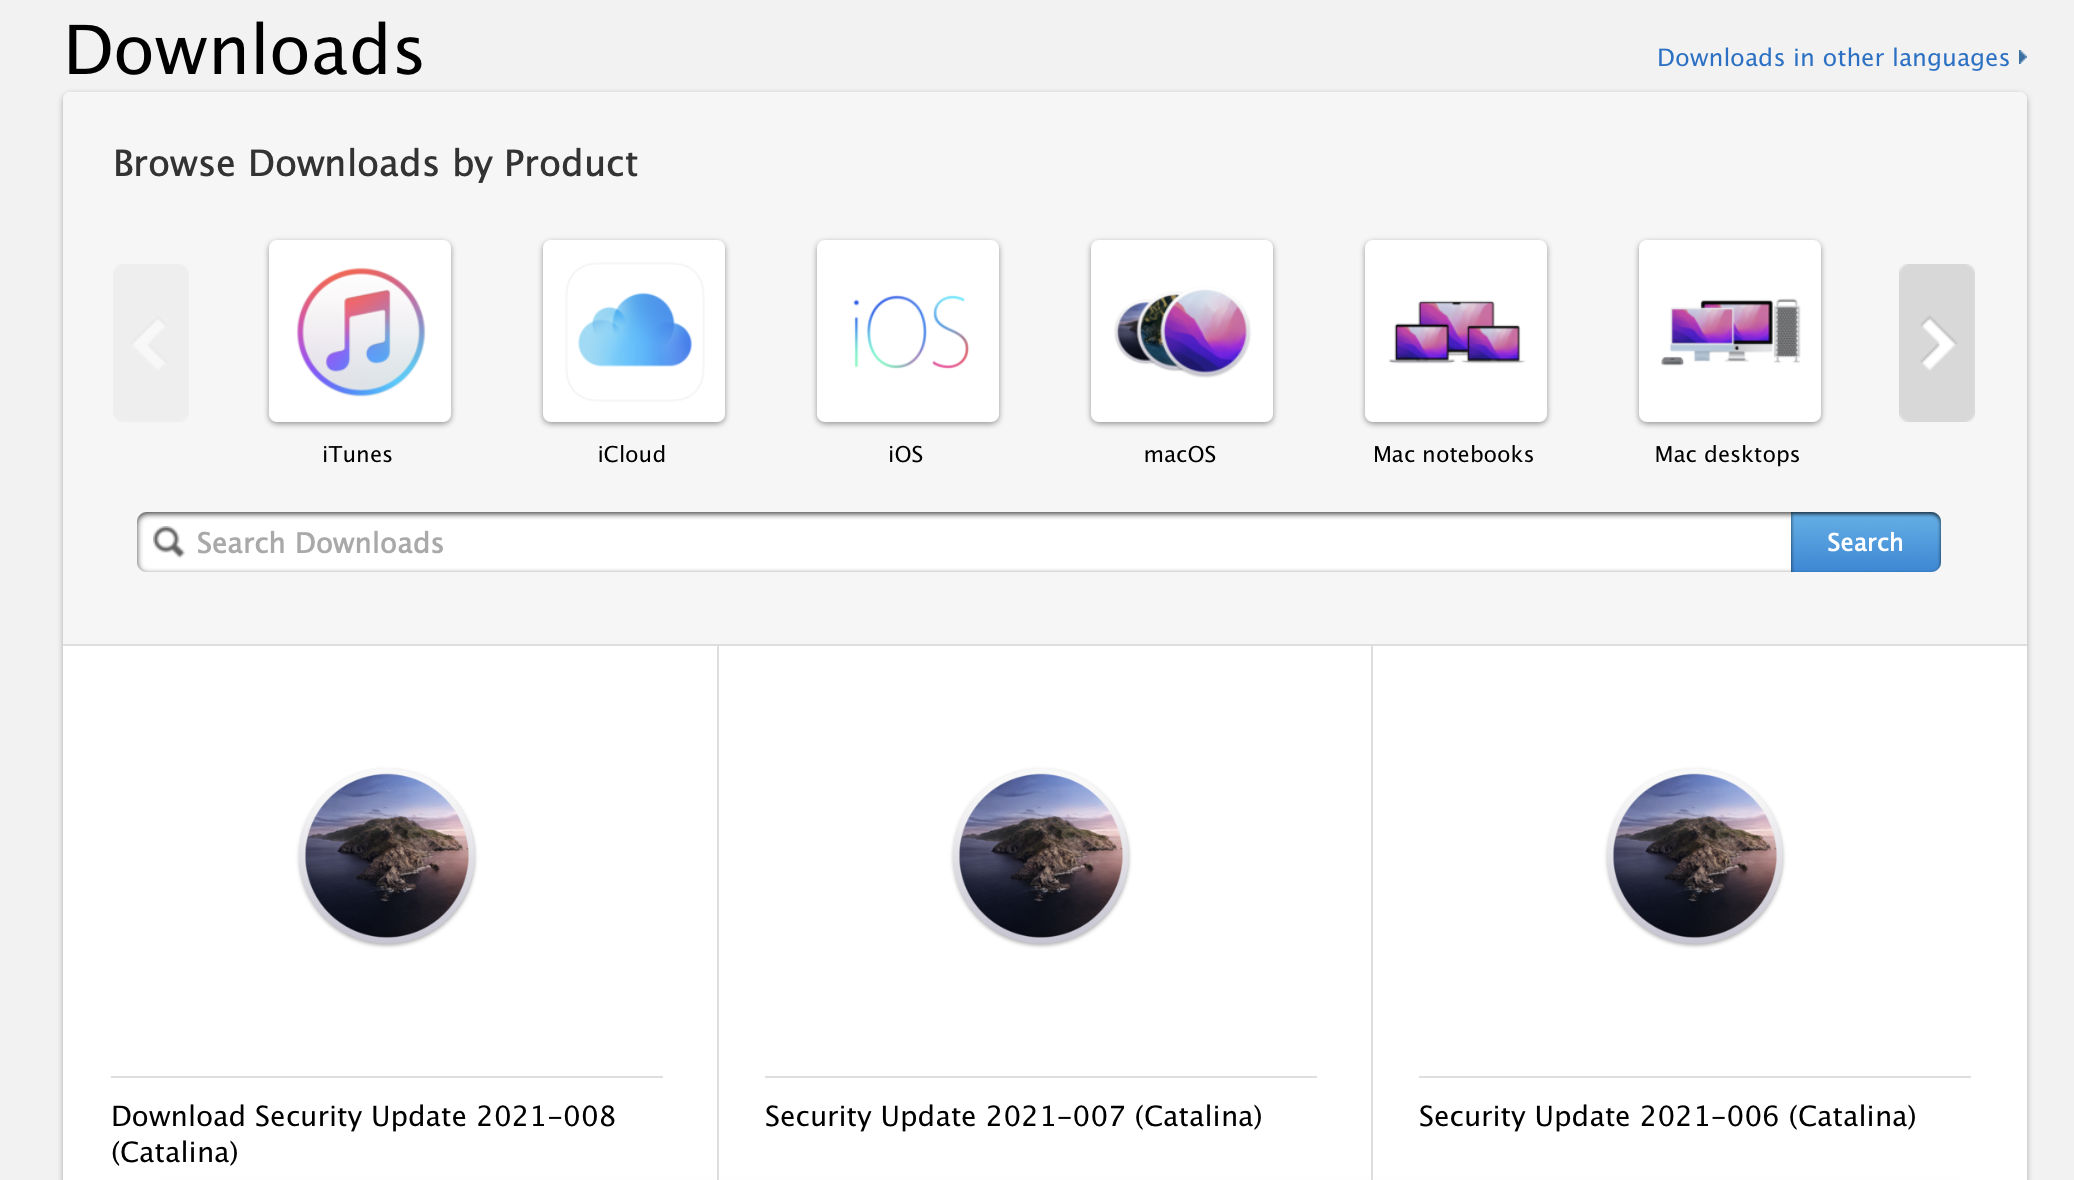
Install new updates from Apple’s site
You can also download updates for your macOS and various Apple apps directly from Apple’s site and then manually install them. Here’s how:
- Go to this page on Apple’s site.

- Type in the search field the name of the specific software that you need to update.
- If you find what you are looking for, click Download, and download the file.
- Once the file downloads, execute it and perform the installation.
Note that this is primarily used for installing updates of older macOS releases – you won’t find the latest patch for macOS Monterey, for example, on that page.
Reinstall macOS
Reinstalling your macOS is the final thing you can try yourself, before bringing your Mac to a specialist, if none of the other methods have solved the problem. The procedure isn’t too complex or difficult, and you should be able to perform it with relative ease as long as you follow our instructions. However, it may be time-consuming as it could take some time for the installation of macOS to complete. If you want to try this last resort option, go to our guide on how to reinstall macOS, and follow the instructions shown there.
Leave a Reply