Camera not working on Mac
When your Mac’s camera stops working, it can put a damper on your productivity, communication, and creativity. But fear not – this comprehensive guide will help you troubleshoot and resolve the issue, so you can get back to video calls, photo editing, and content creation in no time. In this article, we’ll explore various reasons why is your camera not working on Mac and provide actionable solutions to get it up and running again.
Why my Mac camera is not working?
In today’s world of virtual communication, having a functional camera on your Mac is essential. Whether you’re participating in a work video conference, chatting with friends and family, or creating content for social media, a non-working camera can be a major inconvenience. If you’re experiencing issues with your Mac’s camera, you’re not alone. There are many potential reasons why your Mac camera is not working, from software glitches to hardware malfunctions. In this article, we’ll explore some of the most common causes of camera issues on a Mac and provide practical solutions to help you get your camera back up and running.
- Check for Camera Usage Conflicts:
One of the most common reasons for a Mac camera not working is that another application is using the camera. If you have multiple apps that require camera access running simultaneously, your Mac might struggle to manage the conflicting usage.
Solution: Close any unnecessary applications, particularly those that use the camera, and then restart the app that requires camera access. If you’re unsure which apps are using the camera, look for the green camera indicator light on your Mac. If it’s lit, an app is accessing the camera.
- Grant Camera Permissions:
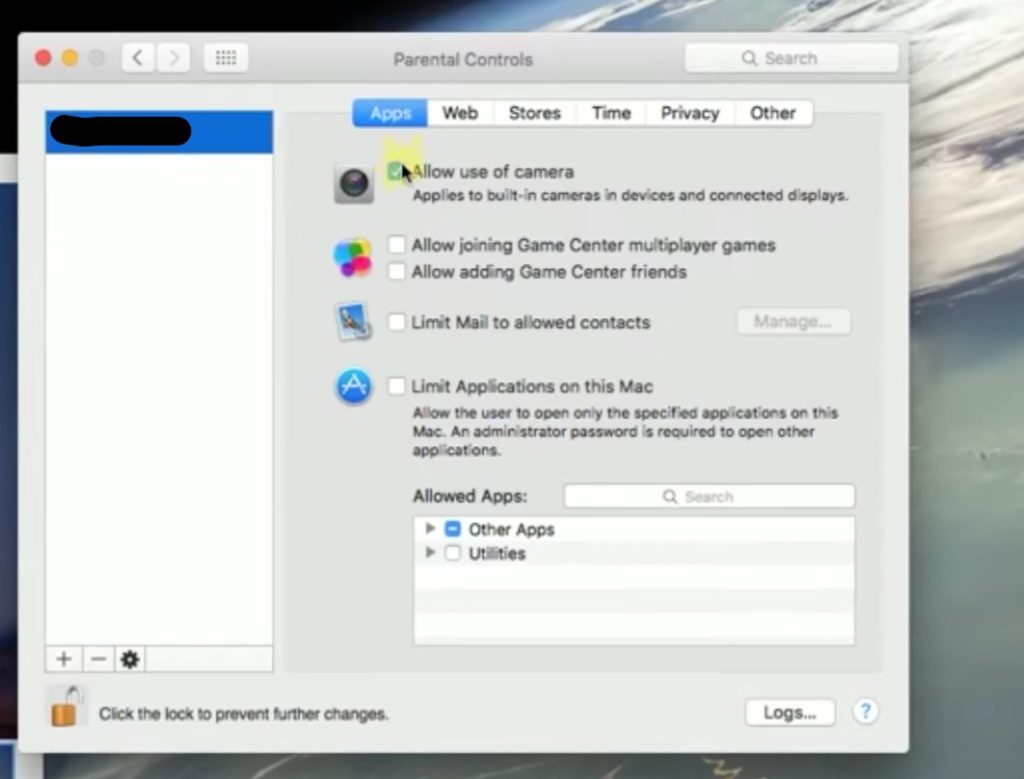
For privacy and security reasons, macOS requires apps to request permission to access your camera. If you’ve accidentally denied permission, the app won’t be able to use the camera.
Solution: To grant or manage camera permissions, go to System Preferences > Security & Privacy > Privacy > Camera. Make sure the checkbox next to the app in question is selected, allowing it to access the camera.
- Restart Your Mac:
Sometimes, a simple restart can resolve issues with your Mac’s camera. Restarting your computer can clear temporary glitches and free up resources.
Solution: Click on the Apple menu in the top-left corner of your screen and select “Restart.” Once your Mac has restarted, try using the camera again.
- Reset the System Management Controller (SMC):
The System Management Controller (SMC) is responsible for various hardware functions, including power management and thermal management. If your Mac’s camera isn’t working, resetting the SMC might help.
Solution: The process for resetting the SMC varies depending on your Mac model. Visit Apple’s support website for instructions on how to reset the SMC on your specific device.
- Update macOS:
Outdated software can cause compatibility issues and glitches, including problems with your Mac’s camera. Keeping your macOS updated ensures that you have the latest security patches, bug fixes, and features.
Solution: To check for updates, go to System Preferences > Software Update. If an update is available, follow the onscreen instructions to install it.
- Check for App-Specific Issues:
If your camera isn’t working with a specific app, the issue might be with the app itself. In this case, check for updates, reinstall the app, or contact the app’s support team for assistance.
Solution: To update an app, open the App Store and click on “Updates” in the sidebar. If an update is available for the app in question, click “Update” next to it. To reinstall the app, delete it from your Mac and then download it again from the App Store.
- Investigate Hardware Issues:
If you’ve tried all the software-related solutions and your Mac’s camera still isn’t working, the issue might be hardware-related. In this case, it’s time to consult with Apple Support or an authorized service provider.
Solution: Contact Apple Support or visit an Apple Store or authorized service provider for assistance. Be prepared to provide information about your Mac, such as the serial number and a description of the issue.
- Perform an NVRAM or PRAM Reset:
NVRAM (non-volatile random-access memory) and PRAM (parameter random-access memory) store settings related to your Mac’s hardware configuration, including camera settings. Resetting NVRAM or PRAM might help resolve camera issues.
Solution: To reset NVRAM or PRAM, shut down your Mac, then turn it back on and immediately press and hold the Option, Command, P, and R keys for about 20 seconds. Release the keys when you hear the startup chime or see the Apple logo. After the reset, try using the camera again.
- Create a New User Account:
A corrupted user account can cause various issues, including problems with your Mac’s camera. Creating a new user account can help you determine if the issue is account-specific.
Solution: To create a new user account, go to System Preferences > Users & Groups, and click the “+” button. Follow the prompts to create a new account, then log out of your current account and log in with the new one. Check if the camera is working in the new account.
- Use Safe Mode:
Booting your Mac in Safe Mode can help you identify and resolve issues related to third-party software or startup items that might be causing problems with your camera.
Solution: To start your Mac in Safe Mode, shut it down, then turn it back on and immediately press and hold the Shift key. Release the key when you see the Apple logo. Test the camera in Safe Mode; if it works, the issue might be related to third-party software or startup items.
- Run Apple Diagnostics:
Apple Diagnostics is a built-in tool that can help you identify hardware issues, including problems with your Mac’s camera.
Solution: To run Apple Diagnostics, disconnect all external devices (except the keyboard, mouse, and display), then shut down your Mac. Turn it back on and immediately press and hold the D key until you see the Apple Diagnostics screen. Follow the onscreen instructions to run the test and review the results.
Conclusion
It can be frustrating when your Mac camera is not working, but with the troubleshooting tips provided in this article, you’ll be well on your way to resolving the issue. From checking for conflicting apps to updating your macOS and contacting Apple Support, these steps will help you diagnose and fix the problem. Remember to be patient and methodical as you work through the solutions, and you’ll be back to using your Mac’s camera in no time. In most cases, you’ll be able to resolve the problem yourself, but if you need professional help, don’t hesitate to reach out to Apple Support or an authorized service provider.
Leave a Reply