The release of Windows 11, the newest operating system developed by Microsoft, was recently announced and the time of release is set for this fall. Among other information about the upcoming OS, it was also made clear that Windows 11 won’t be officially available for Mac computers. The reason for this is the requirement for TPM 2.0 support that a computer’s CPU would need to have in order to run Windows 11. Most Macs don’t have a TPM 2.0 chip on their CPUs, and even the ones that have it don’t have official support for it from Apple. What this basically means is that no Mac would officially be able to run the Windows 11 OS. However, if you really need to be able to install and use Windows 11 on your Mac once the OS is released, there might be a roundabout way to do so. In this post, we will tell you more about this roundabout way.
Requirements for Windows 11 on Mac
Before we get any further, we must first say that, while you may be able to circumvent the TPM 2.0 support requirement, your Mac should still need the other requirements that Windows 11 has. The most essential of them are:
- 4GB of RAM
- 64GB of free storage space
- A 64-bit processor with at least two cores and no less than 1GHz clock speed for each core
- GPU that supports DirectX 12
If any of those requirements are not met, not even the roundabout method we are about to show you will let you run Windows 11 on your Mac.
Also, another note we need to make is that if your Mac only meets the minimal requirements (the ones listed above) and doesn’t go beyond them, it’s probably better to not try to install Windows 11 on it because the computer’s performance almost certainly suffer from this, and you won’t be able to use the machine effectively.
How to install Windows 11 on Mac
Before you start, here are the things that you will need to make this work:
- A Mac that meets all of the Windows 11 requirements except the TPM 2.0 one.
- A Windows 10 ISO file
- A Windows 11 ISO file
- A file maker app
Creating a custom Windows 11 ISO file
Once you have everything in place, it is time to start:
- Right-click on the Windows 11 ISO file, select/hover the cursor over Open With, and from the submenu select the DiskImageMounter option.
- Copy everything from the install media contained in the ISO file, create a new folder on the Desktop, and place the copied files in it.
- Once the files have been copied into the new folder, right-click the Windows 11 ISO file and select the Eject option.
- Now, in the same way, open the Windows 10 ISO file, and go to the Sources folder.
- Copy the install.wim file and paste it onto your Desktop.
- Close the DiskImageMounter window, right-click the Windows 10 ISO file, and select Eject.
- Right-click on the install.wim file that you copied onto your Desktop and select Get Info.
- Go to Name & Extension and change the name of the file to Install.esd.
- Open the new folder on your Desktop where you copied the contents of the Windows 11 ISO file.
- Go to the Sources folder and delete from it the Install.esd file.
- Move the Install.esd file that’s on your Desktop to the Sources folder.
- Download any file maker app from the Mac App Store and then use it to convert the new folder on your Desktop that contains the Windows 11 files into an ISO file.
Installing Windows 11 on Mac
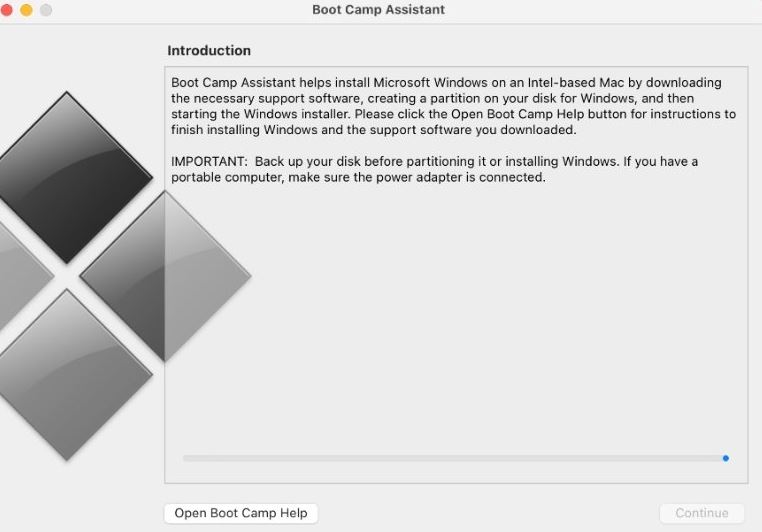
- Open Finder > Applications > Utilities and start the Boot Camp Assistant utility.
- When the app opens, click on Continue and wait for it to load.
- Click on Choose, find the new ISO file for Windows 11 (the one you created with the file maker), select it, and click Next.

- Next, choose the partition sizes by dragging the dot and make sure that you give the Windows partition enough storage space (we remind you that at least 64GB of free space is required for the Windows 11 OS). We advise you to give the Windows 11 partition at least 100GB of free storage space. Naturally, you must make sure that you have that much free space on your Mac, to begin with.
- Now click on Install and wait for your Mac to restart.
- When the computer restarts, pick your preferred language, select a country, and keyboard input mode.
- On the next screen, when asked to type in a product key, click on the I don’t have a product key option to continue.
- Next, it is advisable to select the Windows 11 Home version, but you can opt for another one if you want.
- Click on Next, agree to the Terms and Conditions, and select Next again to launch the Installation.
- Patiently wait for the process to complete and when it does and your Mac restarts, you will be asked to log into your Microsoft account – if you don’t have one, skip this step. In case you want to create a Microsoft account, you can do so from this page.
- After Windows loads, the Bootcamp driver installation wizard should appear on your monitor – follow the prompts in it to complete the installation of the drivers required to run Windows 11.
- Once the driver installation finishes, restart your Mac, and it should boot into Windows 11.
Switching between the different partitions
Lastly, we must tell you how to switch between the Windows 11 and the macOS petitions on your Mac.
- Shut down your Mac, press the Power button, and then immediately press and hold down the Option button.
- Wait until a screen shows up in which you can choose between the different partitions and use the arrow keys to switch to the one you want to use.
- Press Enter to boot your Mac into the chosen partition (and the OS that’s installed on it).
Install Windows 11 on Mac using Parallels
To install Windows 11 on Mac using Parallels, you first need to enroll in the free Windows Insider program and download the Windows 11 ARM ISO file. After that, you can download Parallels and use it to install Windows 11 on your Mac.
Below is a detailed guide on how to perform this process, but before you start completing the steps, take note of the following points:
- The information you will find below refers to Parallels 17 – the latest version of the program.
- Parallels is not a free program but a paid one with a 14-day free trial. We recommend making use of that free trial to test the program on your Mac with Windows 11 and see whether it meets your requirements, so that you can decide whether to eventually purchase the full product.
- Parallels can be used to play Windows games on your Mac through the Windows 11 virtual machine, but you need to bear in mind that, since this is a workaround method of playing Windows games, it may not always work perfectly for every game. Again, take advantage of the offered free trial to figure out the game you want to play can be run smoothly and with no issues within the virtual machine.
- Make sure that your Mac meets the minimum system requirements for Parallels and exceeds them by a significant margin if you are to use the Windows 11 virtual machine for gaming. The image below shows the program’s system requirements according to the developers of Parallels.
If you’ve read everything and are ready to continue with installing Windows 11 on your Mac using Parallels, here are our instructions on how to do that:
- First, you need to go to this page, scroll down to the Meet the Windows Insider Program, and click Register.
- Now, click on Sign in now and sign in with your current Microsoft account. If you don’t have an account, you must create one and use it to sign in.
- Click Register on the next page and after that click on Start Flighting/Flight Now.
- Follow this link, click the Sign in icon in the top-right, and sign in to your Microsoft account.
- Next, click the Windows Client ARM64 button to begin downloading the Windows 11 ARM ISO file. It is a rather large file and so downloading it is bound to take a while.
- In the meantime, follow this link to Parallels’ site, and click the Download Free Trial button.
- Next, select the Download Now button to download the installation file for Parallels.
- Open the downloaded file (Install Parallels Desktop.dmg) and double-click on the Install Parallels Desktop button.
- If/When asked by macOS whether you are sure you want to open the program, click Open.
- Wait as the necessary data is being downloaded, and then enter your Admin password when required to.
- Wait for a couple more moments and then provide the necessary permissions required by Parallels.
- Next, if you see a Download and Install Windows 10 screen in Parallels, click Skip.
- Now click on the Install Windows or another OS from a DVD or image file icon and select Continue.
- (Proceed with this step only if the ARM ISO file has already been downloaded) On the next Parallels screen, select Find Automatically and the program will search for the downloaded Windows 11 ISO file and use it to perform the creation of the Windows 11 VM. If, for some reason, the program is unable to find the file, you can navigate to the directory where you downloaded the file and manually drag it to the center of the Parallels window, after which you can click Continue to begin the installation.
- Parallels will now give you the option to optimize the virtual machine for gaming if that’s what you are going to be primarily using it for. Click Games Only to optimize the VM for gaming.
- Next, if you want, check the Customize option – this will allow you to make changes to the hardware resources that the virtual machine will have access to. If you want to use Parallels for gaming, we recommend using this option to allocate more memory and CPU cores to the VM for better performance.
- Click Create to begin the installation – if you checked Customize in the previous step, you will now be given the option to make changes to the virtual machine settings after you close the customization window, the VM creation will begin.
- Patiently wait for the installation to be finished – know that the process may take quite some time, so it’s best to keep your Mac plugged in to a power source so that you don’t risk it running out of battery power and shutting down.
- After the installation completes, and you enter Windows 11 through the virtual machine, we suggest opening the Start Menu, going to Windows update, and installing all available Windows 11 updates.
- Next, you must restart the virtual machine. After it restarts, Parallels Tools would likely need to be reinstalled. The process should start automatically without the need for you to do anything but wait for the installation to complete. Once the Parallels Tools are reinstalled, your Windows 11 virtual machine should be ready for use.
A couple of useful notes:
- Think of the Parallels Windows 11 virtual machine as another app (albeit a highly resource-intensive one) – you can easily switch between it and other apps on your Mac by simply swiping with three fingers on your trackpad or by using the Command + Tab keyboard combination.
- You can pause Parallels instead of quitting it, by switching to your macOS interface, selecting the Parallels icon from the Menu Bar, clicking on Actions, and then selecting Pause. To unpause the program, you can do it from that same menu, or you can simply switch to the Parallels/Windows 11 interface and click the big pause icon in the center of your screen.
- To quit the virtual machine, you can do it from the Parallels menu in the macOS menu bar or by selecting the Start Menu in the Windows 11 virtual machine, clicking on Power, and then selecting Shut Down.
Leave a Reply