Table of Contents
What is a Time Machine backup for Mac?
Time Machine backup for Mac is a built-in mechanism introduced to Mac with macOS 10.5 Leopard, which allows for a quick and easy way to back up your data. Time Machine backup for Mac works with both network-attached disks and local storage devices.
There are different ways you can back up your Mac and different apps that you can use for that purpose, but, by far, the easiest and most streamlined method of doing that is by using the built-in Time Machine tool that comes preinstalled on Mac computers. All you will need to perform a backup with Time Machine is an empty external USB/Thunderbolt drive that has enough space on it to accommodate the data you want to back up. Setting up a Time Machine is really easy, and after you do it, your Mac will get backed up automatically every the backup drive is connected to it, without you having to do anything.
How to set up a Time Machine backup for Mac?
To set up a Time Machine backup for Mac, you need to do the following:
- Connect an external storage drive (USB or Thunderbolt) to your Mac.
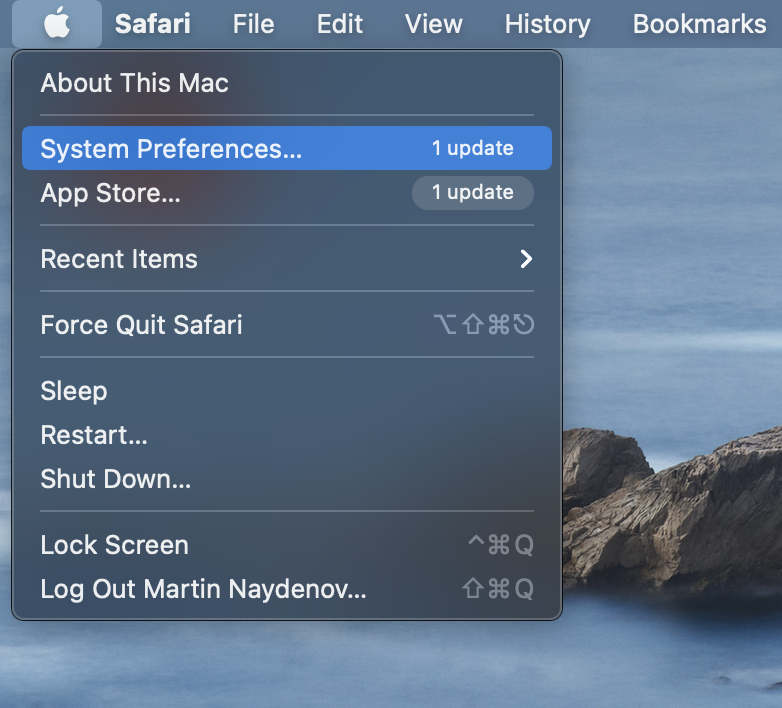
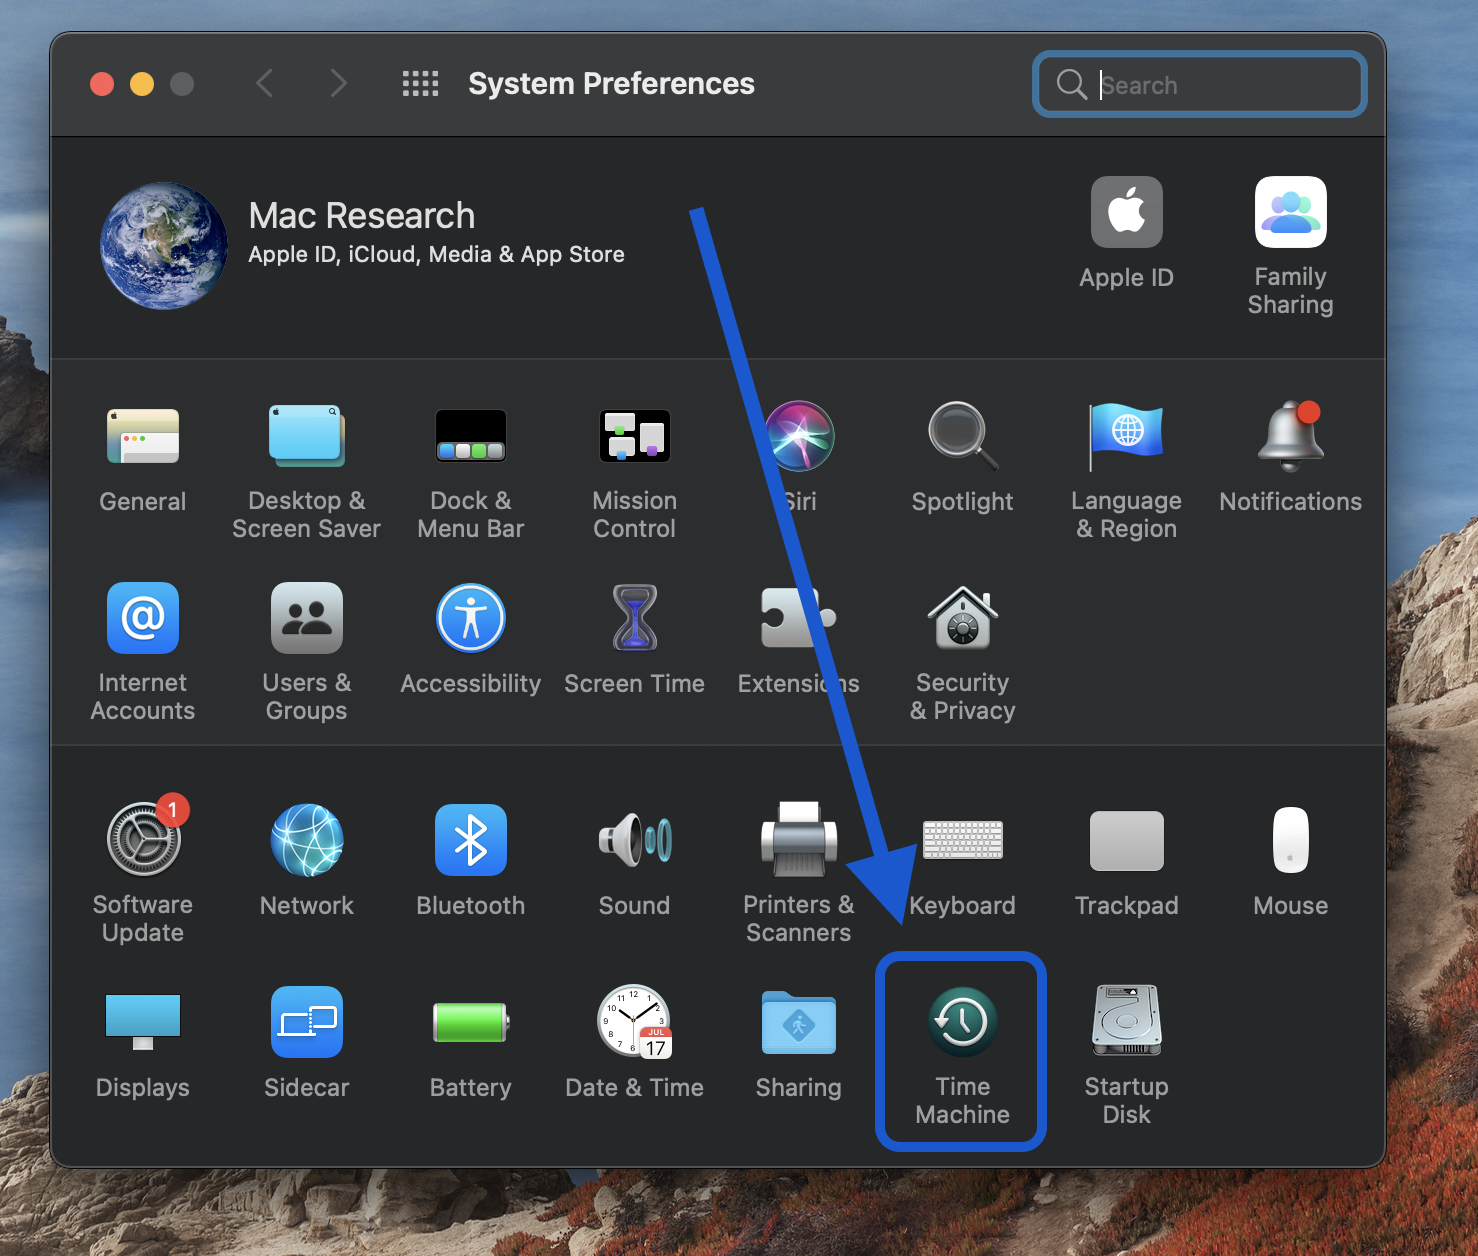
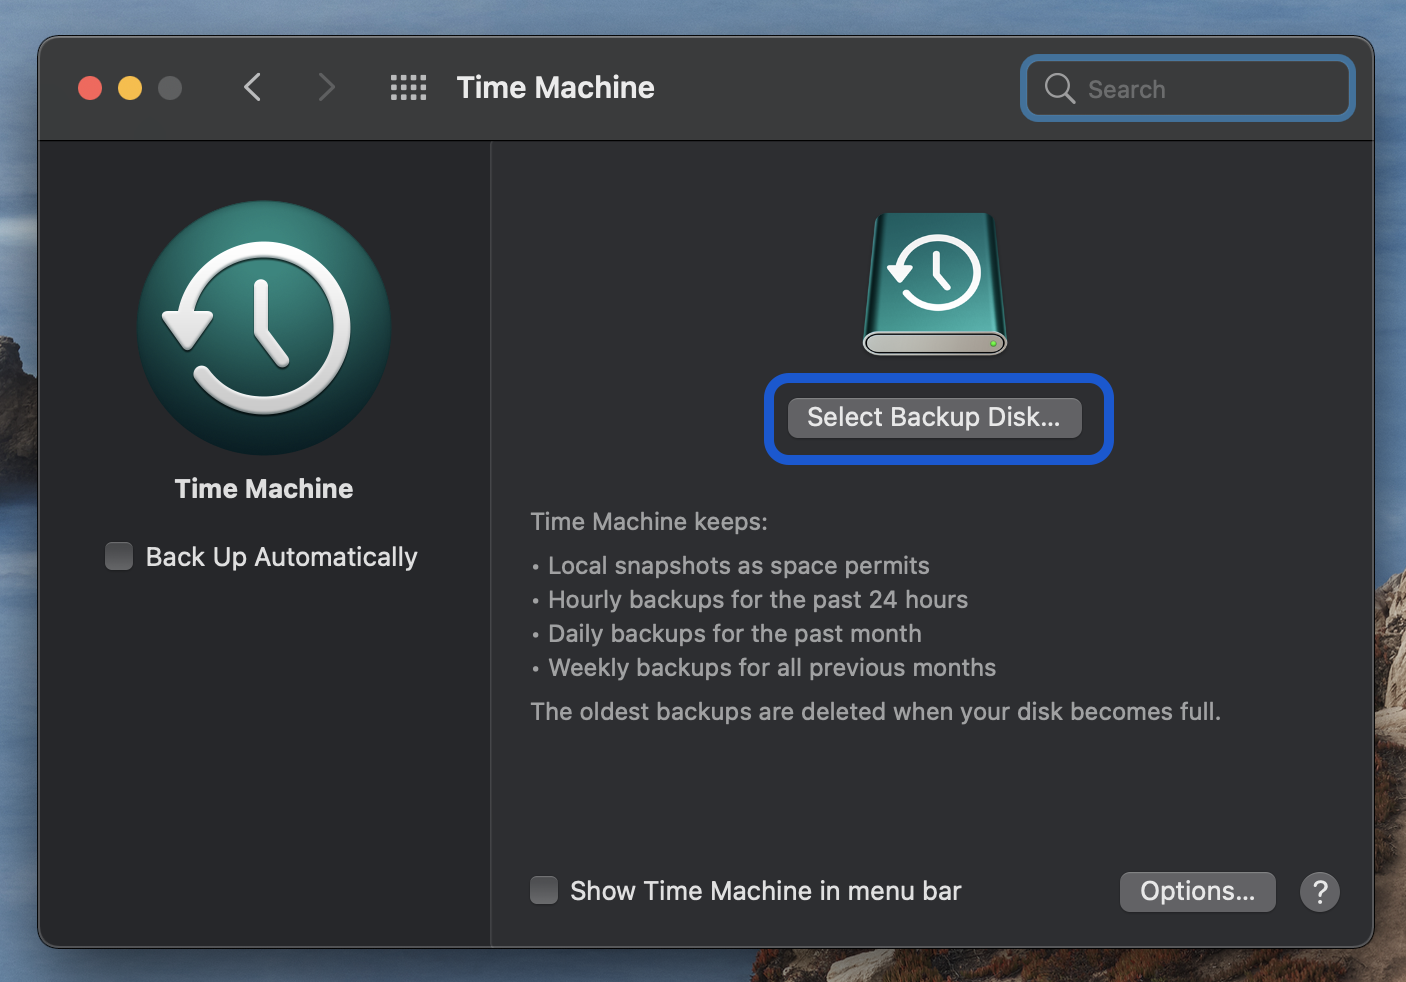
- Go to Apple Menu > System Preferences > Time Machine.


- Check the Back Up Automatically option, click on Select Backup Disk, and choose the connected drive as your backup location.

Once you do this, the Time Machine tool will automatically begin backing up your data – Time Machine is set by default to make hourly backups for the past day (24 hours). It also makes daily backups for the last 30 days and weekly backups for all previous months. The first time you set up a Time Machine backup, the process would take a while to complete – the more data you have on your Mac’s drive, the longer the time required to finish the first backup. Note that you can still use your Mac while your data is being backed up. Once the first backup completes, Time Machine would only back up files that have been changed since the last backup, greatly reducing the time required to complete subsequent backups.
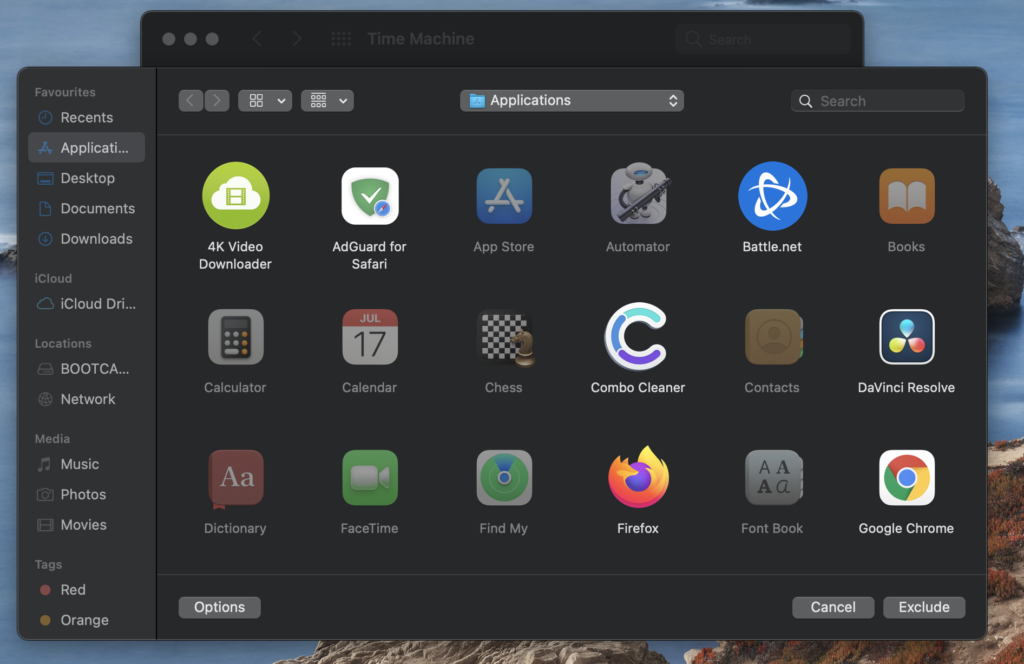
The default setting of Time Machine is to back up all your data, but you can change that by excluding different items. To do that, go back to Apple Menu > System Preferences > Time Machine, click Options and click the (+) under the list of exclusions. Now navigate to the items you don’t want to get backed up, select them, and click Exclude. If you want to remove items from the Exclusions list (meaning that Time Machine would be backing them up in future backups), select the item in the list, and click the (-) button.
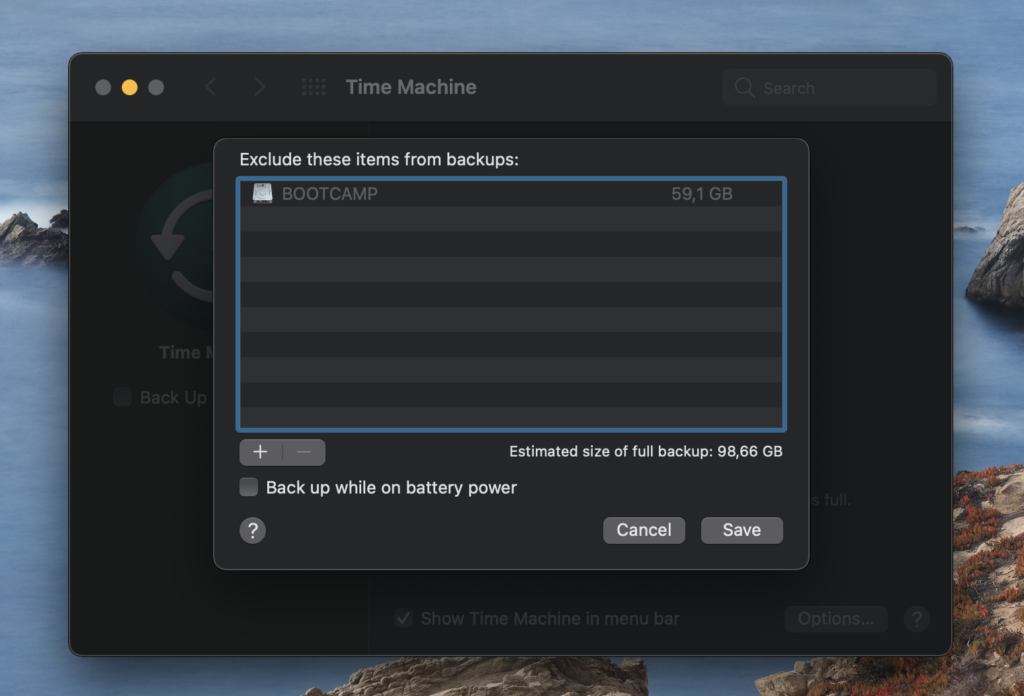
In the Exclusions list window, at its bottom, you will see an option labeled Backup while on battery power. The default setting of Time Machine is to not back up data while it’s running only on battery to save battery power. If you want, you can tick that option to allow backups to be carried out even when your Mac isn’t connected to a power outlet.
Performing a manual backup
If you want to manually start a backup of your Mac without waiting for Time Machine to start its automatic backup, first go to the Time Machine section of System Preferences and make sure that the Show Time Machine in the menu bar option is checked. Then connect the backup drive that you’ve already set up, click the Time Machine icon from the menu bar (top-right), and click Back Up Now. This will initiate a manual backup of your Mac. You can also use that same menu to track the current progress of a backup that’s underway.
How to restore your Mac from a Time Machine backup
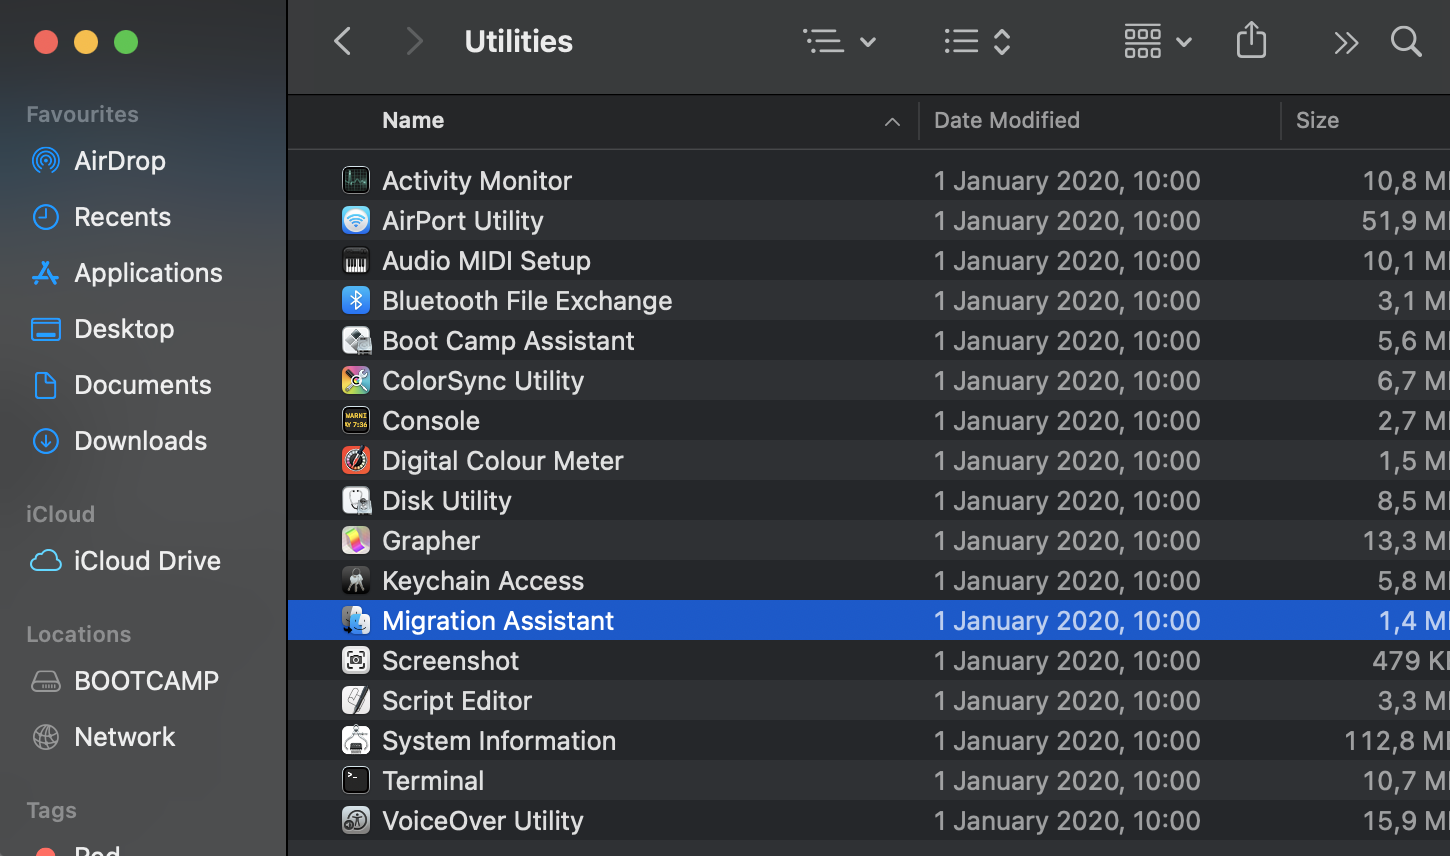
To restore your Mac from a Time Machine backup, you must already have previously set up a Time machine backup disk. Connect your backup drive to your Mac, open the Migration Assistant app from the Utilities folder and use it to restore your Mac.
Here are the exact instructions on how to perform the Mac restoration using a Time Machine backup drive:
- Connect your external backup drive to your Mac.
- Go to Applications > Utilities and open the Migration Assistant tool.

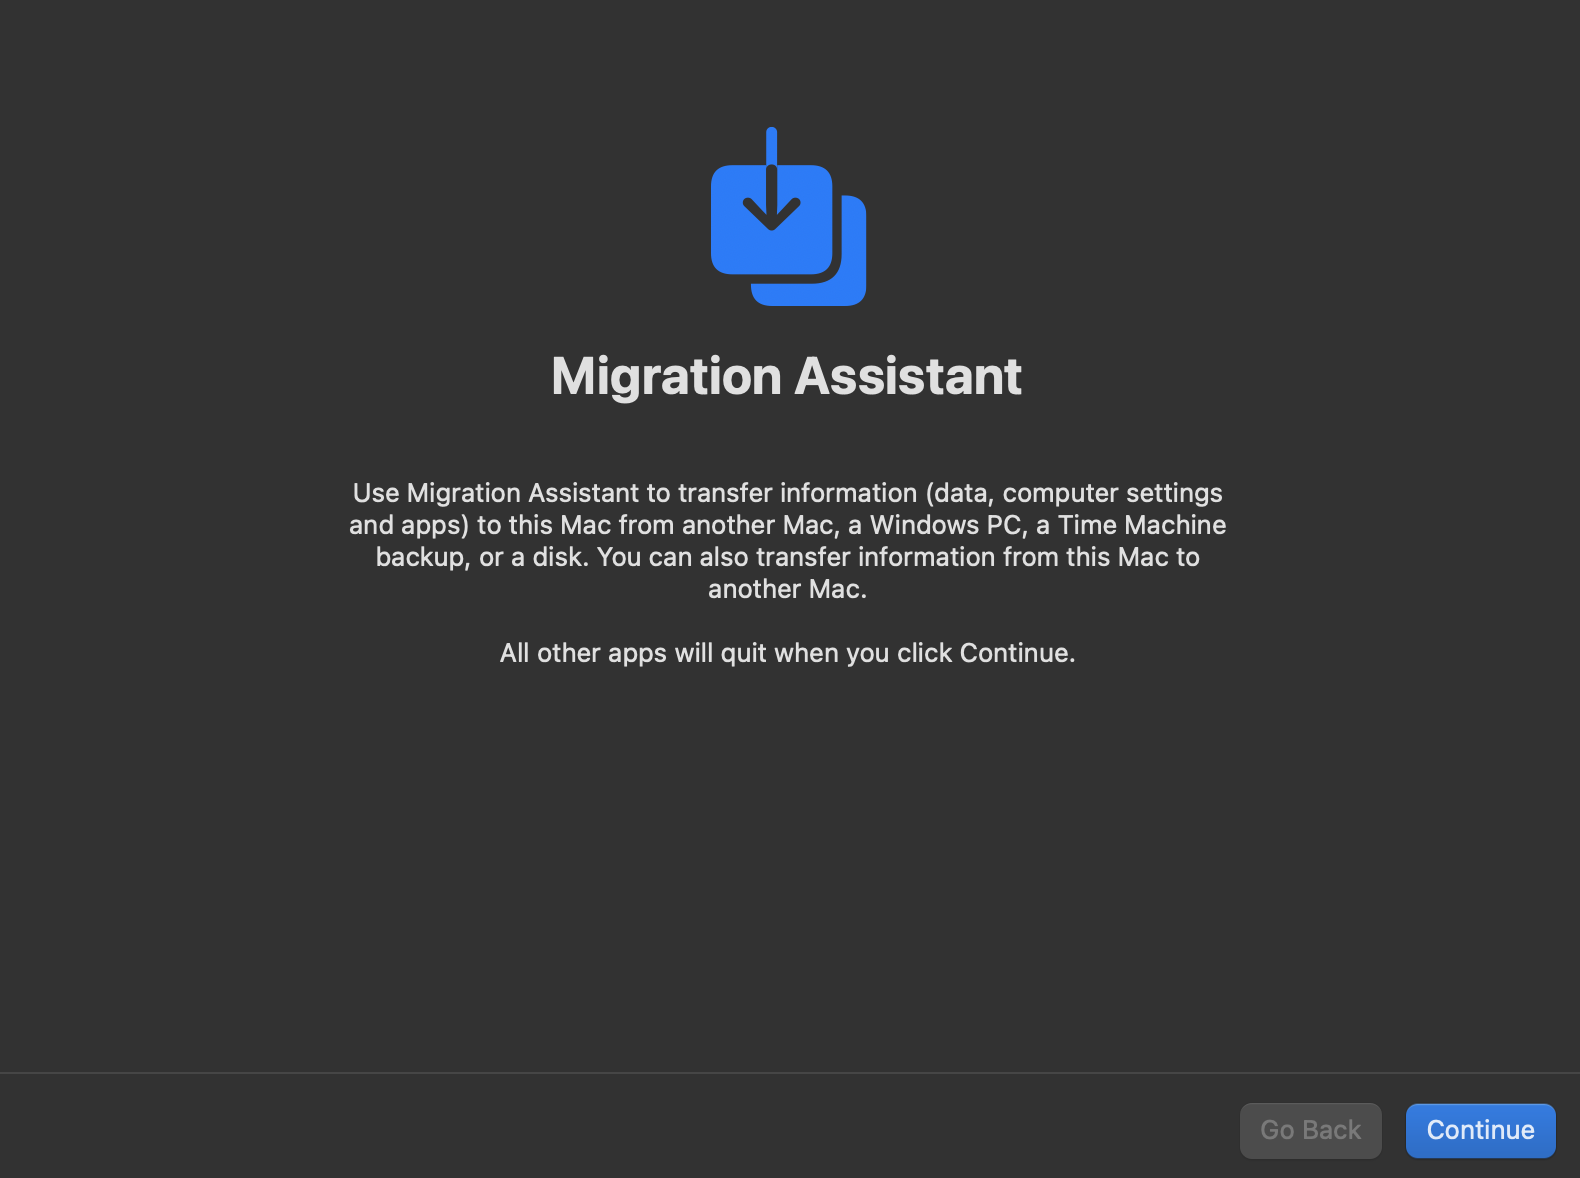
- Click Continue, then enter your Admin password, and wait for the Migration Assistant to prepare – this will cause your other apps to quit. If your Mac is running only on battery, you will get a warning about it that recommends connecting your Mac to a power outlet. You can click Continue and perform the transfer on battery, but it’s better to plug in your Mac to a power source.

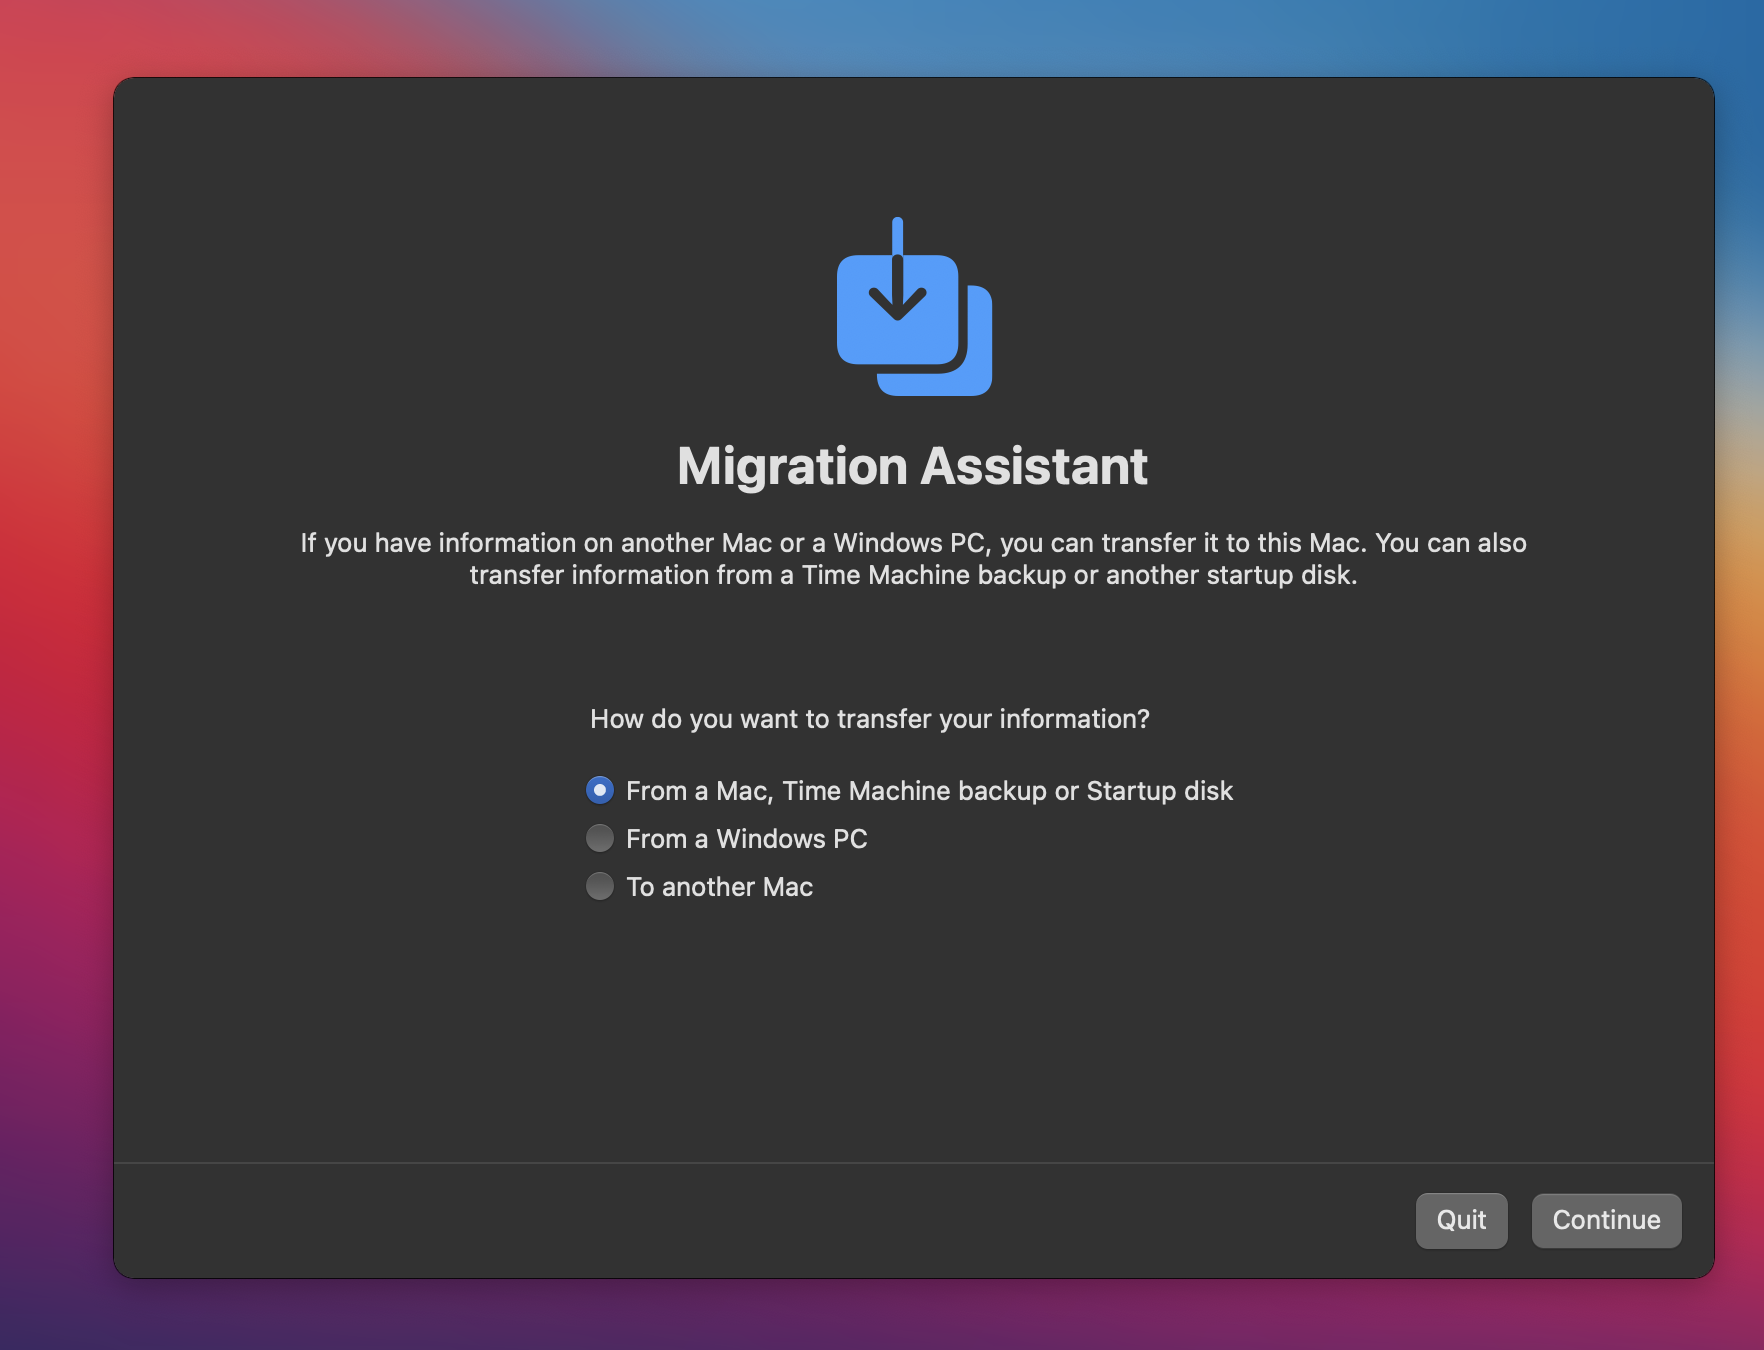
- On the next page, make sure that the first option, From a Mac, Time Machine backup or Startup disk, is selected and click Continue.

- When your Mac finds the connected backup drive, select it and click Continue.
- Look through the different backups, select the one you want to use, and select Continue again.
- Choose what information you want to transfer, then click Continue.
- If you choose to transfer a Mac account folder that’s already on your Mac, you will be asked to either rename the old account folder that has the same name or replace it. If you select the rename option, the old user account will appear on your Mac as a separate account, different from the one you transfer from the backup. If you pick the replace option, the old account will be deleted and replaced by the one from the backup drive.
- Wait as the transfer is being performed. If you are transferring a lot of data, the process could take quite a while – possible several hours – to complete. Be patient and don’t interrupt the Migration Assistant’s work by turning off your Mac or by closing its lid (if it’s a MacBook).
Leave a Reply