Wiping a MacBook
To wipe a MacBook, you must first restart your Mac in Recovery Mode by pressing Command + R as soon as the computer begins to boot up. After this, you must enter the Disk Utility, select the drive you want to wipe, and erase it.
Wiping a MacBook clean is a useful and oftentimes necessary thing to do as it ensures that any sensitive and personal details stored on the computer don’t fall into the hands of other people. Your Mac likely has records of your credit/debit card and social security numbers, phone numbers, contacts, emails, online accounts passwords, and more. For this reason, if you intend to give away your Mac or sell it, even if its future owner is going to be a person you know, it would still be a good idea to erase all data on your Mac that may reveal any details about you, you would prefer to remain private.
The go-to method to achieve this is to perform a disk-wipe – to delete all data stored on your Mac’s hard drives in one fell swoop and reset the machine to its factory settings. The way to do this is rather easy, and it involves the use of a built-in Mac tool called Disk Utility. We will show you how to use it to wipe your Mac down below, but before we get to the actual instructions, there are a few notes that we must make regarding the process of erasing all data from your Mac.
How to reset a MacBook
To reset a MacBook, you must use the built-in Disk Utility that you can access while in Recovery Mode. To make sure that all of your data gets erased when you reset your MacBook, select the drive shown at the top in the Disk Utility.
There are obviously a lot of Mac models that have come out over the years and though most of them are quite similar, there are several important differences that need to be mentioned and taken into account before you start the disk-wiping process.
SATA vs. SSD
Most MacBook models that have come past 2010 use SSD drives rather than SATA HDD drives, and this may have a certain impact when performing a disk-wipe. On Macs that have SSD rather than SATA drives, the secure erase option is not available. Secure erase allows you to more fully delete all data from your Mac so that there’s absolutely no chance of any of your data falling into the hands of other people. You can still erase your Mac’s SSD drive, and you can be fairly certain that no one is going to get hold of your data, but there would still be a theoretical chance of that happening. Another thing worth mentioning about SSD drives is that it is not recommended to erase them very often since the chances of them getting damaged by the process are higher compared to SATA drives. That said, a single disk-wipe before you give away/sell your Mac is very unlikely to cause any issues, especially on newer Macs that have more reliable SSD drives.
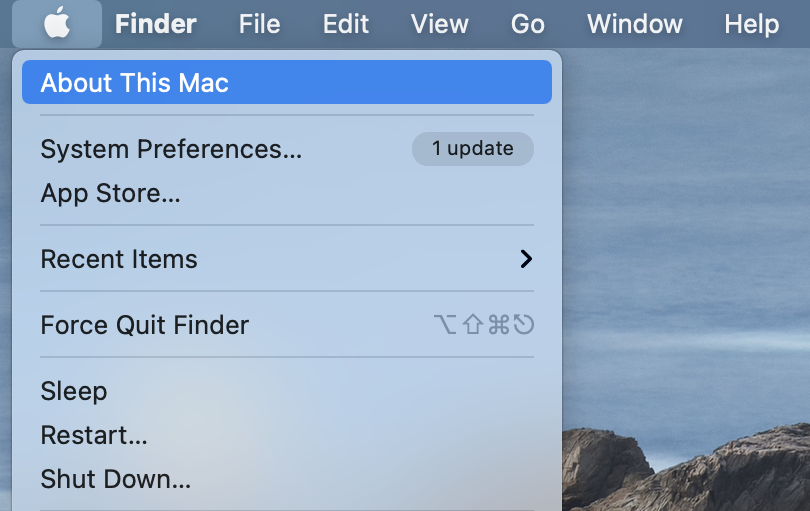
To see what type of drive your Mac has, click the Apple menu from the top-left, go to About this Mac, and click on the Storage tab. There, under the drive icon, you will either see SATA Disk/Drive, meaning that you have a SATA hard drive, or Flash Drive, meaning that your Mac uses an SSD drive.

Intel vs. M1 Macbooks and Macs
Though there isn’t a significant difference between erasing the drive of an Intel-based Mac compared to an M1-based Mac, there are some slight deviations, so keep this in mind. The differences will be addressed in the guide we’ve prepared for you. Macs released since November 2020 are equipped with M1 chips rather than Intel processors.
To see what type of processor your Mac uses, go back to Apple Menu > About This Mac, and see what’s written next to Processor in the Overview tab.
How to Completely wipe a Macbook or Mac
To fully wipe a Mac, the easiest method is to restart the machine in Recovery Mode and use the Disk Utility tool to perform the data deletion. It’s recommended to fully wipe your Mac if you intend to sell it or give it away.
The last thing we must mention before we give you the instructions is to ensure that you back up any important/valuable data which may currently be stored on your Mac. After you perform the disk-wipe, there would be no way of recovering any such data unless you’ve made sure to back it up. For this reason, consider using the built-in Time Machine utility that your Mac has and/or a third-party app in order to ensure that any important data you don’t want to lose is saved on iCloud, on another cloud storage, or on an external drive. Once you are certain that no valuable files would be lost in the process, you can safely begin wiping your Mac.
Here are our detailed instructions on how to fully wipe your Mac, delete all data stored on it, and return it to its factory settings:
Instructions for Intel-based Macs
- Start by shutting down your Mac, then press the power button and immediately after that press together the Command and R keys (don’t wait for your Mac to begin booting into macOS as normal). If you’ve timed it correctly, you should see a loading screen with the Apple Logo on it.
- Wait for the loading to complete and then select your Admin profile, enter your password and continue.
- You should now get to the Recovery Mode and see on your screen several macOS utilities – click the Disk Utility icon and select Continue.
- Click View in the top-left and select the Show All Devices option.
- Next, select the drive you want to erase – if you wish to perform a full disk-wipe, select the drive shown at the top of the list that includes all other drives of your Mac.
- Next, select the Erase button from the top, change the name of the drive if you want to, and make sure that the selected file system format is APFS.
- Only in case you intend to use the drive as Time Machine backup storage, are about to install macOS High Sierra or a later version for the first time, or use the disk with a Mac that’s using a macOS version that’s earlier than High Sierra, should you opt for the macOS Extended (Journaled) file system format.
- Only in case you intend to use the drive as Time Machine backup storage, are about to install macOS High Sierra or a later version for the first time, or use the disk with a Mac that’s using a macOS version that’s earlier than High Sierra, should you opt for the macOS Extended (Journaled) file system format.
- If there is a Security Options button, you can select it and then choose how many times you wish to write over the erased data for a more secure data deletion. As we mentioned earlier, this option won’t be available on all Macs.
- Finally, click Erase and then select Done to start the process. Be patient while the disk erasing is being performed and do not turn off your MacBook. Also, it’s recommended to keep the computer plugged in to a power source so that its battery doesn’t accidentally run out of juice, resulting in the MacBook shutting down (this could cause problems that would require an expert to resolve).
Instructions for M1 Macbooks
- If you are using an M1 Mac chip, when the computer is turned off, press and hold down the power button until you get the Startup Options screen, then click Options, and select Continue.
- When the Utilities screen shows up, click on Disk Utility and select the Continue button.
- Select Macintosh HD from the sidebar to the left.
- Click Erase, give the disk a new name if you wish, and select Erase Volume Group. There’s no need to choose a file system format here, as the only option is APFS.
The process will likely take a while – do not shut down your Mac until everything’s completed, and also make sure that the computer is connected to a power outlet so that it doesn’t run out of battery before the disk gets wiped.
Leave a Reply